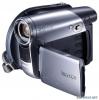
Anleitung Samsung, modell VP-DC175WI
Dieses Gerät hat auch andere Anweisungen:
Anleitung Zusammenfassung
—page 26 ■ Zooming more than 34x (SC-DC171/DC173(U)/DC175 only) or 26x (SC-DC575) is achieved digitally, up to 1200x when combined with optical zoom. The picture quality may deteriorate depending on how much you zoom in on the subject. • Please disable 16:9 Wide mode to use this function. —page 60 -26® 34x(OTSC-DC171/DC173(U)/DC175)^ 26x(MSC-DC575)W±$f;^£^$fK£®lfr,^fcft 1200xo 16:9 XSSBäättffltttttt» -60® Selecting the Digital Zoom 1. Set the [Mode] switch to [DISC]. (SC-DC173(U)/DC175/DC575 only) 2. Set the [Power] switch to [flBi(Camera)]. 3. Press the [MENU] button. ■ The menu list will appear. 4. Move the [Joystick] up or down to select , then press the [Joystick]. 5. Move the [Joystick] up or down to select , then press the [Joystick]. 6. Move the [Joystick] up or down to select desired zoom value (Off, 100x, 200x, 400x or 1200x), then press the [Joystick]. 7. To exit, press the [MENU] button. ■ When using the [Zoom] lever or [Zoom] button, an digital zoom indicator appears on the screen. a S ] Camera Mode ►Camera® Program AE ►Auto fj White Balance ►Auto Digital Effect ► Off 1 Shutter ►Auto f-1 Exposure ►Auto 16:9 Wide ► Or cm Move QQ Select m □C Notes ■ Maximum zooming may result in lower picture quality. ■ Digital Zoom is not available while DIS, EASY.Q, Color Nite, 16:9 Wide, Mosaic, Mirror, Emboss2, or Pastel2 is in use. ■ Once Color Nite, EASY.Q, 16:9 Wide, Mosaic, Mirror, Emboss2, or Pastel2 is selected, Digital Zoom mode will be released. (The Digital Zoom mode will be backed up.) ■ Once DIS is selected, Digital Zoom mode will be released. EJ Move OQ Select 1. ^IÄ[Mode]^^iSMÄft&[DISC]c (fiKSC-DC173(U)/DC175/DC575) 2. 1№E[Power]ff£iäMilg§:[Bi (Camera)]. 3. ®T[MENU]#o ■ 4. fi±SfiT»«ft[Joystick]«<»»>,^fi ^T[Joystick]. 5. fi±SfiT»«ft[Joystick]«, ^fi®T[Joystick]. 6. fö±äföT»№ff[Joystick]W®¥äaiK$* ffi(£ffl, 100x, 200x, 400x®1200x),^fi® ^[Joystick]. 7. S®SW,®[MENU]®. ■ [Zoom] [Zoom] ai m r « STB^SP 0:00:00 @> V i J ■ EASY.Q, Color Nite, 16:9 ss», 5#ä, a», si2,ä*»2atw, ■ Color Nite, EASY.Q, 16:9 SS», 5#£, a », gi2,s*w2~Ë»iât, a?æ««æ »'o(«i$*«swsfiÄÄ#o) ■ ¥í4a»e-M»ist, ENGLISH DVD Camcorder: Thumbnail index and Playlist ^ £ DVDMtt:ttMS3ltt№B№* What is the Thumbnail Index? The thumbnail index displays multiple titles scenes that have been recorded. ■ A title scene is created between the points where you start and stop a recording. Once deleted, you cannot recover the title scene again. Thumbnail view «S-.MM.gWÆâSW'&S*. Previous page Next page Current title scene/Total title scenes—1 What's a Playlist? mode). ❖ You can create a playlist on the same disc by gathering your favorite scene from the recorded title scenes. You can edit the playlist without changing the original recordings. ❖ Even if the playlist is deleted, the original title scenes remain undeleted. ❖ Up to 999 title scenes (chapters) can be registered on a playlist. Example: You have recorded a few scenes on a DVD-RW in VR mode. You want to save the original recording, but you also want to create a digest by putting your favorite scenes together. In this case, you can create a playlist by selecting your favorite scenes, leaving the original recording as it is. I-12.JAN.2007- A title scene is created between the-«Title scene 1 Title scene 2 Title scene 3 points where you start and stop a recording. Once deleted you cannot recover the title scene again. izSbOSS flA*»ttH*? 999 ^)° (* Current playlist/ Total playlist «P:iVR «ÄTSDVD-RW41, ®EgiS*7-®& «-¡etM-i'-m ss»'i;ÄT, fSniKaais I-30.JAN.2007- Title scene 4 Title scene 5 Title scene 6 Title scene 7 * - sfs?ifêïni#±-aiHtKiâ ENGLISH DVD Camcorder Si LimiMuma The recorded title scenes are displayed as a thumbnail index (multiple images) on the LCD Screen. You can find the desired scene quickly using this convenient index. If the TFT LCD screen is closed, you can view the recording through the viewfinder. Use the Playback related buttons on the DVD Camcorder or on the remote control. (SC-DC175/DC575 only) '-pages 65-66 1. Insert the disc you want to view. 2. Open the LCD Screen. 3. Set the [Mode] switch to [DISC], (SC-DC173(U)/DC 175/DC575 only) 4. Set the [Power] switch to [B(Player)]. ■ The thumbnail index screen appears. ■ To change the current thumbnail page, use the [Joystick] to highlight the thumbnail page movement arrows then press the [Joystick] left or right to match the direction of the arrow. ■ Use the [MEN U] button to adjust brightness or color of the LCD Screen, -page 36 5. Use the [Joystick] to select a title scene to be played, then press the [Joystick]. ■ To stop playback, move the [Joystick] down. Note During playback, a displayed image may be paused for a while until the next image to be shown. ❖ When you use the LCD Screen for playback, you can hear recorded sound from the built-in speaker. ❖ When you hear sound once the disc is in play, use the ...
Dieses Handbuch ist für folgende Modelle:
Kameras - VP-DC171I (15.06 mb)
Kameras - VP-DC171WI (15.06 mb)
Kameras - VP-DC172W (15.06 mb)
Kameras - VP-DC173 (15.06 mb)


 )
)