


Stimmen - 1, Durchschnittliche Bewertung: 5
(
 )
)
)
|
Fotos und technische Daten Yamaha NS-P440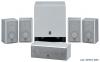 |


Dieses Gerät hat auch andere Anweisungen:


Anleitung Zusammenfassung
¦ Use the non-skid pads Put the provided non-skid pads at the four corners on the bottom of the subwoofer to prevent the subwoofer from moving by vibrations, etc. Installing the speakers on wall/ ceiling brackets or speaker stands (NX-E440) Placing the speaker (NX-C440) Notes A screw with a diameter of 6 mm can be used. (Hole depth: 15 mm) 60 mm Rear view YAMAHA Speaker stand SPS-30MMS (example) A screw with a diameter of 4 mm can be used. (Hole depth: 9 mm) 60 mm Bottom view Placing the subwoofer (SW-P440) Peel off the seal Peel off the seal ( : Subwoofer, : Front speakers) Figure A Figure B CONNECTIONS Caution CONNECTIONS Caution Plug in the subwoofer and other audio/video components after all connections are completed. An example of connections Front speakers Right Left Center speaker SPEAKERS MAIN OUTPUT SUB WOOFER CENTERREAR CENTERLR LR LR A — — + + — + — + — + B REAR (SURROUND) 0 10 110V–120V 220V–240V VOLTAGE SELECTOR VOLUME INPUT INPUT 0 10 VOLUME CENTER CENTER FRONT R FRONT R FRONT LFRONT L REAR L REAR L REAR R REAR R REAR C REAR C Amplifier/Receiver Subwoofer To AC outlet Surround center speaker (for NS-P446) Right Left Surround speakers 6 CONNECTIONS CONNECTIONS Connect the front, center and surround speakers (and surround center speaker for NS-P446) to the speaker output terminals of your amplifier/receiver with the provided speaker cables. The provided speaker cables have labels marked FRONT L, FRONT R, CENTER, REAR L, REAR R (and REAR C for NS-P446). Caution Before connecting the speakers and the subwoofer, make sure that the power of the subwoofer and the amplifier/ receiver is turned off. Note For connections, keep the speaker cables as short as possible. Do not bundle or roll up the excess part of the cables. If the connections are faulty, no sound will be heard from the speakers. ¦ Front speakers and Center speaker Use the provided speaker cables (4 m). One side of the speaker cable is red and the other side is black. 1 Remove approximately 10 mm of insulation from the end of each speaker cable and twist the exposed wires of the cable together to eliminate the risk of a short-circuit. Good Not good 2 Press and hold the tab of the terminal, as shown in the figure of step 3. 3 Insert the bare wire. Note: Do not insert the insulation coating into the hole. The sound may not be produced. 2 Red: positive (+) 3 Black: negative (–) 4 Release your finger from the tab to allow it to lock securely on the wire end of the cable. 5 Test the firmness of the connection by pulling lightly on the cable at the terminal. Note Do not let the bare speaker wires touch each other as this could damage the speaker and/or the amplifier. ¦ Surround speakers and Surround center speaker (for NS-P446) Use the provided speaker cables (15 m). One side of the speaker cable has a gray line and the other side has no line. The connection method is the same with Front speakers and Center speaker. Read from 1 to 5 on left column on this page. Note: Do not insert the insulation coating into the hole. The sound may not be produced. 2 Gray line: positive (+) 3 No line: negative (–) Note Do not let the bare speaker wires touch each other as this could damage the speaker and/or the amplifier. ¦ SUBWOOFER Connect the subwoofer to the subwoofer pre out jack of the amplifier/receiver. ¦ Connecting components and the subwoofer to AC plug After you complete the connection, plug the amplifier/receiver, TV or other outlet component and the subwoofer into an AC outlet of appropriate voltage. English 7 USING THE SUBWOOFER (SW-P440) USING THE SUBWOOFER (SW-P440) 0 10 110V–120V 2 20V –240V VOLTAGE SELECTOR VOLUME INPUT POWER ON OFF 0 10 VOLUME INPUT 110V–120V 220V–240V VOLTAGE SELECTOR 12345To AC outlet Controls and their functions 1 VOLUME control Adjusts the volume level. Turn the control clockwise to increase the volume and counterclockwise to decrease the volume. 2 INPUT jack Used to input unamplified bass signals from the amplifier/ receiver (see “An example of connections” on page page 6). 3 POWER indicator Lights up while the subwoofer is turned on and goes off when the subwoofer is turned off. 4 POWER switch Press inward to the ON position to turn on the power of the subwoofer. Press again to release it outward to the OFF position to turn off the subwoofer. 5 VOLTAGE SELECTOR switch (For Asia and General models) If the preset setting of the switch is incorrect, set the switch to the proper voltage range (110 V-120 V or 220 V-240 V) of your area. Caution Be sure to unplug the subwoofer before setting the VOLTAGE SELECTOR switch. Adjusting the subwoofer Before using the subwoofer, adjust the subwoofer to obtain the optimum volume balance between the subwoofer and the other speakers by following the procedures described below. 1 Rotate the VOLUME control counterclockwise to the 0 position. 2 Turn on the power of all the other components. 3 Press the POWER switch inward to the ON position. The POWER indicator lights up. 4 Play a source th...