


Stimmen - 2, Durchschnittliche Bewertung: 5
(
 )
)
)
|
Fotos und technische Daten Sony HDR-XR500E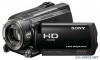 |


Dieses Gerät hat auch andere Anweisungen:

Kameras - HDR-XR500E (34.51 mb)
Kameras - HDR-XR500E (33.64 mb)


Anleitung Zusammenfassung
To connect a high definition TV via component video jacks: (HOME) . (SETTINGS) . [OUTPUT SETTINGS] . [COMPONENT] . [1080i/576i] . . . To connect a non-high-definition TV via component video jacks: (HOME) . (SETTINGS) . [OUTPUT SETTINGS] . [COMPONENT] . [576i] . . . To connect a 4:3 TV: (HOME) . (SETTINGS) . [OUTPUT SETTINGS] . [TV TYPE] . [4:3] . . . To activate “BRAVIA” Sync: (HOME) . (SETTINGS) . [GENERAL SET] . [CTRL FOR HDMI] . [ON] . . . On “PhotoTV HD” This camcorder is compatible with the “PhotoTV HD” standard. “PhotoTV HD” allows for highly-detailed, photo-like depiction of subtle textures and colors. By connecting Sony’s PhotoTV HD-compatible devices using an HDMI cable (sold separately)* or the component A/V cable (supplied)**, a whole new world of photos can be enjoyed in breathtaking full HD quality. * The TV will automatically switch to the appropriate mode when displaying photos. ** Setup of the TV will be necessary. Please refer to the instruction manual of your PhotoTV HD- compatible TV for details. Saving movies and with Saving movies and photos with a computer Preparing a computer (Windows) You can perform following operations using “PMB (Picture Motion Browser).” Importing images to a computer Viewing and editing imported images Creating a disc Uploading movies and photos to websites To save movies and photos using a computer, install “PMB” from the supplied CD-ROM beforehand. Do not format the hard disk of your camcorder from a computer. Your camcorder may not operate correctly. This camcorder captures high definition footage in the AVCHD format. Using the enclosed PC software, high definition footage can be copied onto DVD media. However, DVD media containing AVCHD footage should not be used with DVD based players or recorders, as the DVD player/recorder may fail to eject the media and may erase its contents without warning. Step 1 Checking the computer system OS*1 Microsoft Windows XP SP3*2/Windows Vista SP1*3 CPU Intel Pentium 4 2.8 GHz or faster (Intel Pentium 4 3.6 GHz or faster, Intel Pentium D 2.8 GHz or faster, Intel Core Duo 1.66 GHz or faster, or Intel Core 2 Duo 1.66 GHz or faster is recommended.) However, Intel Pentium III 1 GHz or faster is sufficient for the following operations: Importing the movies and photos to the computer One Touch Disc Burn Creating an Blu-ray disc/AVCHD format disc/DVD-video (Intel Pentium 4, 2.8 GHz or faster, is required when creating a DVD video by converting high definition image quality (HD) to standard definition image quality (SD).) Copying a disc Software DirectX 9.0c or later (This product is based on DirectX technology. It is necessary to have DirectX installed) Memory For Windows XP: 512 MB or more (1 GB or more is recommended.) However, 256 MB or more is sufficient for processing only the movies with standard definition image quality (SD). For Windows Vista: 1 GB or more Hard disk Disk volume required for installation: Approximately 500 MB (10 GB or more may be necessary when creating AVCHD format discs. 50 GB maximum may be necessary when creating Blu-ray discs.) Display Minimum 1,024 . 768 dots Others USB port (this must be provided as standard, Hi-Speed USB (USB 2.0 compatible)), Blu- ray disc/DVD burner (CD-ROM drive is necessary for installation) Either NTFS or exFAT file system is recommended as the hard disk file system. Operation with all computer environments is not assured. *1 Standard installation is required. Operation is not assured if the OS has been upgraded or in a multi-boot environment. *2 64-bit editions and Starter (Edition) are not supported. *3 Starter (Edition) is not supported. When using a Macintosh The supplied software “PMB” is not supported by Macintosh computers. To process photos using a Macintosh computer connected to your camcorder, see the following website. ms/us/ 23 Step 2 Installing the supplied software “PMB” Install “PMB” before connecting your camcorder to a computer. If a version of “PMB” supplied with another device has already been installed on the computer, check the version. (The version number is displayed by clicking [Help] - [About PMB].) Compare the version number of the supplied CD-ROM with that of the previously installed “PMB,” check to ensure that the versions have been installed in order, from the lower to the higher. If the version number of the previously installed “PMB” is higher than that of the “PMB” of your camcorder, uninstall “PMB” from the computer and then re-install it in order, from lower to higher. If you install a higher version of “PMB” first, some functions may not work correctly. See page 48 on the “Handycam Handbook.” . Confirm that your camcorder is not connected to the computer. . Turn on the computer. Log on as an Administrator for installation. Close all applications running on the computer before installing the software. . Place the supplied CD-ROM in the disc drive of your computer. The installation screen appears. If the sc...
Dieses Handbuch ist für folgende Modelle:Kameras - HDR-XR500VE (14.95 mb)
Kameras - HDR-XR520E (14.95 mb)
Kameras - HDR-XR520VE (14.95 mb)