


Stimmen - 2, Durchschnittliche Bewertung: 4.5
(

 )
)
|
Fotos und technische Daten Brother LS-1217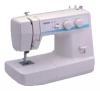 |


Anleitung Zusammenfassung
(Ver fig. A) avanco, basta soltar a alavanca. (Veja fig. A) CONTENTS INDEXMAINTENANCEKNOWING STRAIGHT BUILT-BUTTONHOLE USING ATTACHMENTSAND APPLICATIONS 10 Selecteur de largeur de point Stitch Width Dial The width of the zigzag stitch is regulated by operating the stitch width La largeur de point zigzag est reglee al’aide du selecteur de largeur du knob. point. The numbers above the knob represent the stitch width in millimeters Les chiffres au-dessus du selecteur representent la largeur du point en (mm). millimetres (mm). The lar ger numbers set a wider stitch width. Plus le chiffre est eleve, plus le point est large. Lorsque le selecteur est sur 0, le point sera droit. 15 0 1 2 4 3 aaaaaaaaaaaaaaaaaaaaaaaaaaaaaaaaaaaaaaaaaaaaaaaaaaaaaaaaaaaaaa When the knob is set at 0, a straight stitch is sewn. NOTE: REMARQUE : 1. Do not move the knob while the needle is in the fabric. 1. Ne pas tourner le selecteur lorsque l’aiguille se trouve dans le tissu. 2. When using the twin needle, the knob should always be set below 2. Lors de l’utilisation de l’aiguille jumelee, le selecteur doit toujours 3. se trouver sur un chiffre inferieur a3. Selector del ancho de puntada Seletor de Largura do Ponto Se puede ajustar el ancho de la puntada zigzag con el selector de A largura do ponto em zig-zag e regulada pela oper acao do seletor de largu ancho de puntada. ra do ponto. Los numeros marcados arriba del boton representan el ancho de Os numeros acima do botao representam a largura do ponto em milimetros puntada en milimetros (mm). (mm). Los numeros mas altos corresponden a una puntada mas ancha. Numeros maiores definem uma largura de ponto tambem maior. Cuando el boton esta en “0”, se logra una puntada recta. Quando o botao for ajustado a 0, um ponto reto sera costurado. NOTA: NOTA: 1. No mueva el boton cuando la aguja esta picada en el tejido. 1. Nao mova o botao enquanto uma agulha estiver no tecido. 2. Cuando se usa la aguja doble, el valor marcado por el boton debe 2. Quando for usar a agulha dupla, este botao devera ser ajustado sempre ser siempre inferior a 3. abaixo de 3. CONTENTS INDEXMAINTENANCEKNOWING STRAIGHT BUILT-BUTTONHOLE USING ATTACHMENTSAND APPLICATIONS Selecteur de position de l’aiguille Needle Position Selector En placant ce levier sur L (gauche), M (milieu) ou R (droite), il est pos- By shifting this lever to L (left), M (middle) or R (right), you can sew sible de piquer des points droits et en zigzag sur les ourlets. straight and zigzag stitches on the baseline. Lorsque l’on coud pres du bord du tissu, selectionner L ou R pour que When you sew close to the edge of the fabric, select L or R so the fabric le tissu soit plus facilement entraine. is fed more easily . Ce selecteur doit etre sur M (milieu) pour presque tous les points, mais This selector should be set at M (middle) for almost all stitches, but set sur d’autres positions pour les coutures suivantes : it to other positions for the following applications. L M R L M R L M R aaaaaaaaaaaaaaaaaaaaaaaaaaaaaaaaaaaaaaaaaaaaaaaaaaaaaaaaaaaaaa 1. Buttonhole Sewing (See page 36.) 1. Boutonnieres (Voir page 36.) 2. Button Sewing (See page 40.) 2. Boutons (Voir page 40.) 3. Decorative Stitches (See page 33.) 3. Points fantaisie (Voir page 33.) REMARQUE : NOTE: 1. Ne pas tourner le selecteur lorsque l’aiguille se trouve dans le tissu. 1. Do not move the selector while the needle is in the fabric. 2. Toujours mettre le selecteur sur M lors de l’utilisation de l’aiguille 2. Always set the selector to M when using the twin needle. jumelee. Selector de posicion de la aguja Seletor de Posicao da Agulha Si coloca esta palanca en “L” (izquierda), “M” (medio), o “R” (dere- Mediante o deslocamento desta alavanca a L (esquerda), M (meio) or R cha), podra coser puntadas rectas y zigzag como linea principal. (direita), voce pode costurar pontos retos e zig-zag como linha-base. Al coser cerca de la orilla del tejido, conviene seleccionar L o R para Quando for costurar perto da borda do tecido, selecione L ou R de forma que el tejido se alimente mas facilmente. que o tecido avance com maior facilidade. Conviene colocar el selector en “M” (medio) para la mayoria de las Este seletor deve ser ajustado a M (meio) para quase todos os pontos, mas puntadas, pero es necesario cambiarlo de posicion para las siguien para as aplicacoes a seguir, regule-o a outras posicoes. tes aplicaciones: 1. Costura de Casas para Botoes (Veja pagina 37.) 1. Costura de ojales (vease pagina 37.) 2. Fixacao de Botoes (Veja pagina 41.) 2. Costura de botones (vease pagina 41.) 3. Pontos Decorativos (Veja pagina 33.) 3. Puntadas decorativas (vease pagina 33.) NOTA: NOTA: 1. Nao mova o seletor enquanto a agulha estiver no tecido. 1. No se puede mover el selector cuando la aguja esta picada en el 2. Ajuste sempre o seletor a M quando for usar a agulha dupla. tejido. 2. Ponga siempre el selector en “M” si usa la aguja doble. CONTENTS INDEXMAINTENANCEKNOWING STRAIGHT BUILT-BUTTONHOLE USING ATTACHMENTSAND APPL...