


Stimmen - 4, Durchschnittliche Bewertung: 3.5
(


 )
)
|
Fotos und technische Daten Hyundai H-F2561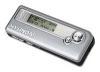 |


Anleitung Zusammenfassung
8000Hz is standard quality and 48000Hz is best quality. 11025Hz 16000Hz 22050Hz 32000Hz 44100Hz 48000Hz - 17 - 6. BACKLIGHT SETTING • Select “Backlight Setting” in setting list. • Press “NEXT” or “PREV” to setting the backlight time. • 4 types of backlight time will be shown on the LCD. • Press “MENU” to confirm the selection. 7.BACKLIGHT COLOR SETTING • Select “Backlight Color” in setting list. • Press “NEXT” or “PREV” to select the backlight color. • 7 backlight color will be shown on the LCD. • For “Random” Color selection, the player will change the backlight color when any button is pressed. • Press “MENU” to confirm the selection. • You can press backlight color button for turning on the backlight. 8. EXIT • Select “Exit” in setting list • Press “MENU” to quit from the Setting Mode • Press and hold “MENU” for 3 seconds to return the music mode - 18 - 3. Record • Select “Record” icon with “PREV” or “NEXT” button. • Press “MENU” to enter the “Record” mode and start Recording. • Press “MENU” to stop. • Press and hold “MENU” return to the music mode. 4. Erase File(s) • Select “Erase icon” with “PREV” and “NEXT” button. • Press “MENU” to enter. • Select “Music” or “voice” by pressing “NEXT” or “PREV”. • Press “MENU” to enter the selected mode. • Enter “Music” to delete music files, enter “Voice” to delete voice files. After entering the Erase mode, the procedures are listed in the following: • Press the “Turning knob” upward or downward to select file (s) for delete. • Press VOLUME “+” or to toggle “Yes” or “No” icon. • Press “Play / Pause” to confirm & delete. • Press and hold “MENU” to go back to the music mode. Warning: The erased file(s) cannot be recovered in any condition. - 19 - 5. Music Mode • Select “MUSIC” icon with “PREV” or “NEXT” button. • Press “MENU” to enter the selected mode. • Press “PREV” or “NEXT” for selecting the track. • Press “PLAY / PAUSE” for playback or pausing the track. • Press “PLAY / PAUSE” for stopping. • Press and hold “PLAY / PAUSE’ for power off. 6. About Mode • Select “About” icon and press “MENU” to enter. The player information will be displayed on the LCD. • Press “MENU” to exit . • Press and hold “MENU” for return to the music mode. Ver: 2,001 Mem: 128 MB - The firmware version - The internal memory size 7.Exit Mode Select “Exit” icon by pressing “PREV” or “NEXT”. Press “MENU” for returning the Music Mode. - 20 - Operating the FM radio • While playing in Music Mode, press “MENU” and select the “FM Radio” with the “Turning knob” upward or downward • Press “MENU” to enter the Radio Mode. 1. FM Tuning Auto Scanning the whole FM band. • Press “MENU” and select “Auto Scan” with pressing the “Turning knob” upward or downward. • Press “MENU” to enter the “Auto Scan”. • Auto scanning will be started. • Each FM station detected will be stored in the 20 preset memory (previous preset channel will overwrite by new FM station detected). Fine adjust FM Band • Press “Play / Pause” to remove the “Preset” icon. • Press the “Turning knob” downward to increase FM frequency and press the “Turning knob” upward to decrease FM frequency. How to save desired FM band in Memory Channel • Select the Channel first. • Press “Play / Pause” to remove “Preset” icon. • Adjust “FM” frequency by pressing the “Turning knob” upward or downward. • Press the “Turning knob” downward to increase FM frequency for selecting the channel and press the “Turning knob” upward to decrease FM frequency for selecting the channel. • Press “MENU” and select “Memory Ch” with pressing the “Turning knob” upward or downward. • Press “MENU” to enter the “Memory Ch”. • Adjust the channel position by pressing the “Turning knob” upward or downward. • Save the Frequency into the memory channel by press “MENU” to confirm. - 21 - 2. FM Recording • In Radio Mode, press “MENU” to select “FM Recording” with pressing the “Turning knob” upward or downward. • Press “MENU” to enter the FM Record Mode and the start recording. • Press the “MENU” button again to stop recording. • The recorded file is saved in the Player memory • To play a FM recorded file, press and hold “MENU“ back to Music Mode. • Press the “Turning knob” upward or downward to select the saved FM files in .wav format in the Music track. • Press “Play/Pause” to play the selected FM file. • When the memory is not enough, “Memory Full” will appear. • You are required to free the memory by deleting some files. 3. FM Recording Setting • Select “Record settings” in setting list. • Adjust the voice recording frequency from 8000Hz to 48000Hz by pressing the “Turning knob” upward or downward. Press “MENU” to confirm voice recording frequency. • Higher sampling rate, the recording voice gets higher quality. 8000Hz is standard quality and 48000Hz is best quality. 4. Exit • Select “Exit” in setting list • Press “MENU” for quit from the Setting Mode and return to the FM radio mode - 22 - O...