


Stimmen - 3, Durchschnittliche Bewertung: 4
(

 )
)
|
Fotos und technische Daten Senco PC 1010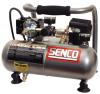 |


Anleitung Zusammenfassung
Use only extension cords having an electrical rating not less than the rating of the product. Do not use damaged extension cords. Examine extension cord before using and replace if damaged. Do not abuse extension cord and do not yank on any cord to disconnect. Keep cord away from heat and sharp edges. Always shut off the air compressor switch before removing the plug from the receptacle. 10 OPERATION PRE-START CHECKLIST: 1. Remove any moisture in the air compressor tank. Remove excessive pressure by pulling on the safety relief valve ring or with an air tool, then open the air tank drain valve in the bottom of the air tank. Close tightly when drained. WARNING:Risk of bodily injury.NEVER attempt to open the drain valve when more than 10 PSI of air pressure is in the air tank! 2. Make sure the air compressor Motor Switch is in the “OFF” position. 3. Make sure all safety valves are working correctly. 4. Make sure all guards and covers are in place and securely mounted. START-UP: 1. Ensure the lever on the pressure switch box is in the “OFF” position. 2. Plug the power cord into the grounded outlet. 3. Move the lever on the pressure switch box to the “ON” position. 4. This will allow the air compressor to “START” building up pressure in the air tanks and “STOP” when correct pressure is achieved. When pressure drops with usage, the air compressor will “START” building up pressure again. 5. Set pressure by adjusting the pressure regulator knob counterclockwise for less pressure and clockwise for more pressure. 6. If you notice any unusual noise or vibration, stop the air compressor and refer to “Troubleshooting”. SHUTDOWN: 1. To stop the air compressor, move the lever on the pressure switch box to the "OFF" position. NEVER stop the air compressor by unplugging it from the power source. This could result in risk of electrocution. 2. Drain air from the air tank by releasing air with an attached air tool or by pulling on the safety relief valve ring. 3. Once pressure in the air tanks register under 10 PSI, open the drain valve under each air tank to drain any moisture. 4. Allow the air compressor to cool down. 5. Wipe air compressor clean and store in a safe, non-freezing area. MAINTENANCE Read the instruction manual before performing maintenance. The following procedures must be performed when stopping the air compressor for maintenance or service. 1. Turn off the air compressor . WARNING:Neverassumetheaircompressorissafetoworkonjustbecauseitisnot operating.Itcouldrestartatanytime! 2. Disconnect cord from main power supply. 3. Open all drains. 4. Wait for the air compressor to cool before starting service. MAINTENANCE CHART PROCEDURE DAILY WEEKLY MONTHLY Drain condensation in air tank(s) X Check for unusual noise/vibration X Check for air leaks X Inspect air filter X Clean exterior of compressor X Check safety relief valve X 11 TROUBLESHOOTING Symptom 1. Motor will not run or restart. Power cord not plugged in. Motor/Pressure switch in “OFF” position. Fuse blown or circuit breaker has tripped. Wrong gauge wire or length of extension cord. Air tank pressure exceeds motor/ pressure switch “cut-in” pressure. Pressure release valve on motor/pressure switch has not unloaded pumphead pressure. Defective motor, motor capacitor, motor/pressure switch, or check valve. Plug cord into grounded outlet. Move switch to “ON” position. Replace fuse or reset circuit breaker. Check for proper fuse amperage. Check for low voltage conditions. Disconnect any other electrical appliances from circuit or operate air compressor on its own branch circuit. Check chart on page #10 for proper gauge wire and cord length. Motor will start automatically when air tank pressure drops below “cut-in” pressure of motor/pressure switch. Contact Senco Customer Service. Bleed the line by moving the switch to the “OFF” position. Symptom 2. When in the “ON” position, motor runs continuously. PROBABLE CAUSE Motor/Pressure switch does not shut off motor when air compressor reaches “cut-out” pressure and safety relief valve activates. Air compressor is incorrectly sized. REMEDY Move the motor/pressure switch to the “Off” position. If the motor doesn’t shutoff, unplug the air compressor. If the electrical contacts are welded together, replace the pressure switch. Limit the air pressure to the capacity of the air compressor. Either use a smaller tool or a larger air compressor. Symptom 3. Air continues to leak at motor/pressure switch release valve after motor stops. PROBABLE CAUSE The check valve is stuck open. REMEDY Remove, clean or replace. Symptom 4. Air continues to leak at motor/pressure switch release valve after motor is running. PROBABLE CAUSE Defective motor/pressure switch. REMEDY Replace 12 TROUBLESHOOTING Symptom 5. Air leaks from safety relief valve. PROBABLE CAUSE Possible defective safety relief valve. Excessive air tank pressure. REMEDY Operate safety relief valve manually by pulling on ring. If it still leaks, it should be replaced. Defective...