


Stimmen - 2, Durchschnittliche Bewertung: 4
(

 )
)
|
Fotos und technische Daten LG XH-TK5035Q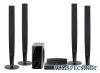 |


Anleitung Zusammenfassung
c cc. Connect the wires to the speakers. Connect the other end of each wire to the correct speaker according the colour coding: Grey Blue Green Orange Red White Rear Rear Centre Sub Woofer Front Front Behind you and to your right. Behind you and to your left. Above screen, directly in front of you. In front of you, to the right of the screen. In front of you, to the left of the screen. POSITIONSPEAKERCOLOUR To connect the cable to the speakers, press each plastic finger pad to open the connection terminals on the base of each speaker. Insert the wire and release the finger pad. Be careful of the following Be careful to make sure children do not put their hands or any objects into the *speaker duct. *Speaker duct: A hall for plentiful bass sound on speaker cabinet(enclosure) . HT503TH-XHK_TRUSLLK_2/18/08 7:32 PM Page 5 Hooking up the unit a Connect jacks on the unit and your Audio In connection The unit’s Audio jacks are colour coded (red for right audio and white for left audio). If your TV has only one input for audio (mono), connect it to the left (white) audio jack on the unit. SCART connection Connect the TO TV jack on the unit and your TV using the SCART cable. AM/FM connection AM - Connect the AM loop aerial to the DVD receiver. FM - Connect the FM aerial. The reception will be its best when the two loose ends of the aerial are in a straight and horizontal line. Video Out connection Connect the VIDEO OUT-PUT jack on the unit to the corresponding input jack on your TV using a Video cable. Component Video connection Connect the COMPO-NENT/PROGRESSIVE SCAN OUTPUT jacks on the unit to the corresponding input jacks on your TV using a Y PB PR cable. b Plug the power cord into the power source. 5 HT503TH-XHK_TRUSLLK_2/18/08 7:32 PM Page 6 Hooking up the unit Digital Audio in connection Connect the unit’s OPTICAL IN jack to the optical out to jack on your TV (or Digital Devicae etc.) HDMI Out connection Connect the HDMI OUTPUT jack on the unit to the HDMI input jack on a HDMI compatible TV using a HDMI cable. Hooking up the unit - more can do Resolution Setting You can change the resolution for component video and HDMI output. To change the resolution using setup menu to select the desired resolution - Auto, 480i(576i), 480p(576p) , 720p, 1080i, 1080p. Available resolution according to connection [HDMI OUT]: Auto, 1080p, 1080i, 720p and 480p (or 576p) [COMPONENT VIDEO OUT]: 480p (or 576p) and 480i (or 576i) [VIDEO OUT]: 480i (or 576i) [SCART]: 576i Notes on HDMI Out connection • If your TV does not accept your resolution setting, abnormal picture appears on the screen. Please read owner’s manual for TV, and then set the resolution that your TV can accept. • Use the HDMI cable within 5 meters • If the volume bar is not displayed on TV screen, when you select Simplink to off on TV, restart the unit. Enjoying audio from an external source You can enjoy audio from an external source through your unit. Press INPUT repeatedly to select the desired input source. - AUX, AUX OPT, TV-AUDIO, PORTABLE, USB 6 HT503TH-XHK_TRUSLLK_2/18/08 7:32 PM Page 7 Remote control abcde a. • POWER: Switches the unit ON or OFF. KARAOKE/FUNCTION : Selects the function (DVD/CD, FM, AM) INPUT : Changes the input source ( AUX, AUX OPT, TVAUDIO, PORTABLE, USB) SLEEP : Sets the System to turn off automatically at a specified time. (Dimmer : Dims the LED (Light-emitting diode) of front panel by half in power-on status. ) MUTE : Press MUTE to mute your unit. You can mute your unit in order, for example, to answer the telephone. EQ : You can choose 6 (or 7) fixed sound impressions. VSM : Press VSM to set the Dolby Pro Logic II or VIRTUAL sound. RETURN ( O): Press to move back wards in the menu. 0-9 numerical buttons: Selects numbered options in a menu. b. • ECHO VOL. : Adjusts echo volume. MIC VOL. : Adjusts microphone volume. c. • SETUP : Accesses or removes setup menu MENU : Accesses the menu on a DVD disc. DISPLAY: Accesses On-Screen Display. TITLE : If the current DVD title has a menu, the title menu appears on the screen. Otherwise, the disc menu may appear. b / B / v / V (left/right/up/down): Used to navigate on- screen displays. ENTER : Acknowledges menu selection. PRESET(-/+): Selects programme of Radio. TUN.(-/+): Tunes in the desired radio station. PLAY ( B): Starts playback. Mono/Stereo(St. ) STOP ( x): Stops playback or recording. PAUSE/STEP ( X): Pause playback. REC (z) : USB RECORD SCAN( bb/ BB) : Search backward or forward. SKIP( . .. / > >> ): Go to next or previous chapter/ track. PROG./MEMO. : Accesses or removes Program menu. VOLUME (+/-) : Adjusts speaker volume. TEMPO(-/+) : This function enable you to fast paly or slow the music speed in KARAOKE mode. KEY CON.( b/ # ): This function can change the key to suit your vocal range. d. • TONE CONTROL( ) : Adjusts man’s or woman’s key in the karaoke mode. SHADOW : If Video CD caption and the song’s subtitle are mixed u...
Dieses Handbuch ist für folgende Modelle:Stereoanlage - XH-TK5035 (503.54 kb)