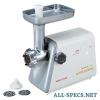
Anleitung Panasonic, modell MK-G20PR
Anleitung Zusammenfassung
х шир. х гл.) 38.6 х 16.6 х 31.0см 38.6 х 16.6 х 34.2 см Масса 3.3 кг 3.7 кг Сменные рабочие органы Дисковый нож Приспособление Куббе CAUTION МЕРЫ ПРЕДОСТОРОЖНОСТИ 1. If the supply cord is damaged, it must be replaced by a special cord or assembly available from your Panasonic dealer or its service agent. В случае повреждения сетевого шнура, не пытайтесь заменить его самостоятельно, обратитесь к дилеру компании “Panasonic” или его агентам по обслуживанию. 2. Never remove or attach container when motor is operating. Запрещается снимать или устанавливать емкости во время работы электродвигателя. 3. Do not open the container or place anything (especially finger, spoon, fork, etc.) in the container during operation. Во время работы прибора не открывайте емкость и не помещайте в нее посторонние предметы (особенно пальцы рук, ложки, и т.д.). •1, 2, 3, 4, 7 1, 2, 5, 6 -1- MK-G20PR Parts identification Before use © Switch(es) ® Locking knob © Motor housing © Opening © Food pusher © Hopper plate © Head © Feed screw © Cutting blade ©~© Attachments © Cutting plate (fine) © Cutting plate (medium) © Cutting plate (coarse) (m) Kubbe attachment A © Kubbe attachment B © Cap Cautions Unplug when assembling or disassembling the unit. Close supervision is necessary when any appliance is used near children. When carrying the unit, be sure to hold Motor Housing with both hands, not to hold only Hopper Plate. Do not fix Cutting Blade and Cutting Plate when using Kubbe Attachments. Never feed food with hand. Use Food Pusher. Do not grind hard foods such as bones and nuts. Do not grind ginger and other materials with hard fiber. To avoid jamming, do not force to operate the unit with excessive pressure. If the unit jams due to hard materials lodged on to Feed Screw or Cutting Blade, switch off immediately and clean the unit. (See "Jamming" on page 4.") When the circuit breaker activates, do not switch on. Never try to undo the parts or to repair the unit by yourself. This product is intended for household use only. Make sure that the voltage and frequency indicated on the bottom plate are the same as your local supply. Wash all the parts (except those that do not touch foods ©.©.©and ©) in warm soapy water. Before plugging in, ensure Switch is off. To mince meat (Assembling) I 1 I Place Head tightly onto Opening of Motor Housing. Holding Head with one hand, place Locking Knob into the hole on the side of Motor Housing and tighten it clockwise. Place Feed Screw into Head, long end first, by turning Feed Screw slightly until it is set into Motor Housing. 3 Place Cutting Blade onto Feed Screw shaft with the blade facing the front as illustrated. • If it is not fitted properly, meat will not be ground. 4 Place desired Cutting Plate next to Cutting Blade, fitting protrusions in the slots. Screw Cap into place until tight. • Do not over tighten. Place Hopper Plate on Head and fix into position. Locate the unit on a firm place. • The air passage at the bottom and the side of Motor Housing should be kept free and not blocked. (Mincing meat) Cut all foods into pieces so that they fit easily into Hopper opening. Plug in, then switch on. Feed foods into Hopper Plate. • Use Food Pusher. After use, switch off and unplug. -3- To make kubbe Jamming —Recipe— (Stuffing) 100 g 1 1/2 tablespoons 11/2 tablespoons 1/3 teaspoon 1/2 teaspoon 11/2 tablespoons mutton olive oil onion (cut finely) all spice salt flour Mince mutton once or twice. Fry onion until brown and add minced mutton, all spice, salt and flour. (Outer cover) 450 g 150 - 200 g 1 teaspoon 1 a pinch dash lean meat flour all spice nutmeg powdered red pepper pepper Mince meat three times and mix all ingredients together in a bowl. • More meat and less flour for outer cover creates better consistency and taste. Grind the mixture three times. Disassemble by reversing the steps from [5] - [3j to remove Cutting Plate and Cutting Blade. | 7 | Place Kubbe Attachments A and B onto Feed Screw shaft together, fitting protrusions in the slots. 8 Screw Cap into place until tight. • Do not over tighten. 9 Following the same steps as in 15j - [6], make the cylindrical outer cover. Form kubbe as illustrated below and deep fry. When the circuit breaker automatically stops the motor, or when the motor continues to function but no meat comes out of Cutting Plate, due to jamming of bone or other materials, switch off. • Do not switch on. Clean the unit. (See "To clean" below.) To clean (Disassembling) Make sure that the motor has stopped completely. Disconnect the plug from the power outlet. Disassemble by reversing the steps from S] - [U . 10 Cap has pins for easy unscrewing. To remove Cutting Plate easily, [“I'll place a screwdriver between Cutting Plate and — Head as illustrated and lift up. (Cleaning) Remove meat, etc. Wash each part in warm soapy water. • A bleaching solution containing chlorine will discolor ...


 )
)


