


Stimmen - 4, Durchschnittliche Bewertung: 3.8
(

 )
)
|
Fotos und technische Daten Casio XJ-ST155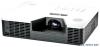 |


Anleitung Zusammenfassung
Confirm LIGHT : – that the POWER/STANDBY indicator is lit red (without flashing). After checking the POWER/STANDBY indicator, disconnect the power cord TEMP : Red steady from the projector and wait for all of the projector’s indicators to go out. Message : – Next, reconnect the power cord and turn projector power back on. If the error occurs again when you turn power back on, contact your retailer or nearest authorized CASIO Service Center. POWER : Amber flashing • The projector was turned off automatically because the light source unit Red steady turned off or did not turn on. After confirming that the POWER/STANDBY LIGHT : Red flashing (0.5-second interval) indicator is lit red (without flashing), unplug the power cord. Wait for a short while and then plug it back in and turn on the projector again. If the error occurs again when you turn power back on, contact your TEMP : Red flashing retailer or nearest authorized CASIO Service Center. (0.5-second interval) Message : – POWER : Amber flashing • Power has turned off automatically due to a projector memory error. Red steady Confirm that the POWER/STANDBY indicator is lit red (without flashing). LIGHT : Not lit or red flashing After checking the POWER/STANDBY indicator, disconnect the power cord from the projector and wait for all of the projector’s indicators to go TEMP : Red flashing out. Next, reconnect the power cord and turn projector power back on. (2-second interval) If the error occurs again when you turn power back on, contact your Message : – retailer or nearest authorized CASIO Service Center. 42 Indicator/Error Message Description and Required Action POWER LIGHT TEMP Message : Amber flashing • Red steady : – : Amber flashing (1-second interval) : – Power has turned off automatically because the light source unit cover is open. Perform the following steps. 1 After confirming that the POWER/STANDBY indicator is lit red (without flashing), disconnect the power cord from the projector. 2 Check to make sure that the light source unit cover is closed. 3 Plug the power cord back in and turn the projector back on again. If the error occurs again when you turn power back on, contact your retailer or nearest authorized CASIO Service Center. 43 Appendix Appendix Connecting to a Video Device The projector is able to project images from the composite video output, S-video output, or component video output of a connected video device. Important! Always turn off the projector and the video device before connecting them. Connection to a composite video output or S-video output Projector Video device To S-video output terminal To video/audio output terminal Yellow: To VIDEO terminal To S-VIDEO terminal Red: To AUDIO IN R terminal White: To AUDIO IN L terminal S-video cable (commercially available) Pin plug type video/audio cable (commercially available) Note Note that regardless of whether the image being projected is being input via the projector’s S-VIDEO terminal or VIDEO terminal, the projector outputs audio that is input via the projector’s AUDIO IN L/R terminals. 44 Connection to a component video output Projector Video device AUDIO IN 1 terminal COMPUTER IN 1 terminal Component video cable (commercially available) To component video output terminals To AUDIO output terminals Red White AUDIO IN 2 terminal COMPUTER IN 2 terminal Stereo mini plug .. Pin plug type audio cable (commercially available) • Component video output terminals come in 3-terminal sets: Y·Cb·Cr or Y·Pb·Pr. Be sure to match the colors of the plugs on a component video cable with the colors of the terminals (Green: Y; Blue: Cb/Pb; Red: Cr/Pr). • Note that connection only to an analog component video output terminal is supported. Connection to a digital output terminal is not supported. 45 Connecting the HDMI Output of a Video Device or Computer to the Projector The projector supports projection and output of HDMI video and audio output from a computer or video device. Important! Turn off the projector and the computer or video device before connecting them. Projector Computer or video device HDMI port To HDMI output terminal HDMI cable (commercially available) • You will need to obtain a commercially available HDMI cable with a connector that matches the terminal of the output device on one end and a connector that matches the projector’s HDMI port (HDMI Type A Socket) on the other end. • For information about HDMI video signal supported by the projector, see page 54. • The projector supports L-PCM 32kHz, 44.1kHz, and 48kHz HDMI audio signals. 46 Remote Controller Signal Range When performing an operation on the remote controller, point it at the remote control signal receiver on the back or front of the projector. The following illustration shows the range of the remote controller signal. Front ±30 degrees max. 5 meters (16.4 feet) max. 5 meters (16.4 feet) max. Back 5 meters (16.4 feet) max. 5 meters (16.4 feet) max. ±30 degrees max. ±30 degrees max. 5 degrees to 30 degrees Remote Contr...
Dieses Handbuch ist für folgende Modelle:eBook-Reader - XJ-H1600 (1.03 mb)
eBook-Reader - XJ-H1650 (1.03 mb)
eBook-Reader - XJ-ST145 (1.03 mb)