


Stimmen - 3, Durchschnittliche Bewertung: 4
(

 )
)
|
Fotos und technische Daten Sony RHT-G5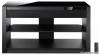 |


Dieses Gerät hat auch andere Anweisungen:


Anleitung Zusammenfassung
• Place the stand in a location with adequate ventilation to prevent heat buildup and prolong the life of the stand. • Use caution when placing the stand on surfaces that have been specially treated (with wax, oil, polish, etc.) as staining or discoloration of the surface may result. • Move the stand only after removing the TV. If you fail to do so, the TV may fall from the stand resulting in serious injury. Do not hold the grille as it may detach from the stand resulting in serious injury. Be careful not to pinch your fingers when moving the stand. 5GB Precautions Precautions • Do not place unspecified objects, such as a flower vase or pottery on the stand. • Do not make alterations to the stand. • Should any solid object or liquid fall into the stand, unplug the stand and have it checked by qualified personnel before operating it any further. On power sources • If you are not going to use the stand for a long time, be sure to disconnect the stand from the wall outlet (mains). To disconnect the AC power cord (mains lead), grasp the plug itself; never pull the cord. • AC power cord (mains lead) must be changed only at the qualified service shop. On operation Before connecting other components, be sure to turn off and unplug the stand. If you have any question or problem concerning your stand, please consult your nearest Sony dealer. Copyrights This stand incorporates Dolby* Digital and Pro Logic Surround and the DTS** Digital Surround System. * Manufactured under license from Dolby Laboratories. Dolby, Pro Logic, and the double-D symbol are trademarks of Dolby Laboratories. ** Manufactured under license under U.S. Patent #’s: 5,451,942; 5,956,674; 5,974,380; 5,978,762; 6,487,535 & other U.S. and worldwide patents issued & pending. DTS and the Symbol are registered trademarks & DTS Digital Surround and the DTS logos are trademarks of DTS, Inc. Product includes software. © DTS, Inc. All Rights Reserved. This stand incorporates High-Definition Multimedia Interface (HDMI™) technology. HDMI, the HDMI Logo, and High-Definition Multimedia Interface are trademarks or registered trademarks of HDMI Licensing LLC in the United States and other countries. “BRAVIA” is a trademark of Sony Corporation. “PlayStation” is a trademark of Sony Computer Entertainment Inc. 6GB Getting Started Getting Started • Remote commander (RM-• Digital optical cord for a TV ANU032) (1) (1) • Size AA (R6) batteries (2) • FM wire antenna (aerial) (1) • Warranty (1) • Operating Instructions (1) • Theatre Stand System Installation Guide (1) Note • The package also contains the parts necessary to assemble the stand. For details on the parts and assembly, refer to “Theatre Stand System Installation Guide” (supplied). Getting Started Inserting batteries into the remote You can control the stand using the supplied remote. Insert two size AA (R6) batteries by matching the + and – ends on the batteries to the markings inside the compartment. Notes • Do not leave the remote in an extremely hot or humid place. • Do not use a new battery with an old one. • Do not drop any foreign object into the remote casing, particularly when replacing the batteries. • Do not expose the remote sensor to direct light from the sun or lighting apparatus. Doing so may cause a malfunction. • If you do not intend to use the remote for an extended period of time, remove the batteries to avoid possible damage from battery leakage and corrosion. 7GB Setting this stand Setting this stand The stand requires assembly. For details, refer to “Theatre Stand System Installation Guide” (supplied). About the installation position Install the stand after connecting all the components to the stand. Install the stand after allowing for a space of more than 7 cm from the wall. This is to allow for heat dissipation and to prevent the TV from falling. Installation of the stand requires two or more people. Side view More than 7cm Note • Be careful not to pinch your fingers when setting up the stand. 2 Fasten the support belt to the stand with a wood screw. You can fasten a wood screw to the centrally-positioned hole on the rear of the stand. For details on acquiring the support belt and screws, refer to the operating instructions supplied with Sony LCD TV. Hole for a wood screw Preventing the TV from falling Secure the TV to provide a protective measure against earthquakes, etc. Perform the following steps if you have a Sony LCD TV. 1 Place the TV on the stand. The TV should be placed in the center of the stand, aligning the rear edge of the TV’s base with the stand’s rear edge. 8GB Connecting the TV and player Connecting the TV and player . By connecting Sony “BRAVIA” Sync-compatible components using HDMI cables, operation can be simplified when you set the Control for HDMI function for the TV. See ““BRAVIA” Sync Features” (page 23). TV HDMI IN Digital Audio OUT (optical) Digital optical cord for a TV (supplied) HDMI cable (not supplied) ANTENNA FM COAXIAL 75 DMPORT HDMI TV OUT ARC BD INDVD ...