


Stimmen - 3, Durchschnittliche Bewertung: 4
(

 )
)
|
Fotos und technische Daten Sony ICD-BX700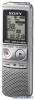 |


Dieses Gerät hat auch andere Anweisungen:
Anleitung Zusammenfassung
If you try to set the alarm to play back a message at a previously set time on another message, “PRE SET” will be displayed, preventing new settings. If the alarm time comes while another message is being played back with an alarm, the playback stops and the new message will be played back. If the alarm time comes during recording, alarm will sound for 10 seconds after the recording is finished and playback begins. “.” will flash when the alarm time comes. If more than one alarm time comes during recording, only the first message will be played back. If you delete a message on which you have set an alarm, that alarm will be also cancelled. If the alarm time comes during erasing operation, alarm will sound for 10 seconds after the erasing is finished and playback begins. If the alarm time comes while you are updating the data, the alarm setting will be cancelled automatically. GB Editing Messages Erasing Messages You can erase the recorded messages one by one or all messages in a folder at a time. .Notes . Once a recording has been erased, you cannot retrieve it. . If the message you want to erase is locked in the menu, the message is not erased. Erasing messages one by one ERASE . You can erase unwanted messages, retaining all other messages when the IC recorder is in the stop or playback mode. When a message is erased, the remaining messages will advance and be renumbered so that there will be no space between messages. Editing Messages GB 1 Press ERASE while you are playing back the message you want to erase, or press and hold ERASE during the stop mode. A beep will sound and the message number and “ERASE” will flash. 2 Press ERASE again. The message is erased and the remaining messages will be renumbered. (For example, if you erase Message 3, Message 4 will be renumbered as Message 3. When erasing is completed, the unit will stop at the beginning of the following message.) To cancel erasing Press .(stop) before step 2. To erase another message Proceed with the same steps again from the beginning. To erase a part of one message Divide the message into two messages first, then proceed with the same steps from the beginning. GB Erasing all messages in a folder DISPLAY/ MENU . . PLAY/ STOP• –., ENTER .+ 1 Select the folder containing the messages you want to erase when the IC recorder is in the stop mode. 2 Press and hold DISPLAY/MENU to enter the menu mode. The menu mode window will be displayed. 3 Press –.or .+ to select “ALL ERASE,” then press . PLAY/ STOP•ENTER. 4 Press .PLAY/STOP•ENTER while “ALL ERASE” is flashing. All messages in the selected folder will be erased. 5 Press .(stop) to exit the menu mode. To cancel erasing Press .(stop) before step 3. Editing Messages GB Moving a Message to a Different Folder DISPLAY/ MENU . . PLAY/ STOP• –., ENTER .+ You can move the recorded messages to another folder. 1 Select the message you want to move. 2 Press and hold DISPLAY/MENU to enter the menu mode. The menu mode window will be displayed. 3 Press –.or .+ to select “MOVE,” then press .PLAY/ STOP•ENTER. The destination folder indicator flashes. 0 0 GB 4 Press –.or .+ to select the folder that you want to move the message into, then press .PLAY/ STOP•ENTER. The message is moved to the last position in the destination folder. When you move a message to another folder, the original message in the previous folder will be deleted. 5 Press .(stop) to exit the menu mode. .Note If 99 messages have been recorded in the folder to which you want to move a message, you cannot move it. To cancel moving the message Press .(stop) before step 4. Dividing a Message into Two DIVIDE –., .+ You can divide a message during playback, so that the message is divided into two parts and a new message number is added to the newer part of the divided message. By dividing a message, you can easily find the point from which you want to play back when you make a long recording such as at a meeting. You can divide a message until the total number of messages in the folder reaches 99. Editing Messages 1 1 GB 1 Press DIVIDE while you are playing back the message you want to divide. The current message number and “DIVIDE” flash. 2 Press DIVIDE. A new number is added to the newer part of the divided message, and the message numbers of the following messages will be incremeted by one. Message 1 Message 3 Message 1 Message 2 A Message is divided. Message 2 Message 3 Message 4 The message numbers are incremeted. To cancel dividing the message Press .(stop) before step 1. .Notes . You need a certain amount of free space in the memory to divide a message. For more information, see “System Limitations” on page 67. . If 99 messages have been recorded in a folder, you cannot divide a message. In that case, reduce the number of messages to 98 or less by erasing unwanted messages or by moving some of the messages to another folder before dividing a message. . When you divide a message with a title and artist name, the newer part has the same title, artis...