


Stimmen - 5, Durchschnittliche Bewertung: 3.6
(

 )
)
|
Fotos und technische Daten Sony CDX-CA650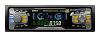 |


Dieses Gerät hat auch andere Anweisungen:
Anleitung Zusammenfassung
The hour indication flas О Press either side of to set the hour. О Press the (+) side ol The minute indication fl О Press either side of to set the minute. Press (ENTER). hes. ( DISC/PRESET) (SEEK). ashes. ( DISC/PRESET) tnntr IUUU The clock starts. After the clock setting is completed, the display returns to normal play mode. Tips • You can set the clock automatically with the RDS feature (page 19). • When D.INFO mode is set to ON, the time is always displayed (page 22). In addition to playing a CD with this unit, you can also control external CD/MD units. Note If you connect an optional CD unit with the CD TEXT function, the CD TEXT information will appear in the display when you play a CD TEXT disc. Playing a disc (With this unit) 1 Press (open) and insert the disc (labelled side up). 2 Close the front panel. Playback starts automatically. If a disc is already inserted, press (SOURCE) repeatedly until “CD” appears to start playback. To Press Stop playback (OFF) Eject the disc (OPEN ) then Z Skip tracks (SEEK) - Automatic [once for each track] Music Sensor Fast-forward/ (SEEK) fm/M) reverse [hold to desired point] - Manual Search Notes • When the last track on the disc is over, playback restarts from the first track of the disc. • With optional unit connected, playback of the same source will continue on to the optional CD/MD unit. continue to next page t 9 (With optional unit) 1 Press (source) repeatedly to select “CD” or “MD.” 2 Press (mode) repeatedly until the desired unit appears. Playback starts. To Press Skip discs (disc/preset) (+/-) -Disc selection Display items When the disc/track changes, any prerecorded title*1 of the new disc/track is automatically displayed (if the Auto Scroll function is set to “ON,” names exceeding 8 characters will be scrolled (page 22)). To Press Switch display (DISPLAY/PTY) item Scroll display item (S) (SCROLL) *1 “NO NAME” indicates there is no Disc Memo (page 11) or prerecorded name to display. *2 Only for CD TEXT discs with the artist name. Notes • Some characters cannot be displayed. • For some CD TEXT discs with very many characters, information may not scroll. • This unit cannot display the artist name for each track of a CD TEXT disc. Tip When Auto scroll is set to OFF and the disc/track name is changed, the disc/track name does not scroll. 10 Playing tracks repeatedly — Repeat Play The disc in the main unit will repeat a track or the entire disc when it reaches the end. For repeat play, you can select: • REP-1 — to repeat a track. • REP-2* — to repeat a disc. • Available only when one or more optional CD/MD units are connected. During playback, press (3) (REP) repeatedly until the desired setting appears in the display. Repeat Play starts. To return to normal play mode, select “REP-OFF.” Playing tracks in random order — Shuffle Play You can select: • SHUF-1 — to play the tracks on the current disc in random order. • SHUF-2*1 — to play the tracks in the current optional CD (MD) unit in random order. • SHUF-ALL*2 — to play all the tracks in all the connected CD (MD) units (including this unit) in random order. *1 Available only when one or more optional CD (MD) units are connected. *2 Available only when one or more optional CD units, or two or more optional MD units are connected. During playback, press (6) (SHUF) repeatedly until the desired setting appears in the display. Shuffle Play starts. To return to normal play mode, select “SHUF-OFF.” Note “SHUF-ALL” will not shuffle tracks between a CD player and an MD player. Labelling a CD — Disc Memo (For a CD unit with the CUSTOM FILE function) You can label each disc with a custom name (Disc Memo). You can enter up to 8 characters for a disc. If you label a CD, you can locate the disc by name (page 12). 1 Start playing the disc you want to label. 2 Press (menu), then press either side of (disc/preset) repeatedly until “NAMEEDIT” appears. 3 Press (ENTER). // /T— . It r T? L if ^EQ7*: © DBC Ai 7' \ 1 ✓ The unit will repeat the disc during the labelling procedure. 4 Enter the characters. O Press the (+)*1 side of (disc/preset) repeatedly to select the desired character. A t B t C ... t 0 t 1 t 2 ... t + *2 . t--► * ... t _*2 t A *1 For reverse order, press the (-) side of ( DISC/PRESET). *2 (blank space) 0 Press the (+) side of (seek) after locating the desired character. If you press the (-) side of (SEEK), you can move back to the left. © Repeat steps O and 0 to enter the entire name. 5 To return to normal CD play mode, press (ENTER). continue to next page t 11 Tips • Simply overwrite or enter “_” to correct or erase a name. • There is another way to start labelling a CD: Press (list) for 2 seconds instead of performing steps 2 and 3. You can also complete the operation by pressing (list) for 2 seconds instead of step 5. • You can label CDs on a unit without the CUSTOM FILE function if that unit i...
Dieses Handbuch ist für folgende Modelle:Car-Receiver - CDX-CA650V (2.38 mb)
Car-Receiver - CDX-CA650X (2.38 mb)