


Stimmen - 2, Durchschnittliche Bewertung: 3.5
(


 )
)
|
Fotos und technische Daten Sony HDR-UX9E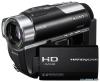 |


Dieses Gerät hat auch andere Anweisungen:
Kameras - HDR-UX9E (3.42 mb)
Kameras - HDR-UX9E (9.49 mb)
Kameras - HDR-UX9E (17.13 mb)
Kameras - HDR-UX9E (17.19 mb)
Anleitung Zusammenfassung
Set [REDEYE REDUC] to [ON], then set [FLASH MODE] (p. 86) to [AUTO] or [ON] to display . You can prevent redeye by activating the flash before recording. b Notes • The redeye reduction may not produce the desired effect due to individual differences and other conditions. FACE DETECTION Adjusts the focus/color/exposure of face images automatically. Also, adjusts face images for clear viewing. B ON ( ) Detects face images in frames, then adjusts their image quality automatically. Face detection frame Face detection icon ON [NO FRAMES] ( ) Detects face images without frames, then adjusts their image quality automatically. OFF Face images are no detected. b Notes • Your camcorder may not be able to detect face images depending on the recording condition. • Your camcorder may not be able to optimize the images depending on the recording condition. In this case, set [FACE DETECTION] to [OFF]. INDEX SET The camcorder detects faces automatically during movie recording. The default setting is [ON]. Face icons and their meanings : This icon appears when the setting is [ON]. : This icon flashes when your camcorder detects a face. The icon stops flashing when the face is recorded in the Face Index. : This icon appears when faces cannot be recorded in the Face Index. Customizing your camcorder Continued , 87 MOVIE SETTINGS (Continued) To play back a movie from the Face Index screen, see page 45. b Notes • The detectable number of face image is limited. CONVERSION LENS You can set this function when you use an external conversion lens (optional) that is compatible with your camcorder. You can shoot with the SteadyShot function adjusted optimally for the conversion lens attached. You can select from [WIDE CONVERSION] ( ) and [TELE CONVERSION] ( ). The default setting is [OFF]. PHOTO SETTINGS (Items for recording still images) Touch 1, then 2. If the item is not on the screen, touch / to change the page. How to set (HOME MENU) t page 82 (OPTION MENU) t page 96 The default settings are marked with B. B 4.0M ( 4.0M 2304 . 1728) Records still images clearly in the 4:3 ratio. 3.0M ( 3.0M 2304 . 1296) Records still images clearly in the 16:9 (wide) ratio. 1.9M ( 1600 . 1200) Allows you to record more still images in relatively clear quality in the 4:3 ratio. VGA (0.3M) ( 640 . 480) Allows the maximum number of still images to be recorded in the 4:3 ratio. b Notes • The set image size is effective during the (Still) lamp turning on. The number of still images recordable on the internal memory (HDR-UX19E/ UX20E) The maximum number of recordable still images is 9,999. The number of recordable still images varies depending on the recording conditions. Capacity of a “Memory Stick PRO Duo” and the number of recordable still images (Approx.)* When the (Still) lamp is lights up: 4.0M 2304 . 1728 4.0M 1GB 475 2GB 970 4GB 1900 8GB 3850 * All numbers measured when recording still images at the maximum image size. Check the actual number of recordable still images while recording still images on the LCD screen (p. 141). When the (Movie) lamp lights up: The image size is fixed depending on the image quality and the aspect ratio of the movie recorded. –[ 3.0M] with HD (high definition) image quality –[ 3.0M] in the aspect ratio 16:9 with SD (standard definition) image quality – [2.2M] in the aspect ratio 4:3 with SD (standard definition) image quality b Notes • Numbers in the table are of when using a “Memory Stick PRO Duo” made by Sony Corporation. The recordable number of still images varies depending on the recording conditions or the type of “Memory Stick.” • The unique pixel array of Sony’s ClearVid CMOS Sensor and image processing system (BIONZ) allows the still image resolution equivalent to the sizes described. z Tips • For recording still images, you can use the “Memory Stick PRO Duo” that has 512 MB or less. FILE NO. B SERIES Assigns file numbers of still images in sequence, even if you replace the “Memory Stick PRO Duo.” RESET Assigns individual file numbers for each “Memory Stick PRO Duo.” NIGHTSHOT LIGHT See page 84. STEADYSHOT See page 85. GUIDEFRAME See page 86. ZEBRA See page 86. FLASH MODE See page 86. FLASH LEVEL See page 87. REDEYE REDUC See page 87. FACE DETECTION See page 87. CONVERSION LENS See page 88. Customizing your camcorder 89 VIEW IMAGES SET (Items to customize the display) Touch 1, then 2. If the item is not on the screen, touch / to change the page. How to set (HOME MENU) t page 82 (OPTION MENU) t page 96 The default settings are marked with B. DATA CODE During playback, displays the information (data code) recorded automatically at the time of recording. B OFF Data code is not displayed. DATE/TIME Displays the date and time. CAMERA DATA Displays camera setting data. DATE/TIME ADate BTime CAMERA DATA Movie Still image CSteadyShot off DBrightness EWhite balance FGain GShutter speed HAperture value IExposure z Tips • appears for a still image recorded using a flash. • The data code is displayed on the TV screen i...
Dieses Handbuch ist für folgende Modelle:Kameras - HDR-UX10E (7.01 mb)
Kameras - HDR-UX19E (7.01 mb)
Kameras - HDR-UX20E (7.01 mb)