


Stimmen - 5, Durchschnittliche Bewertung: 4.2
(

 )
)
|
Fotos und technische Daten Sony HDR-UX5E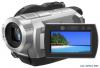 |


Anleitung Zusammenfassung
106) after attaching it to your camcorder. b Notes • You can use only the H series of “InfoLITHIUM” battery pack with your camcorder. 1 Slide the POWER switch in the direction of the arrow to OFF (CHG) (The default setting). 2 Raise the viewfinder, then attach the battery pack by sliding it in the direction of the arrow until it clicks. 3 Connect the AC Adaptor to the DC IN jack of your camcorder. Open the jack cover, and connect the DC plug of the AC Adaptor. Match the v mark on the DC plug with the v mark on your camcorder. 4 Connect the mains lead to the AC Adaptor and the wall socket. The CHG (charge) lamp lights up and charging starts. The CHG (charge) lamp turns off when the battery is fully charged. 5 Disconnect the AC Adaptor from the DC IN jack on your camcorder. b Notes • Disconnect the AC Adaptor from the DC IN jack holding both the camcorder and the DC plug. To remove the battery pack 1 Slide the POWER switch to OFF (CHG). 2 Raise the viewfinder. 3 Press the BATT (battery release) button and remove the battery pack. b Notes • When you remove the battery pack or the AC Adaptor, make sure that the (Movie) lamp/ (Still) lamp (p. 21) is turned off. When storing the battery pack Fully discharge the battery before storing it for an extended period (see page 107 for the details of storage). To use an outside power source Make the same connections as you do when charging the battery pack. The battery pack will not lose its charge in this case. To check the remaining battery (Battery Info) Set the POWER switch to OFF (CHG), then press DISP/BATT INFO. After a while, the approximate recordable time and battery information appear for about 7 seconds. You can view the battery information for up to 20 seconds by pressing DISP/BATT INFO again while the information is displayed. Remaining battery (approx.) Recording capacity (approx.) Charging time Approximate time (min.) required when you fully charge a fully discharged battery pack. Battery pack Charging time NP-FH50 135 NP-FH60 (supplied with 135 HDR-UX3E/UX5E) NP-FH70 (supplied with 170 HDR-UX7E) NP-FH100 390 Recording time Approximate time (min.) available when you use a fully charged battery pack. HDR-UX3E/UX5E Battery pack Continuous recording time Typical recording time* Image HD SD HD SD quality** NP-FH50 60 75 30 35 65 75 30 35 65 80 30 40 NP-FH60 80 100 40 50 (supplied) 85 100 40 50 90 105 45 50 Continued , 19 Getting Started Step 2: Charging the battery pack (Continued) Battery pack Continuous recording time Typical recording time* NP-FH70 135 160 65 80 140 165 70 80 140 170 70 85 NP-FH100 320 370 160 185 335 375 165 185 335 385 165 190 HDR-UX7E Battery pack Continuous recording time Typical recording time* Image HD SD HD SD quality** NP-FH50 55 65 30 30 60 70 30 35 60 70 30 35 NP-FH70 120 145 65 70 (supplied) 125 150 70 75 125 150 70 75 NP-FH100 285 335 160 165 300 340 165 170 300 340 165 170 * Typical recording time shows the time when you repeat recording start/stop, turning the power on/off and zooming. **“HD” stands for high definition image quality, and “SD” stands for standard image quality. b Notes • All times measured with recording mode [SP] under the following conditions: Top: When the LCD backlight turns on. Middle: When the LCD backlight turns off. Bottom: When recording with the viewfinder while the LCD panel is closed. Playing time Approximate time (min.) available when you use a fully charged battery pack. HDR-UX3E/UX5E LCD panel LCD panel Battery pack opened* closed Image HD SD HD SD quality** NP-FH50 95 105 100 115 NP-FH60 130 140 135 150 (supplied) NP-FH70 205 230 220 245 NP-FH100 470 515 500 555 HDR-UX7E LCD panel LCD panel Battery pack opened* closed Image HD SD HD SD quality** NP-FH50 90 105 100 115 NP-FH70 200 230 215 245 (supplied) NP-FH100 455 515 485 555 * When the LCD backlight is on. **“HD” stands for high definition image quality, and “SD” stands for standard image quality. On the battery pack • Before changing the battery pack, slide the POWER switch to OFF (CHG) and turn off the (Movie) lamp/ (Still) lamp (p. 21). • The CHG (charge) lamp flashes during charging, or Battery Info (p. 19) will not be correctly displayed under the following conditions: – The battery pack is not attached correctly. – The battery pack is damaged. – The battery pack is worn-out (For Battery Info only). • The power will not be supplied from the battery as long as the AC Adaptor is connected to the DC IN jack of your camcorder, even when the mains lead is disconnected from the wall socket. • When attaching an optional video light, it is recommended that you use an NP-FH100 battery pack. • We do not recommend using an NP-FH30, which only allows short recording and playback times, with your camcorder. On the charging/recording/playback time • Times measured when using the camcorder at 25°C(77 °F) (10°C to 30 °C (50 °F to 86 °F) is recommended). • The recording and playback time will be shorter when you use your camcorder in low temperatures. • Th...
Dieses Handbuch ist für folgende Modelle:Kameras - HDR-UX3E (5.82 mb)
Kameras - HDR-UX7E (5.82 mb)