


Stimmen - 4, Durchschnittliche Bewertung: 4.3
(

 )
)
|
Fotos und technische Daten Sony DCR-DVD106E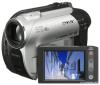 |


Dieses Gerät hat auch andere Anweisungen:


Anleitung Zusammenfassung
DCR-DVD106E/DVD108E/DVD608E LCD panel LCD panel Battery pack opened closed NP-FH40 120 135 (supplied) NP-FH50 140 155 NP-FH70 300 330 NP-FH100 695 760 DCR-DVD109E Battery pack Continuous recording time Typical recording time* NP-FH40 85 40 (supplied) 95 45 95 45 NP-FH50 100 50 110 50 110 50 NP-FH70 215 105 235 110 235 110 NP-FH100 495 235 545 260 545 260 * Typical recording time shows the time when you repeat recording start/stop, turning the power on/off and zooming. b Notes • All times measured with recording mode [SP] under the following conditions: Top: When the LCD backlight turns on. Middle: When the LCD backlight turns off (DCR-DVD306E/DVD308E/DVD708E). Bottom: Recording time when recording with the viewfinder while the LCD panel is closed. LCD panel LCD panel Battery pack opened closed NP-FH40 110 125 (supplied) NP-FH50 130 145 NP-FH70 280 315 NP-FH100 635 725 DCR-DVD306E/DVD308E/DVD708E LCD panel LCD panel Battery pack opened* closed NP-FH40 110 125 (supplied) NP-FH50 130 145 NP-FH70 280 315 NP-FH100 635 725 * When the LCD backlight is on. On the battery pack • Before changing the battery pack, Turn the POWER switch to OFF (CHG) and turn off the (Movie) lamp/ (Still) lamp (p. 23). • The CHG (charge) lamp flashes during charging, or Battery Info (p. 21) will not be correctly displayed under the following conditions: – The battery pack is not attached correctly. – The battery pack is damaged. – The battery pack is worn-out (For Battery Info only). • The power will not be supplied from the battery as long as the AC Adaptor is connected to the DC IN jack of your camcorder, even when the mains lead is disconnected from the wall socket. • When attaching an optional video light, it is recommended that you use an NP-FH70/NPFH100 battery pack (DCR-DVD306E/ DVD308E/DVD708E). • We do not recommend using an NP-FH30, which only allows short recording and playback times, with your camcorder. On the charging/recording/playback time • Times measured when using the camcorder at 25°C(77 °F) (10°C to 30 °C (50 °F to 86 °F) is recommended). • The recording and playback time will be shorter when you use your camcorder in low temperatures. • The recording and playback time will be shorter depending on the conditions under which you use your camcorder. On the AC Adaptor • Use the nearby wall socket when using the AC Adaptor. Disconnect the AC Adaptor from the wall socket immediately if any malfunction occurs while using your camcorder. • Do not use the AC Adaptor placed in a narrow space, such as between a wall and furniture. • Do not short-circuit the DC plug of the AC Adaptor or battery terminal with any metallic objects. This may cause a malfunction. • Even if your camcorder is turned off, AC power (mains) is still supplied to it while connected to the wall socket via the AC Adaptor. Step 3: Turning the power on, and setting the date and time Set the date and time when using this camcorder for the first time. If you do not set the date and time, the [CLOCK SET] screen appears every time you turn on your camcorder or change the POWER switch position. POWER switch Getting Started 1 While pressing the green button, turn the POWER switch repeatedly in the direction of the arrow until the respective lamp lights up. (Movie): To record movies (Still): To record still images The [CLOCK SET] screen appears. 2 Select the desired geographical area with v/V, then touch [NEXT]. 3 Set [SUMMERTIME], then touch [NEXT]. Continued , 23 Step 3: Turning the power on, and setting the date and time (Continued) 4 Set [Y] (year) with v/V. 1 1 AM 5 Select [M] with b/B, then set the month with v/V. 6 Set [D] (day), hour and minute in the same way, then touch [NEXT]. 7 Make sure that the clock is correctly set, then touch . The clock starts. You can set any year up to the year 2037. To turn off the power Turn the POWER switch to OFF (CHG). To reset the date and time Select (HOME) t (SETTINGS) t [CLOCK/ LANG] t [CLOCK SET], and set the date and time. b Notes • If you do not use your camcorder for about 3 months, the built-in rechargeable battery gets discharged and the date and time settings may be cleared from the memory. In that case, charge the rechargeable battery and then set the date and time again (p. 105). • It takes a few seconds for your camcorder to be ready to shoot after the power is turned on. You cannot operate your camcorder during this time. • In the setting at the time of purchase, the power turns off automatically if you leave your camcorder without any operation attempted for approximately 5 minutes, to save battery power ([A.SHUT OFF], p. 70). z Tips • The date and time does not appear during recording, but they are automatically recorded on the disc, and can be displayed during playback (see page 65 for [DATA CODE]). • Refer to page 97 for information concerning “World time difference.” • If the buttons on the touch panel do not work correctly, adjust the LCD screen ([CALIBRATION], p. 103). Changing the language setting You...
Dieses Handbuch ist für folgende Modelle:Kameras - DCR-DVD108E (5.5 mb)
Kameras - DCR-DVD109E (5.5 mb)
Kameras - DCR-DVD306E (5.5 mb)
Kameras - DCR-DVD308E (5.5 mb)