


Stimmen - 0, Durchschnittliche Bewertung: 0
(
 )
)
|
Fotos und technische Daten Brother PT-D200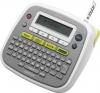 |


Dieses Gerät hat auch andere Anweisungen:
Anleitung Zusammenfassung
• Do not pull the tape since this may damage the tape cassette. You can save up to 30 labels and recall them for printing at a later date. A maximum of 80 characters can be saved per file, a maximum total of 2400 characters for the total memory. You can also edit and overwrite the stored label. .. Save .. Print .. Open • You can also enter the File menu by pressing . NOTE If you try to store a label when there is already a label stored to that number, a message “Overwrite?” will appear. Press to save your new label. Press to cancel. If the cutter blade becomes blunt after repetitive use and the tape cannot be cut cleanly, replace with new cutter unit (stock no. TC-4) by obtaining from an authorized Brother reseller. .. Replacing the Cutter Unit 1. Pull out the two sections of the cutter unit (green) in the direction of the arrows shown in the illustration. 2. Install a new cutter unit. Push it in until it snaps into place. Entering Text Line 1 Label image Line 2 / [Tab] / [Tab Length] / [Auto/0.0"-4.0" (0-100 mm)] Caps Caps - / / / [Label Length] / [Auto/1.2"-12.0" (30-300 mm)] + / [Text&Format] + / [Text Only] Printing Labels + [Copies: ] / - / + / [Numbering] / + / [Mirror] [Mirror Print?] / [Margin] / [Full/Half/Narrow/Chain Print] LCD display Label image Full Half Narrow 1" 1" 0.16" 0.16" ABC ABC 0.47" 0.47" ABC Full Half Narrow 2.7" ABC 1.6" ABC 1" ABC Saving Label Files / [Save] / / [Print] / [Copies: ] / - / [Open] / Accessories Tape Cassettes: See the included “Supplies and Accessories Guide”. AC Adapter: AD-24ES Cutter Unit: TC-4 (replacement) Do not touch the cutter blade directly with your fingers. USING TEMPLATES This function allows you to create various name labels using the built-in templates. Refer to the Name Label format table (D) on the enclosed insertion sheet. Example: This function allows you to create unique labels by using built-in templates. Refer to the DECO MODE format table (C) on the enclosed insertion sheet. Example: NOTE • Depending on the format you have selected, the entire contents of your text may not be printed. For example, if you selected a fixed Label Length and the text is too long, an error message "Text Limit!" will appear. • The templates cannot be edited. • Only the highlighted symbols on the enclosed insertion sheet can be used in DECO MODE. • To clear all text, press and , then “Clear?” appears. Press to clear. Press to cancel. • When you access DECO MODE or Name Label function, your most recently printed DECO MODE or Name Label function text and label length will be recalled. • Press to return to the previous step. • To exit the DECO MODE or Name Label function and return to the text input screen, do one of following: a) Press . b) Press / to select [Cancel], and then press when "Print" appears. • These features are only available when using 0.47" (12mm) wide tape cassettes. • The maximum label length is 7.8" (200mm) for DECO MODE and Name Label function. • When [Auto] is selected for “Label Length”, the label will automatically adjust to the correct length for printing the text one time. • Press to return to the [Auto] setting for “Label Length” mode. USEFUL FUNCTION KEYS 1 Press to select the settings to enter the text. 2 Press / to select the settings. * When [HEL + Atlanta], for example, is selected, the font for characters, including accented characters, will be Helsinki, and the font for numbers and some symbols will be Atlanta. Other combined fonts will be divided in the same way. NOTE • To cancel operations, press . • Refer to the font sample table (F) on the enclosed insertion sheet. • The actual printed font size depends on the tape width, number of characters and number of input lines. Once characters reach a minimum size, the selected font will default to a custom font which is based on the Helsinki style. This allows labels to print using the smallest text possible on narrow or multi-line labels. Press to select the frame design. Refer to the frame design table (E) on the enclosed insertion sheet. NOTE To cancel operations, press . Press to select various symbols. Refer to the table of symbols (A) on the enclosed insertion sheet for a list of available symbols. NOTE To cancel operations, press . You can reset the P-touch labeler when you want to initialize the settings, or in the event the P-touch labeler is not working properly. 1 Turn off the P-touch labeler, hold down and and then press to turn the P-touch back on. 2 Release and . The P-touch labeler turns on with the internal memory reset. NOTE All text, settings and stored files are cleared. Name Label / [Name Label] [Select Layout] / Bill Anderson ABC Company, Inc. / [Auto/1.2" - 7.8" (30 -200mm)] [Print] DECO MODE [Select Layout] / [Input Text] ABCDEF / [Auto/1.2"-7.8"(30-200mm)] [Print] Font Key / Select an item Font Helsinki Brussels US Florida Belgium San Diego Los Angeles Calgary HEL + Atlanta * HEL + Adams * HEL + Brunei * HEL + Istanbul * HEL + Sofia * HEL + Germany * Size Large Medium...