


Stimmen - 4, Durchschnittliche Bewertung: 4.3
(

 )
)
|
Fotos und technische Daten Sony KDL-32S3010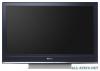 |


Dieses Gerät hat auch andere Anweisungen:
Fernseher - KDL-32S3010 (1.71 mb)
Fernseher - KDL-32S3010 (33.48 mb)
Fernseher - KDL-32S3010 (27.54 mb)
Fernseher - KDL-32S3010 (21.97 mb)
Anleitung Zusammenfassung
~ • Observe the correct polarity when inserting batteries. • Do not use different types of batteries together or mix old and new batteries. • Dispose of batteries in an environmentally friendly way. Certain regions may regulate disposal of batteries. Please consult your local authority. • Handle the remote with care. Do not drop or step on it, or spill liquid of any kind onto it. • Do not place the remote in a location near a heat source, a place subject to direct sunlight, or a damp room. Connecting an aerial/cable and VCR Coaxial cable* Scart lead (not supplied) VCR Coaxial cable (not supplied) Coaxial cable* Terrestrial signal or cable 4 GB 5 GB Start-up Guide 3: Preventing the TV from toppling over ~ For models with swivel stand (KDL-32T30xx, KDL- 40T30xx) do not tense the support belt. 4: Connecting the cables 5: Bundling the cables 6: Selecting the language and country/region 1 Connect the TV to your mains socket (220-240V AC, 50Hz). 2 Press 1 on the TV (top side). When you switch on the TV for the first time, the Language menu appears on the screen. 3 Press F/f to select the language displayed on the menu screens, then press . KDL-40S30xx KDL-40D27xx KDL-40D26xx KDL-40T28xx KDL-40T30xx 3,4 Auto Start Up Language Country Select: Confirm: Continued 4 Press F/f to select the country/region in which you will operate the TV, then press . Auto Start Up Language Country Select: Confirm: Back: If the country/region in which you want to use the TV does not appear in the list, select “-” instead of a country/region. 7: Auto-tuning the TV 1 Before you start auto-tuning the TV, insert a pre-recorded tape into the VCR connected to the TV (page 4) and start play back. The video channel will be located and stored on the TV during auto-tuning. If no VCR is connected to the TV, skip this step. 2 Press . Back: Start: Cancel: MENU Do you want to start automatic tuning? 3 Press F/f to select “Antenna” or “Cable”, then press . If you select “Cable”, the screen for selecting the scan type appears. See “To tune the TV for Cable connection” (page 6). The TV starts searching for all available digital channels, followed by all available analogue channels. This may take some time, so do not press any buttons on the TV or remote while proceeding. If a message appears for you to confirm the aerial connection No digital or analogue channels were found. Check all the aerial/cable connection and then press to start auto-tuning again. 4 When the Programme Sorting menu appears on the screen, follow the steps of “Programme Sorting” (page 26). If you do not change the order in which the analogue channels are stored on the TV, go to step 5. 5 Press MENU to exit. The TV has now tuned in all the available channels. ~ When a digital broadcast channel cannot be received, or when selecting a region in which there are no digital broadcasts in step 4 (page 6), the time must be set after performing step 5. To tune the TV for Cable connection 1 press . 2 Press F/f to select “Quick Scan” or “Full Scan”, then press . "Quick Scan" : channels are tuned according to the cable operator information within the broadcast signal. Recommended setting for "Frequency", "Network ID" and "Symbol Rate" is "Auto". This option is recommended for fast tuning when supported by your cable operator. If the "Quick Scan" does not tune, please use the "Full Scan" method below. "Full Scan" : All available channels are tuned and stored. This procedure may take some time. This option is recommended when "Quick Scan" is not supported by your cable provider. For further information about supported cable providers, refer to support web site: 3 Press G/g/f to select “Start”. The TV starts searching for channels. Do not press any buttons on the TV or remote. ~ Some cable providers do not support “Quick Scan”. If no channels are detected using “Quick Scan”, perform “Full Scan”. Detaching the Table- Top Stand from the TV ~ Do not remove the Table-Top Stand for any reason other than to wall-mount the TV. KDL-40S30xx KDL-32S30xx KDL-40D27xx KDL-32D27xx KDL-40D26xx KDL-32D26xx KDL-40T28xx KDL-32T28xx KDL-40T30xx KDL-32T30xx 6 GB Safety information Installation/Set-up Install and use the TV set in accordance with the instructions below in order to avoid any risk of fire, electrical shock or damage and/or injuries. Installation • The TV set should be installed near an easily accessible mains socket. • Place the TV set on a stable, level surface. • Only qualified service personnel should carry out wall installations. • For safety reasons, it is strongly recommended that you use Sony accessories, including: – Wall-mount bracket SU-WL500 Transporting • Before transporting the TV set, disconnect all cables. • Two or three people are needed to transport a large TV set. • When transporting the TV set by hand, hold it as shown on the right. • When lifting or moving the TV set, hold it firmly from the bottom. Do not put stress on the LCD panel. • When tr...
Dieses Handbuch ist für folgende Modelle:Fernseher - KDL-32D2710 (5.78 mb)
Fernseher - KDL-40D2710 (5.78 mb)
Fernseher - KDL-40S3000 (5.78 mb)
Fernseher - KDL-40S3010 (5.78 mb)