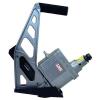
Anleitung Senco, modell SHF50
Anleitung Zusammenfassung
Always carry or manipulate the tool by its handle when connected to air supply. . Con la herramienta apoyada verticalmente sobre el contrapiso, conecte el aire a la herramienta. Siempre lleve o manipule la herramienta por el mango cuando este conectada al abastecimiento de aire. . Maintenez l'outil debout sur le sousplancher et raccordez l'air a l'outil. Manipulez toujours l’outil par sa poignee lorsqu’il est raccorde au reseau d’air comprime. 7 Tool Use ! Uso de la Herramienta ! Utilisation de l’outil . To load: With the tool sitting upright on the sub- floor, insert strip of cleats into rear of magazine. Use only genuine SENCO cleats. . Para cargar: Con la herramienta apoyada verticalmente sobre el contrapiso, inserte la tira de clavos en la parte de atras del cargador. Use solo clavos SENCO genuinas. . Pour charger: Maintenez l'outil debout sur le sousplancher et introduisez une bande de clous dans la partie arriere du magasin. Utilisez uniquement les clous d'origine SENCO. . Pull back fully the feeder clip and slowly release it to engage behind the cleats. Jamming may occur if the feeder clip is not engaged. . Tire hacia atras completamente hasta el clip de alimentacion y sueltelo lentamente para que se enganche detras de los clavos. La herramienta podria trabarse si el clip de alimentacion no se engancha. . Tirez le coulisseau en arriere completement et relachez le doucement jusqu’a ce qu’il s’appuie derriere les clous. Les clous peuvent se coincer si le coulisseau n’est pas engage correctement derriere les clous. . Use the rubber face of the hammer to put the flooring firmly in place. . Use la cara de goma del martillo para poner el piso firmemente en su lugar. . Utilisez la face caoutchoute du marteau pour installer les planches a clouer fermement en place. . The lip of the plastic base should rest snugly against the tongue of the flooring. Downward pressure should be applied to ensure proper seating of the cleat. . El labio del base de plastico debe descansar ajustadamente contra la lengueta del piso. Debera aplicarse presion hacia abajo para asegurar el asentamiento correcto del clavo. . Placer la levre de l’outil en contact avec la languette de la planche de bois. Appliquer une pression verticale sur l’outil pour s’assurer un bon positionnement du clou. . Activate the tool by striking lightly the head cap with the RUBBER FACE of the hammer supplied with the tool. Never strike the tool with the metal end of the hammer. . Active la herramienta pegandoleligeramente al casquete con la CARA DE GOMA del martillo que vino con la herramienta. Nunca golpee laherramienta con el extremo metalico del martillo. Si la madera se tuerce ligeramente, golpeando la herramienta conmas fuerza ayudara a tirar la tabla haciaarriba ajustadamente. If wood is slightly twisted, hitting the tool with more force will assist in pulling the board up snugly. . Pour declencher l’outil, frapper legerementsur le chapeau du declencheur avec laFACE CAOUTCHOUTEE du marteau fourni avec l’outil. Frapper avec le cotemetallique du marteau endommageral’outil. On peut frapper plus fort sur l’outilsi le bois est courbe; dans ce cas, il fautretenir l’outil plus fermement. 8 Tool Use ! Uso de la Herramienta ! Utilisation de l’outil . Always use the RUBBER FACE of the hammer. Using the steel face will damage the tool. . Siempre use la CARA DE GOMA del martillo. La cara de acero danara la herramienta. . Toujours utiliser la FACE CAOUTCHOUTEE du marteau pour declencher l’outil. L’utilisation du bout metallique endommagera l’outil. . Should a cleat jam occur, disconnect air supply. . Si se produce un altascamiento de un clavo, desconecte el suministro de aire. . Au cas ou il se produirait un coincage de clous, coupez l’alimentation en air. . Release the feeder clip and remove cleats from the to...


 )
)


