


Stimmen - 3, Durchschnittliche Bewertung: 4
(

 )
)
|
Fotos und technische Daten Makita BO3700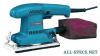 |


Anleitung Zusammenfassung
Lock button 2. Switch trigger ASSEMBLY 003308 1 2 1. Clamper 2. Abrasive paper with pre-punched holes CAUTION: • Always be sure that the tool is switched off and unplugged before adjusting or checking function on the tool. Switch action CAUTION: • Before plugging in the tool, always check to see that the switch trigger actuates properly and returns to the “OFF” position when released. • Switch can be locked in “ON” position for ease of operator comfort during extended use. Apply caution when locking tool in “ON” position and maintain firm grasp on tool. To start the tool, simply pull the switch trigger. Release the switch trigger to stop. For continuous operation, pull the switch trigger and then push in the lock button. To stop the tool from the locked position, pull the switch trigger fully, then release it. CAUTION: • Always be sure that the tool is switched off and unplugged before carrying out any work on the tool. Installing or removing abrasive paper For conventional type of abrasive paper with pre- punched holes (standard equipment): Press the clamper. Insert the paper end into the clamper, aligning the holes in the paper with those in the pad. Then release the clamper to secure the paper. Repeat the same process for the other end of the base, maintaining the proper paper tension. 1 2 1 2 Abrasive paper without pre- punched holes 2. Punch plate 003310 For conventional type of abrasive paper without pre- punched holes (available on the market): Press the clamper. Insert the paper end into the clamper, aligning the paper edges even and parallel with the sides of the base. Then release the clamper to secure the paper. Repeat the same process for the other end of the base, maintaining the proper paper tension. Place the punch plate (optional accessory) over the paper so that the guide of the punch plate is flush with the sides of the base. Then press the punch plate to make holes in the paper. 003312 For hook-and-loop type of abrasive paper with pre- punched holes (optional accessory): Remove the pad for the conventional type of abrasive paper from the tool with a screwdriver. Install the pad for the hookand- loop type of abrasive paper (optional accessory) on the tool. Tighten the screws firmly to secure the pad. 1 2 3 1. Screws 2. Screwdriver 3. Pad 1 2 1. Hook-and-loop type of abrasive paper with pre-punched holes 2. Pad 003313 Remove all dirt or foreign matter from the pad. Attach the paper to the pad, aligning the holes in the paper with those in the pad. CAUTION: • Always use hook-and-loop type of abrasive papers. Never use pressure-sensitive abrasive paper. 1 2 1. Dust spout 2. Dust bag 003318 Dust bag Attach the dust bag onto the dust spout. The dust spout is tapered. When attaching the dust bag, push it onto the dust spout firmly as far as it will go to prevent it from coming off during operation. For the best results, empty the dust bag when it becomes approximately half full, tapping it lightly to remove as much dust as possible. OPERATION OPERATION MAINTENANCE NOTE: • If you connect a Makita vacuum cleaner to this tool, more efficient and cleaner operations can be performed. Sanding operation CAUTION: • Never run the tool without the abrasive paper. You may seriously damage the pad. • Never force the tool. Excessive pressure may decrease the sanding efficiency, damage the abrasive paper or shorten tool life. Hold the tool firmly. Turn the tool on and wait until it attains full speed. Then gently place the tool on the workpiece surface. Keep the pad flush with the workpiece and apply slight pressure on the tool. CAUTION: • Always be sure that the tool is switched off and unplugged before attempting to perform inspection or maintenance. To maintain product SAFETY and RELIABILITY, repairs, carbon brush inspection and replacement, any other maintenance or adjustment should be performed by Makita Authorized or Factory Service Centers, always using Makita replacement parts. ACCESSORIES ACCESSORIES CAUTION: • These accessories or attachments are recommended for use with your Makita tool specified in this manual. The use of any other accessories or attachments might present a risk of injury to persons. Only use accessory or attachment for its stated purpose. If you need any assistance for more details regarding these accessories, ask your local Makita service center. • Abrasive papers (with pre-punched holes) • Abrasive papers (without pre-punched holes) • Hook-and-loop type abrasive papers (with pre-punched holes) • Punch plate • Backing pad (for use with hook-and-loop abrasive paper) • Dust bag Memo Memo Memo Memo Memo Cut Cut s Postage Required Post Office will not deliver without proper postage. Makita U.S.A., Inc. 14930 Northam Street La Mirada, CA 90638-5753 Fold MAIL THIS PORTION Your answers to the following questions are appreciated. 1. This product was purchased from: Home Center Other ( Hardware/Lumber Store Tool Distributor Industrial Supply Construction Supply 2. Use of the product is i...