


Stimmen - 4, Durchschnittliche Bewertung: 4
(

 )
)
|
Fotos und technische Daten Sony STR-DE598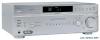 |


Dieses Gerät hat auch andere Anweisungen:
Receiver und Verstärker - STR-DE598 (3.44 mb)
Receiver und Verstärker - STR-DE598 (5.21 mb)
Anleitung Zusammenfassung
1 Press input buttons to select the input. 2 Press INPUT MODE repeatedly to select the audio input mode. The selected audio input mode appears in the display. Audio input modes • AUTO IN Gives priority to digital signals when there are both digital and analog connections. If there are no digital signals, analog is selected. • COAX IN Specifies the digital audio signals input to the DIGITAL COAXIAL input jack. •OPT IN Specifies the digital audio signals input to the DIGITAL OPTICAL input jacks. • ANALOG Specifies the analog audio signals input to the AUDIO IN (L/R) jacks. Notes • When signals with a sampling frequency of more than 48 kHz is input, the tone and sound field cannot be used. • Some audio input modes may be dimmed depending on the input. This means that the selected input is unavailable. 36GB Customizing sound fields By adjusting the LEVEL menu, you can customize the sound fields to suit your particular listening situation. Note on the displayed items The setup items you can adjust in each menu vary depending on the sound field. Certain setup parameters may be dimmed in the display. This means that the selected parameter is either unavailable or fixed and unchangeable. Adjusting the LEVEL menu You can adjust the balance and level of each speaker. These settings are applied to all sound fields except for effect level parameter. The effect level parameter settings are stored individually for each sound field. 1 Start playing a source encoded with multi channel surround effects (DVD, etc.). 2 Press MAIN MENU repeatedly to select “ LEVEL ”. 3 Press or repeatedly to select the parameter you want to adjust. For details, see “LEVEL menu parameters” below. 4 While monitoring the sound, press + or – repeatedly to select the setting you want. The setting is entered automatically. 5 Repeat steps 3 and 4 to adjust the other parameters. LEVEL menu parameters The initial setting is underlined. x L R BAL. L/R XX (Front speaker balance) Initial setting: BALANCE (0) Lets you adjust the balance between front left and right speakers. You can adjust in the range of BAL. L (+1 to +8), BALANCE (0), BAL. R (+1 to +8) in 17 steps. xCTR XXX dB (Center speaker level) xSUR.L. XXX dB (Surround speaker (left) level) xSUR.R. XXX dB (Surround speaker (right) level) xSB XXX dB (Surround back speaker level) xS.W. XXX dB (Sub woofer level) Initial setting: 0 dB You can adjust from –10 dB to +10 dB in 1 dB steps. D.RANGE x COMP. XXX (Dynamic range compressor) Lets you compress the dynamic range of the sound track. This may be useful when you want to watch movies at low volumes late at night. •OFF The dynamic range is not compressed. •STD The dynamic range is compressed as intended by the recording engineer. •MAX The dynamic range is compressed dramatically. Tip Dynamic range compressor lets you compress the dynamic range of the soundtrack based on the dynamic range information included in the Dolby Digital signal. We recommend using the “MAX” setting. This greatly compresses the dynamic range and lets you view movies late at night at low volumes. Unlike analog limiters, the levels are predetermined and provide a very natural compression. Note Dynamic range compression is possible with Dolby Digital sources only. xEFCT. XXX (Effect level) Initial setting: STD Lets you adjust the “presence” of the surround effect in 3 levels – MIN (minimum effect), STD (standard effect) and MAX (maximum effect). Note This parameter is valid only when you use a sound field selected with the MOVIE or MUSIC buttons. Advanced Adjustments and Settings continued 37GB Resetting sound fields to the initial settings Use the buttons on the receiver for the operation. 1 Press ?/1 to turn off the power. 2 While holding down 2CH, press ?/1. “SF. CLR.” appears in the display and all sound fields are reset to the initial setting. Adjusting the tone You can adjust the tonal quality (bass, treble level) of the front speakers using the TONE menu. 1 Start playing a source encoded with multi channel surround effects (DVD, etc.). 2 Press MAIN MENU repeatedly to select “TONE ”. 3 Press or repeatedly to select the parameter you want to adjust. For details, see “TONE menu parameters” below. 4 While monitoring the sound, press + or – repeatedly to select the setting you want. The setting is entered automatically. 5 Repeat steps 3 and 4 to adjust the other items. Note You cannot adjust the tone when the receiver is decoding signals with a sampling frequency of more than 48 kHz, or when DTS 96/24, DTS-ES Matrix or DTS Neo:6 decoding is applied. TONE menu parameters xBASS XX dB (Front speaker bass level) xTREB. XX dB (Front speaker treble level) Initial setting: 0 dB You can adjust from –6 dB to +6 dB in 1 dB steps. 38GB Advanced settings Using the CUSTOMIZE menu to adjust the receiver You can adjust various receiver settings using the CUSTOMIZE menu. 1 Press MAIN MENU repeatedly to select “ CUSTOM ”. 2 Press or repeatedly to select the parameter you want to adjust. For detail...