


Stimmen - 3, Durchschnittliche Bewertung: 4.3
(

 )
)
|
Fotos und technische Daten Makita HR2010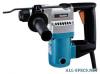 |


Anleitung Zusammenfassung
NOTE: • The depth gauge cannot be used at the position where the depth gauge strikes against the tool body. 003186 Dust cup (optional accessory) Use the dust cup to prevent dust from falling over the tool and on yourself when performing overhead drilling operations. Attach the dust cup to the bit as shown in the figure. The size of bits which the dust cup can be attached to is as follows. Hammer drilling operation Position the bit at the desired location for the hole, then pull the switch trigger. Do not force the tool. Light pressure gives best results. Keep the tool in position and prevent it from slipping away from the hole. Do not apply more pressure when the hole becomes clogged with chips or particles. Instead, run the tool at an idle, then remove the bit partially from the hole. By repeating this several times, the hole will be cleaned out and normal drilling may be resumed. CAUTION: • There is a tremendous and sudden twisting force exerted on the tool/bit at the time of hole break-through, when the hole becomes clogged with chips and particles, or when striking reinforcing rods embedded in the concrete. Always use the side grip (auxiliary handle) and firmly hold the tool by both side grip and switch handle during operations. Failure to do so may result in the loss of control of the tool and potentially severe injury. 002449 1 002449 1 1. Blow-out bulb 003223 1 2 1. Drill chuck 2. Chuck adapter MAINTENANCE 1 2 3 001146 1. Commutator 2. Insulating tip Blow-out bulb (optional accessory) After drilling the hole, use the blow-out bulb to clean the dust out of the hole. Drilling in wood or metal Use the optional drill chuck assembly. When installing it, refer to “Installing or removing the bit” described on the previous page. You can drill up to 13 mm (1/2”) diameter in metal and up to 24 mm (15/16”) diameter in wood. CAUTION: • Pressing excessively on the tool will not speed up the drilling. In fact, this excessive pressure will only serve to damage the tip of your bit, decrease the tool performance and shorten the service life of the tool. • There is a tremendous twisting force exerted on the tool/ bit at the time of hole breakthrough. Hold the tool firmly and exert care when the bit begins to break through the workpiece. • Always secure small workpieces in a vise or similar hold- down device. CAUTION: • Always be sure that the tool is switched off and unplugged before attempting to perform inspection or maintenance. Replacing carbon brushes When the resin insulating tip inside the carbon brush is exposed to contact the commutator, it will automatically shut off the motor. When this occurs, both carbon brushes should be replaced. Keep the carbon brushes clean and free to slip in the holders. Both carbon brushes should be replaced at the same time. Use only identical carbon brushes. 3. Carbon brush 003229 Use a screwdriver to remove the brush holder caps. Take out the worn carbon brushes, insert the new ones and secure the brush holder caps. 1 2 1. Screwdriver 2. Brush holder cap Lubrication 003234 This tool requires no hourly or daily lubrication because it has a grease-packed lubrication system. Lubricate the tool every time the carbon brushes are replaced. Run the tool for several minutes to warm it up. Switch off and unplug the tool. Remove the crank cap using a Makita lock nut wrench 28 (optional accessory). Rest the tool on the table with the bit end pointing upwards. This will allow the old grease to collect inside the crank housing. 1 2 1. Lock nut wrench 2. Crank cap 1 1. Hammer grease 003245 Wipe out the old grease inside and replace with a fresh grease (30 g; 1 oz). Use only Makita genuine hammer grease (optional accessory). Filling with more than the specified amount of grease (approx. 30 g; 1 oz) can cause faulty hammering action or tool failure. Fill only with the specified amount of grease. Reinstall the crank cap and tighten with the lock nut wrench. CAUTION: • Do not tighten the crank cap excessively. It is made of resin and is subject to breakage. To maintain product SAFETY and RELIABILITY, repairs, any other maintenance or adjustment should be performed by Makita Authorized or Factory Service Centers, always using Makita replacement parts. ACCESSORIES ACCESSORIES CAUTION: • These accessories or attachments are recommended for use with your Makita tool specified in this manual. The use of any other accessories or attachments might present a risk of injury to persons. Only use accessory or attachment for its stated purpose. If you need any assistance for more details regarding these accessories, ask your local Makita service center. • SDS-Plus Carbide-tipped bits • Drill chuck assembly • Drill chuck S13 • Chuck adapter • Chuck key S13 • Hammer grease • Bit grease • Grip 36 • Depth gauge • Blow-out bulb • Dust cup • Dust extractor attachment • Safety goggles • Lock nut wrench 28 • Plastic carrying case Memo Memo Cut Cut s Postage Required Post Office will not deliver without proper postag...