


Stimmen - 2, Durchschnittliche Bewertung: 4
(

 )
)
|
Fotos und technische Daten Sony NW-MS77DR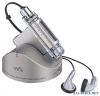 |


Anleitung Zusammenfassung
HOLD switch (Set to off.) z Tip If your Network Walkman is not operated for 10 seconds while in stop mode, the display automatically turns off. When scrolling track titles, etc., the display turns off after scrolling is finished. What is the Group function? When the normal playback mode is selected, playback stops automatically after the last song is played*. * When a “Memory Stick” (not supplied) is inserted into the slot, songs stored in the “Memory Stick” will be played after the last song in the built-in flash memory is played. If playback does not start Make sure that the HOLD switch is set to off (page 32). To stop playback Press the Play/Stop button. To adjust the volume The volume can be set in the PRESET and MANUAL mode (page 35 to 36). Basic Operations The Group function enables you to select favorite music conveniently on your Network Walkman. You can transfer or play songs by album or artist using the Group function. Note that the group information may be erased or damaged if a song that is transferred to “Memory Stick” using the Group function is edited with a device that does not support the function. Built-in flash memory “Memory Stick” Track1 Track1 Group1 Track2 Group4 Track2 Track3 Track3 Track1 Track1 Group2 Track2 Group5 Track2 Track3 Track3 Track1 Track1 Group3 Track2 Group6 Track2 Track3 Track3 Track1 Track2 Track3 Track1 Track2 Track3 Track1 Track1 • Playback starts in order of the songs in the built-in flash memory, and then data in the “Memory Stick”. • The track number is the order of songs in each group. • You can switch between Track Name mode and Group mode by pulling the Shuttle switch. • In the Group mode, group names are displayed instead of track names. In addition, any shift operations, such as Skip or Repeat, are performed by group. Transferring by group The audio files transferred to the SonicStage software are always grouped when transferred to the built-in flash memory or a “Memory Stick”. continued 23 Listening to music with your Network Walkman (continued) On other operations Shuttle switch Press (Confirm) Pullto (.) Play/Stop button to (>) MENU button z Tip You can switch to the Group mode by pulling the Shuttle switch. To Shuttle switch operation Skip to the beginning Rotate the Shuttle switch of the next track *1 clockwise (>) Skip to the beginning Rotate the Shuttle switch of the current track *1 counterclockwise (.) Skip to the beginning Pull and rotate the Shuttle of the next group *2 switch clockwise (>) Skip to the beginning Pull and rotate the Shuttle of the previous group *2 switch counterclockwise (.) Fast-forward *3 Rotate the Shuttle switch clockwise (>) and hold it. Fast-rewind *3 Rotate the Shuttle switch counterclockwise (.) and hold it. *1 Rotating and holding of the Shuttle switch during stop mode allows you to skip to the beginning of the next (current and previous) track continuously. *2 Pulling, rotating and holding of the Shuttle switch during stop mode allows you to skip to the beginning of the next (current and previous) group continuously. *3 Fast-forward and fast-rewind speed become faster if the operation is continued for five seconds. To remove “Memory Stick” (not supplied) Press the “Memory Stick” Eject button and open the “Memory Stick” slot. Push the “Memory Stick” slightly and release it. “Memory Stick” Eject button Give a slight push once. Removing the headphones from your Network Walkman This procedure is required when you use the supplied extension headphone cord. 1 Rotate the plug cover counterclockwise to disconnect it from your Network Walkman. 2 Pull the plug cover from the plug in the direction of the arrow. 3 Remove the adaptor. Adaptor If the adaptor does not come out, push it out with a ballpoint pen, etc. 4 Remove the plug cover. Notes • The plug cover is to be used with the supplied headphones and extension cord. • Keep the plug cover and adaptor in a safe place when not in use to avoid losing them. Basic Operations continued 25 Listening to music with your Network Walkman (continued) Attaching the plug cover to the supplied extension headphone cord The extension headphone cord is convenient when your Network Walkman is in your pocket or carrying bag. 1 Slip the headphone plug of the extension cord into the plug cover. Plug cover 2 Attach the adaptor to the headphone cord, and slide the adaptor into the plug cover completely. Adaptor 4 Connect the headphone plug together with the plug cover to the headphone jack. Connect the headphone plug to the headphone jack of your Network Walkman with the (a) marks aligned with one another, and rotate the plug cover clockwise until it clicks into place. If the headphone plug is not fully connected to the headphone jack, the plug cover may come loose. 5 Connect the extension cord to the headphone. 3 Slide the headphone plug into the plug cover completely. Note Do not pull the headphone cord when you connect/ disconnect the headphones to/from your Network Walkman or attach/remove the plu...
Dieses Handbuch ist für folgende Modelle:Player - NW-MS70D (633.22 kb)
Player - NW-MS90D (633.22 kb)