


Stimmen - 5, Durchschnittliche Bewertung: 4
(

 )
)
|
Fotos und technische Daten Hyundai H-F2010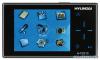 |


Anleitung Zusammenfassung
Below is description of each operation menu item. Select items by pressing UP/DOWN buttons. Press PLAY/PAUSE button to enter the selected item. • Play All. To play all the picture files in the player. • Internal Media. To browse through the internal media for pictures files. • External Media. To browse through the external media for pictures files. At the Photo interface press and hold MENU button to enter Photo mode operation menu. The menu contains following items: 9 Pan & Zoom This option will allow you to pan and zoom the picture. Press LEFT/RIGHT buttons to zoom in/out, press and hold LEFT/RIGHT buttons to pan. Slideshow This option activates the slides show. Slides Interval This option set the interval between the images. Thumbnail Show all the pictures in thumbnail. Manual View Mode Manually go to the next photo by pressing LEFT/RIGHT buttons. Full Screen On/Off Select this option to fully display the photo. 5. Video mode From the Main Menu press PLAY/PAUSE button to enter the Video menu. Below is description of each menu item. Select items by pressing UP/DOWN buttons. Press PLAY/PAUSE button to enter the selected item. Play All. To play all the video files in the player. Internal Media. To browse through the internal media for video files. External Media. To browse through the external media for video files. 10 At the Video interface, press and hold MENU button to enter Video Operation. • Press UP/DOWN buttons to select the desired video file. • Press PLAY/PAUSE button to play the video file. 6. Ebook mode • At the Ebook interface, press PLAY/PAUSE button to view the selected text file. • When reading a text, press PLAY/PAUSE button to start playing the music in the playlist or FM Radio. 7. Browser mode Internal Media This option is to access the internal storage of the MP3 player. External Media This option accesses the external storage, Micro-SD Card, of the MP3 player. 8. Settings Brightness Press LEFT/RIGHT buttons to decrease or increase the brightness. Power Save Display off: Press LEFT/RIGHT buttons to decrease or increase the display off timing. Backlight Dim: Press LEFT/RIGHT buttons to decrease or increase the dimming timing. 11 Auto Shutdown: Press LEFT/RIGHT buttons to decrease or increase the shutdown timing. EQ Select Normal, Classical, Jazz, Pop, Rock or Custom as the desired EQ. Display Skin Select Plain Black, Black, Green and Red as the desired theme. Slides Interval Press LEFT/RIGHT buttons to decrease or increase the interval between slides. Recording Encoder: Select MS ADPCM or PCM as the desired encoding. Device: Select Internal or External as the desired storage device. Rate: Select from different sample rate as the desired setting. Format Drive Format the player internal and external flash memory. Language Selecting the desired language. Set Time/Date Set the time and date. Press PLAY/PAUSE button to select and LEFT/RIGHT buttons to increase/decrease the date/time. 12 Speaker On/Off Press PLAY/PAUSE button to switch On/Off the speaker. Factory Setting Restore the player to factory default setting. Sensor Sensitivity Choose the touch-pad sensitivity from Low, Mid or High. 9. Extras Alarm: Set the alarm. Calendar: This option lets you view the date and time in the player. Game: This option lets you play the games in the player. About: This option lets you view the following information: player firmware version, internal memory storage information, external memory storage information. Lock Function Slide POWER/LOCK switch to the lock position (rightwards) to activate function preventing user from accidentally pressing buttons. Slide the switch rightwards to make buttons active. 13 Operating with computer 1. Computer connection • Switch on the computer. • Turn the player off. • Connect via USB cable the player to PC. • When the connection is established in MY COMPUTER in your PC you will find the new REMOVABLE DRIVE. It is the player’s nandflash. Now you can upload the files into the player like into the PC hardware. If you connect the player to PC for the first time, you should install the driver. Windows 2000/ME/XP/Vista The player does not need to install any driver if Windows is 2000/ME/XP/Vista. MAC OS This MP3 player is compatible with MAC OS 10 and above. Driver is not needed. 2. File transferring • From MY COMPUTER on the PC select the files for copying. • Highlight the files. • Right click the mouse and select “Copy”. • Open the REMOVABLE DRIVE from MY COMPUTER. • In this drive right click the mouse and select “Paste” for transferring the files into the player. 3. Disconnect from the computer • Safely remove the player from Window’s desktop by following the “Windows Safety Remove Hardware” instructions before physically disconnecting the cable. 14 • By double click the hardware removal icon, the box of “Safely Remove Hardware” appears. Note: The circuitry of the player and the ...