


Stimmen - 2, Durchschnittliche Bewertung: 4
(

 )
)
|
Fotos und technische Daten Roland DS-5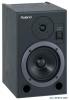 |


Anleitung Zusammenfassung
Should you experience such problems, you should relocate such wireless devices so they are at a greater distance from this unit, or switch them off. • Do not expose the unit to direct sunlight, place it near devices that radiate heat, leave it inside an enclosed vehicle, or otherwise subject it to temperature extremes. Also, do not allow lighting devices that normally are used while their light source is very close to the unit (such as a piano light), or powerful spotlights to shine upon the same area of the unit for extended periods of time. Excessive heat can deform or discolor the unit. • When moved from one location to another where the temperature and/or humidity is very different, water droplets (condensation) may form inside the unit. Damage or malfunction may result if you attempt to use the unit in this condition. Therefore, before using the unit, you must allow it to stand for several hours, until the condensation has completely evaporated. • Do not allow rubber, vinyl, or similar materials to remain on the unit for long periods of time. Such objects can discolor or otherwise harmfully affect the finish. • Do not paste stickers, decals, or the like to this instrument. Peeling such matter off the instrument may damage the exterior finish. Maintenance • To clean the unit, use a dry, soft cloth; or one that is slightly dampened. Try to wipe the entire surface using an equal amount of strength, moving the cloth along with the grain of the wood. Rubbing too hard in the same area can damage the finish. • Never use benzine, thinners, alcohol or solvents of any kind, to avoid the possibility of discoloration and/or deformation. Additional Precautions • Use a reasonable amount of care when using the unit's buttons, sliders, or other controls; and when using its jacks and connectors. Rough handling can lead to malfunctions. • When connecting / disconnecting all cables, grasp the connector itself—never pull on the cable. This way you will avoid causing shorts, or damage to the cable's internal elements. • A small amount of heat will radiate from the unit during normal operation. • To avoid disturbing your neighbors, try to keep the unit's volume at reasonable levels (especially when it is late at night). • When you need to transport the unit, package it in the box (including padding) that it came in, if possible. Otherwise, you will need to use equivalent packaging materials. • Use a cable from Roland to make the connection. If using some other make of connection cable, please note the following precautions. • Some connection cables contain resistors. Do not use cables that incorporate resistors for connecting to this unit. The use of such cables can cause the sound level to be extremely low, or impossible to hear. For information on cable specifications, contact the manufacturer of the cable. • Avoid inserting fingers into the bass reflex ducts when transporting or handling the unit. Otherwise, you risk getting your fingers stuck. 5 Panel Descriptions Front Power Digital In Indicator This lights up when output is received from a connected digital device. Connect the digital-signal output device, set the "Input Select switch" to DIGITAL INPUT, and set the "Digital Input select switch" according to the connector to which the device is attached (Coaxial, Optical or XLR (AES/EBU)). * When the connected digital-signal output device is not powered up, the Digital In indicator does not light up. Bass-reflex Ducts g These are conduits for rich, bass-range reproduction. Power Indicator Lights when power is on. Before turning the power on or off, you must lower f\ the volume of this unit and your connected device etc. lOTf This unit is equipped with a protection circuit. A brief interval (a few seconds) after power up is required before the unit will operate normally. Rear 1 Digital Input Coaxial Input Connector (Digital Input) This is the digital input connector for coaxial cable. It cannot be used for input of analog audio signals (no sound is produced). Optical Input Connector (Digital input) This is the digital input connector for optic-fiber cable. Use commercially available optical cable for audio equipment to make the connection. XLR Input Connector (Digital Input) This is a digital input for AES/EBU professional format digital audio. Power cord note It cannot be used for input of analog audio signals (no sound is produced). 6 Panel Descriptions Digital Input Select Switch This switch selects AES/EBU, Optical or Coaxial. Select the connector used for the input signal. Assign Switch This switch selects the stereo position of the digital signal. It selects Right, L+R, or Left when using two DS-8/7/5 monitors for stereo sound (with digital signals). Choose the setting appropriate for your setup. With the DS-8/7/5, there is no difference between L and R. When using the digital input connectors of two DS-8/7/5 monitors for stereo sound, the digital signal can be input t...