


Stimmen - 4, Durchschnittliche Bewertung: 3.8
(

 )
)
|
Fotos und technische Daten Sony CMT-CP100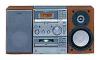 |


Dieses Gerät hat auch andere Anweisungen:
Anleitung Zusammenfassung
1 005 Track number Playing time 1 Turn FUNCTION until “CD” appears in the display. The indicator surrounding the CD u and CD x buttons lights up. 2 Press PLAY MODE repeatedly until the mode you want appears in the display. Select To play No display The CD in original order. SHUFFLE The tracks on the CD in random order. PGM The tracks on the CD in any order that you want (see “Programming the CD tracks” on page 9). 3 Press CD u (or CD N on the remote). Other Operations To Do this Stop playback Press CD x. Pause Press CD u (or X on the remote). Press again to resume playback. Select a track During playback or pause, press CD ./> repeatedly until you find the desired track. Find a point in a track During playback, press and hold down CD m/M until you find the desired point. Remove the CD Press CD EJECT Z. Play repeatedly (Repeat Play) Press REPEAT repeatedly during playback until “REPEAT” or “REPEAT 1” appears in the display. REPEAT: For all the tracks on the CD. REPEAT 1: For only the currently playing track. To cancel playing repeatedly, press REPEAT repeatedly until “REPEAT” and “REPEAT 1” disappear from the display. Programming the CD tracks –– Program Play You can make a program of up to 24 tracks on a CD in any order that you want. 1 Turn FUNCTION until “CD” appears in the display. 2 Press PLAY MODE repeatedly until “PGM” appears in the display. 3 Press CD ./> repeatedly until the desired track number appears in the display. 3 243 PGM Selected track Total playing time number 4 Press PLAY MODE. The selected track is programmed. The selection number appears in the display. 5 To program additional tracks, repeat steps 3 and 4. 6 Press CD u (or CD N on the remote). To Do this Cancel Program Play Press PLAY MODE repeatedly until “PGM” disappears from the display. Add a track to the end of the program Do steps 3 and 4 with Program Play stopped. Erase the entire program Press CD x with Program Play stopped. Tips • The program you made remains after Program Play finishes. To play the program again, switch the function to CD, and then press CD u (or CD N on the remote). • “--.--” appears in the display when the total program time exceeds 100 minutes. Using the CD display Press DISPLAY on the remote repeatedly. The display changes as follows: During normal playback Current track number and elapsed playing time of the track tCurrent track number and remaining playing time of the track t Remaining playing time of the entire CD t Clock display tCurrent track number and elapsed playing time of the track t...... While the CD is stopped Total playing time tClock display t Current source display tTotal playing time t...... Note If the CD contains 25 tracks or more, the remaining playing time of the current track will appears as “---.--” for each track starting with the 25th. CD Tuner Tuner Presetting radio stations The system can store a total of 30 preset stations (20 for FM and 10 for AM). 1 Turn FUNCTION until “TUNER” appears in the display. The indicator surrounding the TUNER BAND button lights up. 2 Press TUNER BAND to select FM or AM. 3 Press TUNING MODE repeatedly until “AUTO” appears in the display. 4 Press TUNING +/– (or m/M on the remote). The frequency changes as the system scans for a station. Scanning stops automatically when a station is tuned in. At that time, “TUNED” and “STEREO” (for stereo program only) appear. 5 Press MEMORY on the remote. A preset number flashes. 1FM1005 PRESET STEREO TUNED MHz Preset number Frequency 6 Press ./> on the remote repeatedly to select the preset number that you want. 7 Press ENTER on the remote. The station is stored to the selected preset number. 8 Repeat steps 2 through 7 to preset other stations. To tune in a weak station In step 3, press TUNING MODE repeatedly until “AUTO” and “PRESET” disappear from the display, then press TUNING +/– (or m/M on the remote) repeatedly to tune in the station. To change the preset number Start over from step 2. Tip The preset stations are saved in the system’s memory for about a day even if you disconnect the power cord or a power failure occurs. To change the AM tuning interval (not applicable on the European, Middle Eastern and Philippine models) The AM tuning interval is factory-preset to 9 kHz (or 10 kHz for some areas). To switch the AM tuning interval, tune in any AM station first, then turn off the system. Pressing and holding down TUNING +, turn the system back on. When you change the interval, all the AM preset stations are erased. To change back to the original interval, tune in any AM station first, then turn off the system. Pressing and holding down TUNING –, turn the system back on. Listening to the radio ––Preset Tuning Presetting radio stations in the system’s memory in advance make it easy to tune in those stations later (see “Presetting radio stations” on this page). 1 Turn FUNCTION until “TUNER” appears in the display. 2 Press TUNER BAND to select FM or AM. 3 Press TUNING MODE repeatedly until “PRESET” appears in the d...