


Stimmen - 6, Durchschnittliche Bewertung: 3.8
(

 )
)
|
Fotos und technische Daten Sony CHC-CL1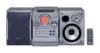 |


Anleitung Zusammenfassung
If you press CD 1 – 3 during play, the selected CD changes and the new CD starts playing. Remove a CD Press one of CD 1 – 3 Z to open the tray that contains the CD you want to remove. Play repeatedly Press REPEAT during play until (Repeat Play) “REPEAT” or “REPEAT 1” appears. REPEAT*: For all the tracks on the CD up to five times. REPEAT 1: For a single track only. To cancel playing repeatedly, press REPEAT until “REPEAT” or “REPEAT 1” disappears. * You cannot select “REPEAT” and “ALL DISCS SHUFFLE” at the same time. Tips • You can start playing from the desired track in Normal Play or Program Play. Turn ./> (or press . or > on the remote) until the desired track number appears after step 1. • The CD 1 – 3 button lights orange when a CD is loaded on the tray. All of the CD 1 – 3 button indicators light orange at first, and then turn on/off if the system determines that a CD is not loaded after the CD tray is opened and closed, etc. Note The play mode cannot be changed while playing a disc. Programing CD tracks —Program Play You can make a program of up to 25 tracks. 1 Press FUNCTION repeatedly to switch the function to CD. 2 Press PLAY MODE/DIRECTION repeatedly until “PGM” appears. 3 Press CD 1 – 3 to select a CD. To program all the tracks on a CD at once, proceed to step 5 with “AL” displayed. 4 Turn ./> (or press . or > on the remote) until the desired track number appears. Playing time of the selected track Selected CD and track number 5 Press ENTER/YES on the remote. The track is programed. “STEP” appears, followed by the number of the track in the programed sequence. The number of the last programed track appears, followed by the total playing time of the program. Total playing time 6 To program additional tracks, repeat steps 3 to 5. 7 Press CD NX (or N on the remote). To Do this Cancel Press PLAY MODE/ Program Play DIRECTION repeatedly until “PGM” and “SHUFFLE” disappear. Check the Press CHECK on the remote program repeatedly in stop mode. After the last track, “Check End” appears. Clear a track Press CLEAR on the remote in from the end stop mode. Clear a Press CHECK on the remote specific track repeatedly in stop mode until the number of the track to be erased lights up, then press CLEAR. Add a track to Perform steps 3 to 5. the program in stop mode Tips • The program you made remains after Program Play finishes. To play the same program again, press CD NX. • “- -.- -” appears when the total CD program time exceeds 100 minutes, or when you select a CD track whose number is 21 or over. CD Last programed track number Using the CD display Labeling a CD Using the CD display Labeling a CD Press DISPLAY repeatedly. When a CD TEXT disc is loaded, you can check the information recorded on the disc, such as the titles. The display changes cyclically as follows: During normal play Elapsed playing time on the current track t Remaining time on the current track t Remaining time on the CD (“1 DISC” mode) or “- -.- -” display (“ALL DISCS” mode) t Track title of the current track* t Clock display t Effect name In stop mode Total number of tracks and total playing time t CD disc title* t Clock display t Effect name * If a CD that has no title is loaded, nothing appears. When the CD contains more than 20 tracks, CD TEXT is not displayed from track 21 on. —Disc Memo You can label up to 50 CDs with titles of up to 20 symbols and characters. Whenever you load a labeled CD, the title appears in the display. Notes • You cannot label a CD for which “CD-TEXT” appears in the display. • When labeling CDs for the first time, be sure to erase all disc titles stored in the system memory (see “Erasing a disc title” on the next page). 1 Press FUNCTION repeatedly to switch the function to CD. 2 Press DISC SKIP on the remote repeatedly until the desired CD appears. If “SHUFFLE” or “PGM” appears in the display, press PLAY MODE/DIRECTION repeatedly until both disappear. 3 Press NAME EDIT/CHARACTER on the remote. The cursor starts flashing. 4 Press NAME EDIT/CHARACTER on the remote to select the desired type of character. Each time you press the button, the display changes cyclically as follows: (Blank space) t A (Upper cases) t a (Lower cases) t 0 (Numbers) t ’ (Symbols) 5 Turn ./> (or press . or > on the remote) to select the desired character. To enter a blank space Press M. To enter a symbol You can use the following symbols. ’ – / , . ( ) : ! ? & + < > _ = ” ; # $ % @ ` 6 Press M. The character you selected in step 5 stops flashing and the cursor shifts to the right. 7 Repeat steps 4 to 6 to complete the entire title. If you made a mistake Press m or M until the character you want to change flashes, then repeat steps 4 to 6. To erase a character Press m or M until the cursor shifts to the character you want to erase, then press CLEAR on the remote while the character is flashing. You cannot insert characters. 8 Press ENTER/YES on the remote to complete the labeling procedure. To cancel labeling Press MENU/NO on the remote during ...
Dieses Handbuch ist für folgende Modelle:Stereoanlage - CHC-CL3 (271.97 kb)