


Stimmen - 3, Durchschnittliche Bewertung: 4.7
(
 )
)
)
|
Fotos und technische Daten Sony MHC-RG190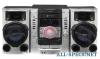 |


Dieses Gerät hat auch andere Anweisungen:
Anleitung Zusammenfassung
. EQ BAND button (page 19) Press to select the frequency band. . ENTER button (page 10, 16, 17, 21) Press to enter the settings. . Sound buttons (page 14, 19) Unit: GROOVE button, SURROUND button Remote: EQ button Press to select the sound. . . (open/close) button (page 11) Press to insert and eject a disc. . DISC 1 – 3 button (page 11) Press to select a disc. Press to switch to the CD function from other function. Unit: DISC SKIP/EX-CHANGE button (page 11) Press to select a disc. Press to exchange a disc while playing. Remote: DISC SKIP button (page 11) Press to select a disc. . Remote sensor (page 23) . CLOCK/TIMER SELECT button (page 21) CLOCK/TIMER SET button (page 10, 21) Press to set the clock and the timers. . REPEAT/FM MODE button (page 11, 12) Press to listen to a disc, a single track or file repeatedly. Press to select the FM reception mode (monaural or stereo). . Battery compartment lid (page 10) . CLEAR button (page 16) Press to delete a pre-programmed track. . TUNER MEMORY button (page 17) Press to preset the radio station. . PLAY MODE/TUNING MODE button (page 11, 12, 13) Press to select the play mode of a CD, MP3 or tape. Press to select the tuning mode. . SLEEP button (page 21) Press to set the Sleep Timer. 8GB Getting Started Hooking up the system securely When carrying this system 1 Remove all discs to protect the CD mechanism. 2 Press CD . to select the CD function. 3 Hold down .. . on the unit, and press ./. . on the unit until “STANDBY” appears. 4 After “LOCK” appears, unplug the power cord. AM loop antenna Subwoofer (MHC-GX470/RG590S/ RG490S only) Place the subwoofer vertically to obtain a better bass reproduction. Also, position the subwoofer: – on a solid floor where resonance is unlikely to occur. – at least a few centimeters away from the wall. – away from the center of the room or place a bookshelf against a wall, to avoid generating a standing wave. Speakers and subwoofer Attach the supplied speaker pads to the bottom of the front speakers and subwoofer to prevent slipping. Front speaker for all models, Subwoofer for MHC-GX470/RG490S Subwoofer for MHC-RG590S FM lead antenna (Extend it horizontally.) or Brown side for other regions White side for North American model Solid (Red/.) Subwoofer Striped (Black/.) Front speaker (right) Solid (Red/.) Getting 9GB Antennas Find a location and an orientation that provide good reception, and then set up the antenna. Keep the antennas away from the speaker cords to avoid picking up noise. Video (Mexican model only) To view video from this system, turn on the TV, and select the appropriate video input on the TV. The Mexican model can play back only NTSC-format CD-G discs. Speakers and subwoofer Insert only the stripped portion of the cord. Video cable (supplied) Power For models with a voltage selector, set VOLTAGE SELECTOR to the local power line voltage. Connect the power cord to a wall socket. The demonstration appears in the display. If the plug does not fit the wall socket, detach the supplied plug adaptor (only for models equipped with an adaptor). * Saudi Arabian model: 120 – 127 V Striped (Black/.) Front speaker (left) Wall socket Continued . To use the remote Slide and remove the battery compartment lid ., and insert the two supplied R6 (size AA) batteries, . side first, matching the polarities shown below. Notes • With normal use, the batteries should last for about six months. • Do not mix an old battery with a new one or mix different types of batteries. • If you do not use the remote for a long period of time, remove the batteries to avoid damage from battery leakage and corrosion. Setting the clock 1 Press ./. (power) . to turn on the system. 2 Press CLOCK/TIMER SET .. If the current mode appears on the display, press ./. . repeatedly to select “CLOCK SET” and then press ENTER .. 3 Press ./. . repeatedly to set the hour, and then press ENTER .. 4 Use the same procedure to set the minutes. When you turn off the system after setting the clock, the clock display appears instead of the demonstration display. The clock settings are lost when you disconnect the power cord or if a power failure occurs. Basic 11GB Basic Operations Playing a CD/CD-G/MP3 disc CD-G discs are supported only on the Mexican model. 1 Select the CD function. Press CD .. 2 Place a disc. Press . . on the unit, and place a disc with the label side up on the disc tray. To insert additional discs, press DISC SKIP . to rotate the disc tray. To close the disc tray, press . . on the unit again. Do not force the disc tray closed with your finger, as this may damage the unit. 3 Start playback. Press . (or .. on the unit) .. 4 Adjust the volume. Press VOLUME +/– (or turn the VOLUME control on the unit) .. Other operation To Press Pause playback . (or .. on the unit) .. To resume play, press the button again. Stop playback . .. Select a folder on an MP3 disc +/– .. Select a track or file ./. (or turn the MULTI JOG dial on the unit) .. Find a point in a track or file (except ...
Dieses Handbuch ist für folgende Modelle:Stereoanlage - MHC-GX470 (960.15 kb)
Stereoanlage - MHC-RG290 (960.15 kb)
Stereoanlage - MHC-RG490S (960.15 kb)
Stereoanlage - MHC-RG590S (960.15 kb)