


Stimmen - 2, Durchschnittliche Bewertung: 3
(

 )
)
|
Fotos und technische Daten Sony CMT-CPZ1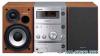 |


Anleitung Zusammenfassung
Please be aware that among those discs, there are some that do not conform to the CD standard and may not be playable by this product. About ATRAC CDs and MP3 CDs The structure of ATRAC CDs and MP3 CDs ATRAC CDs and MP3 CDs consist of “files” and “groups.” A “file” is equivalent to a “track” of an audio CD. A “group” is a bundle of files and is equivalent to an “album.” For MP3 CDs, this system recognizes an MP3 folder as a “group” so that ATRAC CDs and MP3 CDs can be operated in the same way. Playing order of ATRAC CDs and MP3 CDs For ATRAC CDs, files are played in the order selected in SonicStage. For MP3 CDs, the playing order may differ depending on the method used to record MP3 files on the disc. In the following example, files are played in order of 1 to 7. Group File MP3 CD (Maximum directory level: 8) continued 7GB The usable number of groups and files ATRAC CDs: • Maximum number of groups: 255 • Maximum number of files: 999 MP3 CDs: • Maximum number of groups: 256 • Maximum number of files: 511 (The maximum number of MP3 files and groups that can be contained on a single disc is 512) Notes • The system may be unable to play MP3 files that do not have the “.MP3” extension. • Attempting to play non-MP3 files that have the “.MP3” extension may result in noise or malfunction. • If ATRAC3plus files and MP3 files are recorded on the same disc, this system plays the ATRAC3plus files first. • On a disc that has ATRAC3plus and MP3 files, do not save files in other formats and do not make unnecessary folders. • To compress a source in an MP3 file, we recommend setting the compression parameters to “44.1 kHz,” “128 kbps,” and “Constant Bit Rate.” • To record up to the maximum capacity, set the writing software to “halting of writing.” • To record to the maximum capacity at one time up on media that has nothing recorded on it, set the writing software to “Disc at Once.” Cautions when playing a disc that is recorded in Multi Session • If the disc begins with a CD-DA session, it is recognized as a CD-DA (audio) disc, and ATRAC3plus/MP3 sessions are not played back. • If the disc begins with an ATRAC3plus/MP3 session, it is recognized as an ATRAC CD/ MP3 CD, and CD-DA (audio) sessions are not played back. • The playback range of an MP3 CD is determined by the tree structure of files produced by analyzing of the disc. • A disc with a mixed CD format will be recognized as a CD-DA (audio) disc. 8GB Getting Started Hooking up the system Getting Started Perform the following procedures 1 to 3 to hook up your system using the supplied cords and accessories. 1Connect the speakers. Connect the right and left speaker cords to the SPEAKER terminals as shown below. 321AM loop antenna Right speaker Left speaker FM lead antenna Extend the FM lead antenna horizontally AM loop antenna 2 Connect the FM and AM antennas. Set up the AM loop antenna, then connect it. Note To prevent noise pickup, keep the antennas away from the speaker cords. 3 Connect the mains lead to mains. If the plug does not fit the wall socket, detach the supplied plug adaptor (only for models equipped with an adaptor). To turn on the system, press ?/1. continued 9GB Inserting two R6 (size AA) batteries into the remote Note If you do not use the remote for a long period of time, remove the batteries to avoid possible damage from battery leakage and corrosion. Tip With normal use, the batteries should last for about six months. When the remote no longer operates the system, replace both batteries with new ones. Attaching the speaker pads Attach the supplied speaker pads to the bottom of the speakers to stabilize the speakers and prevent them from slipping. When carrying this system Perform the following procedure to protect the CD mechanism. Use buttons on the unit for the operation. 1 Press ?/1 to turn on the system, then press FUNCTION repeatedly to switch the function to CD. 2 Make sure that no disc is loaded in the disc slot. 3 Hold down CD x and then press DSGX and + until “LOCK” appears. 4 Unplug the mains lead. Setting the clock Use buttons on the remote for the operation. 1 Press ?/1 to turn on the system. 2 Press CLOCK/TIMER SET. 3 Press . or > repeatedly to set the hour. 4 Press ENTER. 5 Press . or > repeatedly to set the minute. 6 Press ENTER. The clock starts working. To adjust the clock 1 Press CLOCK/TIMER SET. 2 Press . or > repeatedly to select “CLOCK SET”, then press ENTER. 3 Do the same procedures as step 3 to 6 above. Note The clock is not displayed in Power Saving Mode (page 24). 10GB CD – Play Loading a disc 1 Press CD (or FUNCTION repeatedly) to switch the function to CD. 2 Insert a disc in the disc slot with the label side up. When you play a disc, insert it with the label side up. Notes • When you turn on the system, the disc is not pulled into the disc slot until “NO DISC” appears in the display. Do not attempt to push in the disc until “NO DISC” appears. • Do not use a disc with tape, seals or paste on it as this may cause malfunction....