


Stimmen - 3, Durchschnittliche Bewertung: 4
(

 )
)
|
Fotos und technische Daten BenQ FP71G+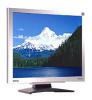 |


Anleitung Zusammenfassung
Tighten all finger screws to prevent the plugs from accidently falling out during use. -5 How to install your monitor hardware 3. Connect the power cable to the monitor. Plug one end of the power cord into the socket labelled ’POWER IN’ on the rear of the monitor. Do not connect the other end to a power point just yet. 4. Route the cables via the loose bracket. Release the cable retaining clip by squeezing the clip inwards as illustrated. Position the cables together and reinsert the clip over them to retain the cables neatly in place behind the monitor stand. How to install your monitor hardware 5. Connect-to and turn-on the power. Plug the other end of the power cord into a power point and turn it on. Turn on the monitor by pressing the power button on the front of the monitor. Turn on the computer too, and follow the instructions in Section 4: How to install your monitor's software to install the monitor software. How to install your monitor hardware How to detach the stand base 1. Prepare the monitor and area. Turn off the monitor and the power before unplugging the power cable. Turn off the computer before unplugging the monitor signal cable. Please be careful to prevent damage to the monitor. Placing the screen surface on an object like a stapler or a mouse will crack the glass or damage the LCD substrate voiding your warranty. Sliding or scraping the monitor around on your desk will scratch or damage the monitor surround and controls. Protect the monitor and screen by clearing a flat open area on your desk and placing a soft item like a towel on the desk for padding, before laying the screen face down on a flat clean padded surface. 2. Release the locking clip on one side of the stand base whilst pulling the edge of the base away from the stand arm. 3. Release the other locking clip to detach the stand base from the monitor stand arm. How to install your monitor hardware 1 1141 114 How to install your monitor’s software You need to set up the correct monitor driver to suit your operating system. To set up Windows 98, start on this page. Windows 2000, turn to page 11. Windows ME turn to page 12. Windows XP turn to page 13. Windows 98. To manually install or update the driver, perform the following steps: 1. Open the control panel and double-click “Display” icon. 2. From the “Display Properties” window, select the “Settings” tab. Click the “Advanced...” button in the bottom right corner. 3. Select the “Monitor” tab. Click the “Change” button in the top right corner. 4. The “Update Device Driver Wizard” opens. Confirm by clicking “Next”. 5. Select “Display a list of all drivers in a specific location, so you can select the driver you want.” and press “Next”. 6. Now click the “Have Disk” button in the bottom right corner. Another window appears. Select the “Browse” button. 7. Insert the supplied CD into your computer. Select the CD-drive from the drop-down menu. 8. By pressing “OK” again in the next window you will be given a list of compatible devices. Select “FP71G” from the list and press “Next” again. 9. An “Insert Disk” dialogue box appears. Click “OK”, and then click “Skip File”. 10. Close “Update Device Driver Wizard” by clicking “Finish” to complete the installation. How to install your monitor’s software 10 Windows 2000. The first time you start Windows with a new monitor, the system will detect it and automatically start the “Add New Hardware Wizard”. Carry out the instructions beginning at step 4. 1. Insert “BenQ LCD Monitor” CD-ROM into your CD-ROM Driver. 2. Click “Start” then “Settings”. 3. Open the Control Panel and double click on the “Display” icon. 4. From the “Display Properties” window, select the “Settings” tab. Click the “Advanced Properties” button in the bottom right corner. 5. Select “Monitor” then click “Properties”. 6. Select “Driver” tab then click “Update Driver”. 7. The “Upgrade Device Driver Wizard” will pop up. Then click “Next”. 8. Select “Display a list of the known drivers for this device so that I can choose a specific driver” then click “Next”. 9. In the next window, click “Have Disk”, then “Install From Disk” window will pop up. Click “Browse”, the “Located File” will pop up. 10. Scroll down and select your CD ROM Driver, then click “Next” . 11. In the list of folders within the CD-ROM, select “Drivers” folder then click “Open” twice, then click “OK”. Select your LCD Mode (FP71G) from the list in the next window then click “Next” twice. 12. The new drivers are now installed on your computer. 11 How to install your monitor’s software Windows ME. To manually install or update the driver, perform the following steps: 1. Click “Start”, “Settings”, “Control Panel” and then double-click “Display”. 2. In the Display Properties window, click the “Settings” tab and click “Advanced...”. 3. Click the “Monitor” tab and then click “Change”. 4. “Update Device Driver Wizard” dialogue box appears. Choose “Specify the location of the driver (Advanced)” and then click “Next”. 5. Choos...
Dieses Handbuch ist für folgende Modelle:Monitore - FP71G (2.59 mb)