


Stimmen - 3, Durchschnittliche Bewertung: 4.3
(

 )
)
|
Fotos und technische Daten Panasonic ES-RT81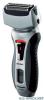 |


Anleitung Zusammenfassung
English EnglishCleaning the shaver1211Insert the appliance plug into . 1211Insert the appliance plug into . self-cleaning recharger. 2 22 Plug in the adaptor. • Remove any soap or water on the shaver if it has been washed with hand soap or any other detergent. 5 4 3 3 33 Pull up the arm. 4 44 Remove the protective cap and then attach the shaver. • Turn the shaver off before attaching. • Check that the outer foil is not deformed or damaged when you are attaching the shaver. 5 55 Push down the arm. SELECTSTATUSCHARGEDRYCLEAN 6 66 Press [SELECT] to select the course. • Each time you press [SELECT], the course changes from “Clean/Dry/Charge” “Clean/Dry” “Dry/Charge” “Dry” “Charge”. • The courses start approximately seconds after they are selected. • The course will be aborted if the power is cut off. In this case, perform the course again from the beginning. • Do not detach the detergent cartridge or the water tank as the cleaning liquid may spill causing a malfunction. Course Course selection indicationsOn shaver . Course completion summaryOn recharger Changeable course halfway through On recharger On shaver Time required (guide)CLEAN DRY CHARGE CLEAN DRY CHARGE 1Charge * 2345Glows .Blinks 1 hour 2Clean/Dry/ Charge 3Glows while charging .Blinks 4 h 0 min 3Clean/Dry 2– .– hours 4Dry/Charge 235Glows while charging .Blinks 4 h 0 min 5Dry 234– .– h 50 min *The lamp goes out in seconds. 8 .Follow the steps outlined below if the status lamp blinks or glows. Blinks Correctly set the detergent cartridge and then restart a course. If the status lamp goes outContinue a course. When an abnormality has been corrected Press and hold [SELECT] for approximately seconds to turn off the status lamp and then restart a course. Continue a course. Glows Remove the shaver from the self.cleaning recharger and then check that the [CLEAN] lamp has gone out. (Be careful as the blade may be hot or wet.) Check that the water tank is correctly attached, the water tank cap is securely closed and the self.cleaning recharger is placed horizontally. When no abnormality was found It is time to replace the detergent cartridge and cleaning liquid inside the water tank. Wash away the old cleaning liquid and then rinse the water tank. Restart the course. When the status lamp goes outWhen the status lamp glows again Contact an authorized service center. Cleaning the shaver without the self-cleaning recharger 1. Disconnect the power cord from the shaver. . Apply some hand soap and some water to the outer foil. . Turn the shaver on. 4. Turn the shaver off after 10. 0 seconds. 5. Remove the outer foil section and turn the shaver on. . Clean the shaver and the outer foil section with running water. 7. Wipe off any drops of water with a dry cloth. 8. Dry the outer foil section and the shaver completely. 9. Attach the outer foil section to the shaver. 3568 English English Replacing the system outer foil and the inner blades system outer foil once every year inner blade once every two years .Replacing the system outer foil 1. Press the system outer foil release buttons and lift the system outer foil upwards as illustrated. . Insert the system outer foil by pushing it downwards until it clicks. .Replacing the inner blades 1. Press the foil frame release buttons and lift the outer foil section upwards as illustrated. . Remove the inner blades one at a time as illustrated. • Do not touch the edges (metal parts) of the inner blades to prevent injury to your hand. . Insert the inner blades one at a time until they click as illustrated. 1132 Cleaning with the brush 1. Clean the inner blades using the short brush by moving it in direction (A). Clean the system outer foil, the shaver body and the trimmer using the long brush. (A) • Do not move the short brush in direction (B) as it will damage the inner blades and affect their sharpness. • Do not use the short brush to clean the outer foils. (B) Cleaning the self-cleaning recharger Beard trimmings may become attached to the cleaning tray of the self.cleaning recharger. Follow the steps below to remove them. We recommend doing this each time you change the detergent cartridge. 1. Be sure to remove the water tank and 1 the appliance plug from the self. cleaning recharger. • Be careful not to spill the cleaning liquid. English . Gently wipe off any beard trimmings attached to the inside of the cleaning tray with a cloth or tissue paper dampened with water. • Clean the corners and uneven parts of the cleaning tray with a cotton swab dampened with water. Do not wash or apply water to the adaptor or self-cleaning recharger. Failure to observe this may cause electric shock Do not pull hard on the rubber blade protector at the bottom of the cleaning tray. The rubber may come off if you pull hard on it. When the water does not drain from the cleaning Removing the built-in rechargeable batteries Remove the built.in rechargeable batteries before disposing of the shaver. Please make sure that the batteries are disposed of at...