


Stimmen - 4, Durchschnittliche Bewertung: 4.5
(

 )
)
|
Fotos und technische Daten Sony DPF-A710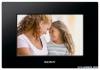 |


Dieses Gerät hat auch andere Anweisungen:


Anleitung Zusammenfassung
• Do not short the plug of the AC adaptor with a metal object. Doing so may cause a malfunction. • Do not use the AC adaptor placed in a narrow space, such as between a wall and furniture. • After use, remove the AC adaptor from the DC IN 5 V jack of the photo frame, and remove the AC adaptor from the outlet. • Do not turn the photo frame off or disconnect the AC adaptor from the photo frame before the standby indicator turns red. Doing so may damage the photo frame. • The AC plug shape may differ depending on the region you purchase the photo frame. PNotes • The socket outlet should be as close as possible to the unit, and easily accessible. • Do not place the photo frame on an unsteady or tilted surface. • Connect the AC adaptor to an easily accessible wall outlet close by. If trouble occurs while using the adaptor, immediately shut off the power by disconnecting the plug from the wall outlet. • Do not short the plug of the AC adaptor with a metal object. Doing so may cause a malfunction. • Do not use the AC adaptor placed in a narrow space, such as between a wall and furniture. • After use, remove the AC adaptor from the DC IN 5 V jack of the photo frame, and remove the AC adaptor from the outlet. • Do not turn the photo frame off or disconnect the AC adaptor from the photo frame before the standby indicator turns red. Doing so may damage the photo frame. • The AC plug shape may differ depending on the region you purchase the photo frame. 1 Insert the plug of the AC adaptor into the DC IN 5 V jack on the rear of the photo frame. 2 Connect the AC adaptor to the wall outlet. The photo frame is automatically turned on. To the DC IN 5 V jack DC cable DC plug To wall outlet AC adaptor main unit 12 GB Operations in an initial state Operations in an initial state Setting the current time 1 Press MENU, and B/b to select the (Settings) tab. v/V [Date/time Settings] , ENTER 2 Press v/V to select [Time] , ENTER. v/V to select a value. , B/b (hour, minute, and second) Setting complete. , ENTER 3 Press MENU. In the same window, you can use the same procedures as time setting to set the following: Setting items •Date •Date Display Order (Y-M-D/M-D-Y/D-M-Y) •First day of the week (Sunday/Monday) •12hr/24hr display (12 hours/24 hours) zTips x If the photo frame is not operated If the photo frame is not operated for 10 seconds, the demo mode is displayed. x Releasing the demonstration mode If any other button than the power button is pressed, the screen returns to the initial display. P Note The B/b buttons become activated only when the Clock and calendar view mode (page 15) is not selected. Let’s get the frame ready 13 GB Let’s view an image PNote When using a memory card of the following types, make sure to insert it in an appropriate adaptor. If you insert it without an adaptor, you may be unable to remove it. As shown in the right-most illustration below, make sure to insert the following types of memory cards with inserted in the appropriate adaptor. 1miniSD /miniSDHC 2microSD/microSDHC 3“Memory Stick Micro” z Tip S-Frame fails to auto rotate if: – An image file has been shot with a DSC which doesn’t support Exif rotate tag recording. – An image file is retouched and saved with retouching software which breaks the Exif rotate tag. 1miniSD/ miniSDHC adaptor 2microSD/ microSDHC adaptor “M2” adaptor (standard size) 3“M2” adaptor (Duo size) Let’s view an image PNote When using a memory card of the following types, make sure to insert it in an appropriate adaptor. If you insert it without an adaptor, you may be unable to remove it. As shown in the right-most illustration below, make sure to insert the following types of memory cards with inserted in the appropriate adaptor. 1miniSD /miniSDHC 2microSD/microSDHC 3“Memory Stick Micro” z Tip S-Frame fails to auto rotate if: – An image file has been shot with a DSC which doesn’t support Exif rotate tag recording. – An image file is retouched and saved with retouching software which breaks the Exif rotate tag. 1miniSD/ miniSDHC adaptor 2microSD/ microSDHC adaptor “M2” adaptor (standard size) 3“M2” adaptor (Duo size) Inserting a memory card Insert a memory card firmly into the corresponding slot with its label side facing toward you (when you are facing the back side of the photo frame). Access lamp SD memory Card (Slot A) “Memory Stick” (Slot A) “Memory Stick Duo” (Slot B) When you insert a memory card The images on the memory card are automatically displayed. If you switch off the power while they are being displayed If you switch the power back on, the same images continue to be displayed. If the access lamp does not flash Reinsert the memory card after checking the label side of the memory card. About the A and B slots If you insert memory cards both into the A and B slots simultaneously, the photo frame will not work properly. 14 GB Changing the display 1 Press VIEW MODE repeatedly to select the view mode you want to display. The display changes to the selected view mode....