


Stimmen - 0, Durchschnittliche Bewertung: 0
(
 )
)
|
Fotos und technische Daten Olympus XZ-10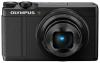 |


Dieses Gerät hat auch andere Anweisungen:
Anleitung Zusammenfassung
Before you start to use your new camera, please read these instructions carefully to enjoy optimum performance and a longer service life. Keep this manual in a safe place for future reference. We recommend that you take test shots to get accustomed to your camera before taking important photographs. The screen and camera illustrations shown in this manual were produced during the development stages and may differ from the actual product. The contents in this manual are based on firmware version 1.0 for this camera. If there are additions and/or modifications of functions due to firmware update for the camera, the contents will differ. For the latest information, please visit the Olympus website. 1 Preparations for shooting 1 Preparations for shooting Names of parts Preparations for shooting 1 1 ON/OFF button ................................P. 7 2 Indicator lamp ...................................P. 6 3 Shutter button .............................P. 9, 37 4 Mode dial ..........................................P. 8 5 Zoom lever ............................P. 9, 10, 25 6 Self-timer lamp/AF illuminator ...............................................P. 23/P. 51 7 Lens 8 Built-in flash ....................................P. 22 9 Control ring* (j) ......................P. 25, 77 0 Tripod socket a Battery/card compartment cover.......P. 5 b Battery/card compartment lock .........P. 5 c Connector cover d Multi-connector ...................P. 56, 60, 63 e HDMI micro connector (Type D)......P. 56 * In this manual, the jicon represents operations performed using the control ring. 2 EN F (Up) / F (Exposure compensation) button (P. 21) I (Right) / # (Flash) button (P. 22) G (Down) / jY (Sequential shooting/Self-timer) (P. 23)/ . (Erase) button (P. 26) H (Left) / P (AF target) button (P. 21) Q button (P. 11, 25, 31) Sub dial* (j) (P. 10, 14 – 15, 25) • Rotate to choose an option. 9 F (Up) / F (Exposure compensation) button (P. 21) I (Right) / # (Flash) button (P. 22) G (Down) / jY (Sequential shooting/Self-timer) (P. 23)/ . (Erase) button (P. 26) H (Left) / P (AF target) button (P. 21) Q button (P. 11, 25, 31) Sub dial* (j) (P. 10, 14 – 15, 25) • Rotate to choose an option. 9 1 Preparations 1 Monitor (Touch screen) ...P. 8, 12, 24, 29 2 q (Playback) button ................P. 10, 25 3 MENU button .................................P. 39 4 INFO (Information display) button ........................................... P. 13, 24, 57 5 Stereo microphone 6 Strap eyelet.......................................P. 4 7 R (Movie) button...................... P. 11, 25 8 Fn button ..................................P. 25, 55 9 Arrow pad .........................................P. 7 * In this manual, the j icon represents operations performed using the sub dial. EN 3 Unpack the box contents The following items are included with the camera. If anything is missing or damaged, contact the dealer from whom you purchased the camera. 1 Preparations for shooting Camera Strap Stylus pen Lithium ion battery (LI-50B) • Computer software CD-ROM • Instruction manual or • Warranty card USB cable USB-AC Adapter (CB-USB8) (F-2AC) Attaching the camera strap • Pull the strap tight so that it does not come loose. Indications used in this manual The following symbols are used throughout this manual. # Cautions Warns of operations that should be absolutely avoided. Also important information on factors which may lead to a malfunction or operational problems. $ Notes Points to note when using the camera. % Tips Useful information and hints that will help you get the most out of your camera. g Reference pages describing details or related information. 4 EN EN 5 Preparations for shooting 1 Inserting and removing the battery and card 1 Follow Steps 1 and 2 to open the battery/card compartment cover. • Turn off the camera before opening the battery/ card compartment cover. 2 1 Battery/card compartment lock Battery/card compartment cover 2 Insert the battery while sliding the battery lock knob in the direction of the arrow. • Insert the battery as illustrated with the l mark toward the battery lock knob. Damage to the battery exterior (scratches, etc.) may produce heat or an explosion. • Slide the battery lock knob in the direction of the arrow to unlock, and then remove the battery. Battery lock knob 3 Insert the card straight until it clicks into place. • Always use SD/SDHC/SDXC cards, Eye-Fi card or FlashAir (wireless LAN mounted) card with this camera. Do not insert other types of memory cards. g “Using the card” (P. 72) • Do not touch the metallic parts of the card directly. Write-protect switch To remove the card Press the card in until it clicks and comes out slightly, then remove the card. 4 Follow Steps 1 and 2 to close battery/ card compartment cover. • When using the camera, be sure to close the battery/card compartment cover. 2 1 Charging the battery Connect the USB cable and USB-AC adapter to the camera and charge the battery. • The battery is not fully ...
Dieses Handbuch ist für folgende Modelle:Kameras - XZ‑10 (2.53 mb)