


Stimmen - 0, Durchschnittliche Bewertung: 0
(
 )
)
|
Fotos und technische Daten Olympus T-100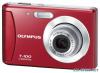 |


Dieses Gerät hat auch andere Anweisungen:
Anleitung Zusammenfassung
p. 16 10 E button (menu guide) ................. p. 19 EN 7 Monitor Shooting mode display 121 2 18 3 4 5 17 6 7 8 9 16 10 Still image 1/1001/100 F3.1F3.1 44 NORM PP 0.00.0 AUTOAUTWBO WB AUTOAUTISOO ISO 12M 1214151920 1 Battery check ................................ p. 11 2 Shooting mode........................p. 14, 20 3 Flash .............................................p. 23 Flash standby/flash charge...........p. 42 4 Macro............................................p. 23 5 Self-timer.......................................p. 24 6 Exposure compensation ...............p. 24 7 White balance ...............................p. 25 8 ISO ................................................p. 25 9 Image size...............................p. 26, 27 10 [SETUP] menu............................p. 4, 5 11 Recording with sound (movies) ....................................................p. 29 0.00.0 AUTOWBAUTO WB 0:340:34 VGA ONON 4 5 6 17 7 16 10 15 9 13 12 11 Movie 12 World time.....................................p. 35 13 Digital image stabilization ........... .p. 28 14 Compression (still images)............p. 27 15 Number of storable pictures (still images) .........................................p. 14 Continuous recording length (movies) ....................................................p. 15 16 Current memory............................p. 48 17 AF target mark ..............................p. 14 18 Camera shake warning....................... 19 Aperture value...............................p. 14 20 Shutter speed................................p. 14 8 EN Playback mode display .Normal display 123456 1 4 1010 ’10/02/2612:30’10/02/26 12:30 4/304/30 00:12/00:3400:12/00:34 6 15 Still image Movie .Detailed display 1 2 3 4 5 6 7 8 9 10 11 1010 4/304/30 1/1000 F3.1 2.0 AUTOWBAUTOISOP NORM 12M FILE 100 0004 ’10/02/26 12:30 1/1000 F3.1 2.0 AUTO WB AUTO ISOP NORM 12M FILE 100 0004 10/02/26 12:30 12 18 13 17 14 15 1 Battery check ................................ p. 11 2 Print reservation/ number of prints...................p. 40/p. 39 3 Protect...........................................p. 31 4 Adding sound..........................p. 29, 31 5 Current memory............................p. 48 6 Frame number/total number of images (still images)..................................p. 16 Elapsed time/total recording time (movies) ........................................p. 17 7 Shooting mode........................p. 14, 20 8 Shutter speed................................p. 14 16 9 Aperture value...............................p. 14 10 ISO ................................................p. 25 11 Exposure compensation ...............p. 24 12 White balance ...............................p. 25 13 Image size...............................p. 26, 27 14 File number ......................................... 15 Date and time................................p. 12 16 Compression (still images)............p. 27 Frame rate (movies)......................p. 27 17 Macro............................................p. 23 18 Flash .............................................p. 23 EN 9 Pr eparing the Camer a Inserting the battery and the SD/SDHC memory card (sold separately) Always use SD/SDHC memory cards with this camera. Do not insert any other types of memory card. 1 2 1 Battery/card compartment cover 2 Battery lock knob Write-protect switch Insert the battery by putting in the Ў marked side first, with the Cmark toward the battery lock knob. Damage to the battery exterior (scratches, etc.) may produce heat or an explosion. Insert the battery while sliding the battery lock knob in the direction of the arrow. Slide the battery lock knob in the direction of the arrow to unlock, and then remove the battery. Turn off the camera before opening the battery/card compartment cover. When using the camera, be sure to close the battery/card compartment cover. Insert the card straight until it clicks into place. Do not touch the contact area directly. 2 1 3 This camera allows the user to take pictures using the internal memory even when no SD/SDHC memory card (sold separately) is inserted. “Using an SD/SDHC memory card” (p. 47) “Number of storable pictures (still images)/ Continuous recording length (movies) in the internal memory and SD/SDHC memory cards” (p. 49) To remove the SD/SDHC memory card 12 Press the card in until it clicks and comes out slightly, then grab the card and pull it out. 10 EN Charging the battery with thesupplied USB-AC adapter The included F-2AC USB-AC adapter (with an AC cable or plug-in type; hereafter referred to as AC adapter) differs depending on the region where you purchased the camera. If you received a plug-in type AC adapter, plug it directly into an AC outlet. The included AC adapter has been designed to be used only for charging. Make sure that operations such as shooting, viewing images and so on are not being used while the AC adapter is connected to the camera. Example: AC adapter with an AC cable 1 2 3 1Multi-connector USB cabl...