


Stimmen - 0, Durchschnittliche Bewertung: 0
(
 )
)
|
Fotos und technische Daten Olympus FE-5000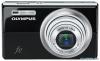 |


Dieses Gerät hat auch andere Anweisungen:


Anleitung Zusammenfassung
Playing back pictures automatically [GSLIDESHOW] G SLIDESHOW T o start a slideshow After pressing the Bbutton, the slideshow starts. To stop the slideshow, press the B button or the mbutton. Retouching images [HPERFECT FIX] H PERFECT FIX Edited or retouched images cannot be retouched again. Depending on the picture, the editing may not be effective. The retouching process may lower the image resolution. Submenu 1 Application [LIGHTING FIX] and [REDEYE ALL FIX] are applied together. Only sections darkened by LIGHTING FIX backlighting and dim lighting are brightened. Eyes that are reddened by the REDEYE FIX flash are corrected. 1Use klto select a correction method, and press the Bbutton. 2Use mnto select an image for retouching, and press the Bbutton. .The retouched image is saved as a separate image. Changing the image size [Q] I EDIT • Q Submenu 2 Application This saves a high-resolution image C 640 . 480 as a separate image with a smaller size for use in e-mail attachments E 320 . 240 and other applications. Cropping image [P] I EDIT • P 1Use mnto select an image, and press the Bbutton. 2 Use the zoom buttons to select the size of the cropping frame, and use klmn to move the frame. Cropping frame TWSETOK 3 Press the Bbutton. .The edited image will be saved as a separate image. 28 EN Make the settings for the functions while referring to “Using the Menu” (p. 3). Make the settings for the functions while referring to “Using the Menu” (p. 3). Creating an index of 9 frames from a Rotating images [y] movie [INDEX] J PLAYBACK MENU • y I EDIT .. INDEX 1Use mnto select a movie, and press the Bbutton. 2 Useklmnto select the fi rst frame, and press the Bbutton. 3 Use klmnto select the last frame, and press the Bbutton. .9 frames are extracted from a movie and saved as a new still image (INDEX). Submenu 2 Application U +90° The image is rotated 90° clockwise. V 0° The image is not rotated. t –90° The image is rotated 90° counter-clockwise. 1Use mnto select an image. 2Use klto select the rotation direction. 3If necessary, repeat Steps 1 and 2 to make settings for other images, and press the Bbutton. The new picture orientations will be saved even after the power is turned off. Adding sound to still images [R] Protecting images [0] J PLAYBACK MENU • R J PLAYBACK MENU • 0 Submenu 2 Application Protected images cannot be erased by The camera adds (records) sound [ERASE] (p. 16), [SEL. IMAGE], or [ALL for approx. 4 seconds while ERASE] (p. 30), but all images are erased YES playing back the image. This by [MEMORY FORMAT]/[FORMAT] (p. 31). is useful for recording notes or comments about the image. Submenu 2 Application NO No sound is recorded. OFF Images can be erased. Images are protected so that 1Use mnto select an image, and press the they cannot be erased except Bbutton. ON by formatting of the internal 2Aim the microphone towards the sound memory/card. source. 1Use mnto select an image. 2Use klto select [ON]. 3 If necessary, repeat Steps 1 and 2 to protect other images, and press the Bbutton. Microphone 3Use klto select [YES], and press the Bbutton. .Recording starts. EN 29 Erasing images [KERASE] Saving print settings to the image data K ERASE [LPRINT ORDER] Submenu 1 Application Images are individually selected SEL. IMAGE and erased. All images in the internal memory ALL ERASE or card will be erased. When erasing pictures in the internal memory, do not insert the card into the camera. When erasing pictures from the card, insert a card into the camera in advance. To individually select and erase images [SEL. IMAGE] 1Use klto select [SEL. IMAGE], and press the Bbutton. 2Use klmnto select the image to be erased, and press the Bbutton to add a Rmark to the image. Rmark 1 4 5 6 IN OKMENUBACK GO SEL. IMAGE D2 3 3 Repeat Step 2 to select the images to be erased, and then press the Dbutton to erase the selected images. 4Use klto select [YES], and press the Bbutton. .The images with a Rmark are erased. To erase all images [ALL ERASE] 1Use klto select [ALL ERASE], and press the Bbutton. 2Use klto select [YES], and press the Bbutton. L PRINT ORDER “Print reservations (DPOF)” (p. 38) Print reservation can be set only for still images that are recorded to the card. 30 EN Select the settings for the functions while referring to “Using the Menu” (p. 3). Select the settings for the functions while referring to “Using the Menu” (p. 3). Menus for Other Camera Settings Erasing data completely [MEMORY FORMAT]/[FORMAT] E SETUP .. MEMORY FORMAT/FORMAT Before formatting, check that no important data is left in the internal memory or card. Non-Olympus cards and cards that have been formatted by a computer must be formatted with this camera before use. Submenu 2 Application Completely erases the image data YES in the internal memory*1 or card (including protected images). NO Cancels formatting. *1 Be sure to remove the card before formatting the internal memory. Copying images in the internal memory to the card [BACKUP] E SETUP .. BACKUP Su...
Dieses Handbuch ist für folgende Modelle:Kameras - FE-5010 (1.53 mb)