


Stimmen - 0, Durchschnittliche Bewertung: 0
(
 )
)
|
Fotos und technische Daten Olympus FE-26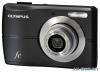 |


Dieses Gerät hat auch andere Anweisungen:
Anleitung Zusammenfassung
Thank you for purchasing an Olympus digital camera. Before you start to use your new camera, please read these instructions carefully to enjoy optimum performance and a longer service life. Keep this manual in a safe place for future reference. . We recommend that you take test shots to get accustomed to your camera before taking important photographs. . In the interest of continually improving our products, Olympus reserves the right to update or modify information contained in this manual. . The screen and camera illustrations shown in this manual were produced during the development stages and may differ from the actual product. Preparing the Camera “Preparing the Camera” (p. 10) Names of Parts ................................. 6 Preparing the Camera .................... 10 Shooting, Playback, and Erasing... 14 Using Shooting Modes................... 17 Using Shooting Functions............. 19 Using Playback Features ............... 23 Menus for Shooting Functions...... 24 .............. Menus for Playback, Editing, and Printing Functions.......................... 28 Menus for Other Camera Settings .. 30 Printing ............................................ 33 Using OLYMPUS Master 2.............. 38 Usage Tips ...................................... 40 Appendix ......................................... 44 Index ................................................ 58 .............. ContentsContents Step2 Shooting and Playing Back Images “Shooting, Playback, and Erasing” (p. 14) Step3 How to Use the Camera “Three Types of Setting Operations” (p. 3) Step4 Printing “Direct printing (PictBridge)” (p. 33) “Print Reservations (DPOF)” (p. 36) Step5 Checking the contents of the box Step1 Other accessories not shown: Instruction Manual (this manual), OLYMPUS Master 2, warranty card. Contents may vary depending on purchase location. Digital camera Strap USB cable microSD Attachment Two AA batteries Preparing the Camera “Preparing the Camera” (p. 10) Names of Parts ................................. 6 Preparing the Camera .................... 10 Shooting, Playback, and Erasing... 14 Using Shooting Modes................... 17 Using Shooting Functions............. 19 Using Playback Features ............... 23 Menus for Shooting Functions...... 24 .............. Menus for Playback, Editing, and Printing Functions.......................... 28 Menus for Other Camera Settings .. 30 Printing ............................................ 33 Using OLYMPUS Master 2.............. 38 Usage Tips ...................................... 40 Appendix ......................................... 44 Index ................................................ 58 .............. ContentsContents Step2 Shooting and Playing Back Images “Shooting, Playback, and Erasing” (p. 14) Step3 How to Use the Camera “Three Types of Setting Operations” (p. 3) Step4 Printing “Direct printing (PictBridge)” (p. 33) “Print Reservations (DPOF)” (p. 36) Step5 Checking the contents of the box Step1 Other accessories not shown: Instruction Manual (this manual), OLYMPUS Master 2, warranty card. Contents may vary depending on purchase location. Digital camera Strap USB cable microSD Attachment Two AA batteries 2 EN Please read “Menu Settings” (p. 24 to 32) while referring to this page. Please read “Menu Settings” (p. 24 to 32) while referring to this page. Three Types of Setting Operations 1 Press the mbutton. This example describes how to use the menus to set the [POWER SAVE]. CAMERA MENU MENUEXIT SET OK Shooting mode top menu 2 Use klmnto select the desired menu, and press the Bbutton. Pressing and holding the Ebutton displays an explanation (menu guide) of the selected option. BACKUP NO 1 2 3 SETUP SET OK ENGLISH PIXEL MAPPING SAVE SETTINGS MEMORY FORMAT MENUEXIT Submenu 1 . 3 Use klto select the desired Submenu 1, and press theBbutton. BEEP OFF ON 1 3 2 SETUP SET OK NORMAL NORMAL POWER SAVE MENU COLOR MENUEXIT BEEP 1 3 2 SETUP SET OK POWER SA MENU COLOR MENUBACK POWER SAVE OFF ON Page tab Submenu 2 To quickly move to the desired submenu, press mto highlight the page tab, and then use klto move the page. Press nto return to the submenu. Some menus include submenus that appear by pressing the Bbutton. 4 Use klto select Submenu 2, and press the Bbutton. Once a setting is selected, the display returns to the previous screen. There may be additional operations. “Menu Settings” (p. 24 to 32) BEEP ON ON 1 3 2 SETUP SET OK NORMAL NORMAL POWER SAVE MENU COLOR MENUEXIT 5 Press the mbutton to complete the setting. . Using the MenuUsing the Menu Various camera settings can be accessed through the menus, including functions used during shooting and playback and the date/time and screen display. There may be menus that are unavailable depending on other related settings or the smode (p. 17). mbutton Arrow pad Bbutton Buttons in use Ebutton 3 EN Using the FUNC Menu (p. 22)Using the FUNC Menu (p. 22) Frequently used shooting menu functions can be set with less steps using the FUNC menu. Us...