


Stimmen - 4, Durchschnittliche Bewertung: 3.8
(

 )
)
|
Fotos und technische Daten Casio EX-ZS100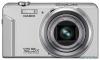 |


Dieses Gerät hat auch andere Anweisungen:
Anleitung Zusammenfassung
Shooting Indoors under Fluorescent Lighting • Minute flickering of fluorescent lighting can affect the brightness or color of an image. Auto Focus Restrictions • Any of the following can make proper focus impossible. – Solid color wall or other very low contrast subject – Strongly back lit subject – Very shiny subject – Blinds or other subject with a repeating horizontal pattern – Multiple subjects at varying distances from the camera – Subject in a dark location – Camera movement while shooting – Fast-moving subject – Subjects outside the focus range of the camera • If you cannot focus properly, try using focus lock (page 57) or Manual Focus (page 56). Quick Start Basics 32 Snapshot Tutorial Using the Control Panel The Control Panel can be used to configure camera settings. 1. In the REC mode, press [SET]. This will select one of the Control Panel icons and display its settings. [8] [2] [4] [6] Available settings Control Panel [SET] 195347826 2. Use [8] and [2] to select the setting you want to change. 1Snapshot image size/quality* 6Silent Mode (page 42) (pages 34, 63) 7easy Mode (page 42) 2Movie image quality (page 37) 8REC menu display (page 54) 3Flash (page 38) 9BEST SHOT scene selection 4Self-timer (page 40) (page 51) 5Face Detection (page 41) * Snapshot image quality cannot be changed using the Control Panel. 3. Use [4] and [6] to change the setting. 4. If you want to configure another setting, repeat steps 2 and 3. 5. After all of the settings are the way you want, press [SET]. This will apply the settings and return to the REC mode. If you selected “MENU”, the REC menu will appear. If you selected “BS”, the BEST SHOT scene menu will appear. • You can close the Control Panel by pressing [ ] (Delete). Snapshot Tutorial 33 NOTE • No icon is displayed for any Control Panel option (page 9) that is set to its initial default (reset) setting. An icon will appear only if you change the setting of the corresponding Control Panel option. The following are the initial defaults for Control Panel options. – Flash: Auto Flash – Self-timer: Off – Face Detection: Off – Silent: Off • You also can configure settings other than those listed above (page 54). Changing the Image Size (Size) . Pixels A digital camera image is a collection of small dots called “pixels”. The more pixels there are in an image, the more detail there will be. However, you generally can do with fewer pixels when printing an image (L size) through a print service, attaching an image to e-mail, when viewing the image on a computer, etc. Pixel . About image sizes The size of an image indicates how many pixels it contains, and is expressed as horizontal pixelsxvertical pixels. 10M (3648x2736) size image = Approximately 10 million pixels *Unit: pixels VGA (640x480) size image = Approximately 300,000 pixels 3648* 2736* 640* 480* Snapshot Tutorial 34 Image Size Selection Tips Note that larger images have more pixels, so they take up more memory space. Large Number of Pixels More detail, but takes up more memory. Best when you plan to print large-size prints (such as A3 size). Small Number of Pixels Less detail, but takes up less memory. Best when you want to send images by e-mail, etc. • For information about image size, image quality, and number of images that can be stored, see page 133. • For information about movie image size, see page 37. • For information about resizing existing snapshots, see page 75. Snapshot Tutorial 35 . To select the snapshot image size 1. In the REC mode, press [SET]. 2. Use [8] and [2] to select the top Control Panel option (Snapshot Image Size). 3. Use [4] and [6] to select an image size and then press [SET]. Image Size (Pixels) Suggested Print Size and Application Description 14M (4320x3240) Poster Print Good detail for better clarity even for images cropped (page 75) from the original 3:2 (4320x2880) Poster Print 16:9 (4320x2432) HDTV 10M (3648x2736) A3 Print Good detail 6M (2816x2112) A4 Print 3M (2048x1536) 3.5"x5" Print Best when preserving memory capacity is relatively more important than image quality. VGA (640x480) E Mail Image files are smaller, which is better when attaching images to e-mail. However, images are relatively coarser. • The initial factory default image size setting is “14M”. • Selecting “3:2” records images with an aspect ratio of 3:2, which matches the standard aspect ratio of print paper. • The letters “HDTV” stand for “High Definition Television”. An HDTV screen has an aspect ratio of 16:9, which makes them wider than the usual 4:3 aspect ratio of television screens of the past. Your camera can record images that are compatible with the aspect ratio an HDTV screen. • You should regard the print paper sizes suggested here as guidelines only (200 dpi print resolution). Snapshot Tutorial 36 . Specifying Movie Image Quality Movie image quality is a standard that determines the detail, smoothness, and clarity of a movie during playback. Shooting with the high-quality (HD) setting will result in bet...