


Stimmen - 2, Durchschnittliche Bewertung: 3
(

 )
)
|
Fotos und technische Daten LG LH-CX245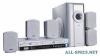 |


Anleitung Zusammenfassung
This feature works with DVD discs encoded with Dolby Pro Logic and Dolby Digital audio tracks. BYPASS Software with multichannel surround audio signals is played according to the way it was recorded. Sound Mode You can enjoy surround sound simply by selecting one of the pre-programmed sound fields according to the program you want to listen to. Press SOUND MODE repeatedly until the sound mode you want appears in the display window as below. Each time you press SOUND MODE button, the sound mode is changed in the following order; PRO LOGIC > PL2 MOVIE > PL2 MUSIC > PL2 MATRIX > 3D SURROUND > BYPASS When DVD is inserted. You can change the stream of DVD (Dolby Digital, DTS, PCM, etc) by pressing the AUDIO button on the remote during playback. Although the DVD contents differ from disc to disc, the following explains the basic operation when this feature is used. Each time you press AUDIO button, the sound mode of DVD is changed as the following order; > > > For your reference • The DVD/VCR Combi receiverr memorizes the last mode settings for each source individually • You can identify the encoding format of program software by looking at its packaging. -Dolby Digital discs are labeled with the logo. -Dolby Surround encoded programs are labeled with the logo. -DTS Digital Surround discs are marked with DTS. Note • When you play sound tracks with 96kHz sampling frequency, the output signals will be converted to 48kHz (sampling frequency). 16 Installation Before Operation-VCR part Tuning in a video channel on your TV Notes • The output frequency of this video recorder (VCR) is set at UHF channel 60. If channel 60 is already used by another TV station, or if the picture is distorted, you can change the transmitter channel of your DVD/VCR Combi receiver. Stages 5 ~ 8 will show you how to change the output frequency of your DVD/VCR Combi receiver. •Your TV receives signals from the video recorder (VCR) like another TV station. You have to select a channel number on your TV and tune it in so that you may watch video tapes. If you have used a SCART cable then your TV should already have a dedicated video channel built into it, usually called AV. 1. Make sure that you have correctly installed your VCR as described earlier in this book. Press POWER to turn on your DVD/VCR Combi receiver. Turn on your TV. 2. Insert a pre-recorded video tape into your DVD/VCR Combi receiver and press PLAY on the remote control. Select a TV channel number on which you wish to watch video’s. Don’t worry if you don’t have a video-tape to play at this stage! If you switch your DVD/VCR Combi receiver on and continue stages 3 ~ 4, instead of seeing video playback tune your TV until you see a bright blue screen. 3. Tune this channel until the video picture is sharp and the sound is clear. If you have used a SCART cable you will not have to tune your TV, simply select the AV channel. The AV channel is already pre-tuned for optimum video playback on your TV. 4. Store this channel on your TV. You will need to look at the TV instruction book if you do not know how to do this. 5. Only carry out stages 5 ~ 8 if you cannot obtain clear video playback as described in stages 1 ~ 4. Select a TV channel number on which you wish to watch video’s. Make sure that your DVD/VCR Combi receiver is in standby pressing POWER on the remote control (only the clock will be displayed). 6. Press PROG. + or -on the front of your DVD/ VCR Combi receiver for more than 4 seconds. RF60 will appear in the display window. The following picture will be displayed on the TV screen. 7. Press PROG. + or -to select another video channel. You may select any channel number between 22 and 68. You can also set it to “OFF” if there is any interfer- ence when your TV is connected to the DVD/VCR Combi receiver with a SCART lead. 8. Select a TV channel number on which you wish to watch video’s. Press STANDBY/ON on the front of your DVD/VCR Combi receiver when you have finished. Tune this channel so that a bright blue screen appears. Store this channel on your TV. Notes Make sure that you have correctly installed your DVD/VCR Combi receiver and successfully tuned in a dedicated video channel on your TV. If you do not tune in a dedicated video channel on your TV you will be unable to view and record video tapes! Using your VCR for the very first Initial preset For the following steps we do assume that you havejust connected your video recorder for the very firsttime. In this case the video recorder is on after mains connection. You should not touch any buttons yet. Onthe connected TV you will now see. Note -If this menu does not appear, your videorecorder was programmed already. 1. Select the country according to your area with F and G. “A”: Austria, “B”: Belgium, “CH”: Switzerland, “D”: Germany, “DK”: Denmark, “E”: Spain, “F”: France, “I”: Italy, “N”: Norway, “NL”: Netherlands, “P”: Portugal, “S”: Sweden, “SF”: Finland, OTHERS. 2. Press OK to start the automatic storing of thechannels of the...