


Stimmen - 1, Durchschnittliche Bewertung: 5
(
 )
)
)
|
Fotos und technische Daten Sony DVP-FX875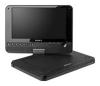 |


Dieses Gerät hat auch andere Anweisungen:


Anleitung Zusammenfassung
To set the parental control, you need the selected password in “Password,” therefore first set the password in the set up. Changing the password 1 Press X/x to select “Password” in the Parental Control setting display, and press ENTER. 2 Select “Change,” and press ENTER. The display for entering the password appears. 3 Enter your current 6-digit password in the “Old Password” box. 4 Enter your new 6-digit password in the “New Password” box. 5 Enter your new 6-digit password once again in the “Verify Password” box, then press ENTER to confirm. If you make a mistake entering your password Press CLEAR, or press C to return one by one before pressing ENTER in step 5, and then reenter the password. Setting the parental control (limited playback) 1 Press X/x to select “Parental Control” in the Parental Control setting display, and press ENTER. The display for setting the playback limitation level appears. Settings and Adjustments Parental Control Password Parental Control 2 3 4 5 6 7 8 Adult ENTERSelect: Cancel: RETURN ,continued 37 2 2 The lower the value, the stricter the limitation. The display for entering the password appears. Parental Control Password OK Enter password, then press ENTER . 3 Enter or re-enter your 6-digit password using the number buttons, then press ENTER. Parental Control setting is complete. To play a disc for which Parental Control is set 1 Insert the disc and press H. The display for entering your password appears. 2 Enter your 6-digit password using the number buttons, then press ENTER. The player starts playback. If you forget your password Remove the disc and repeat the steps outlined in “Changing the password” (page 37). Enter “136900” in the “Old Password” box, and then enter your new 6-digit password in the “New Password” box and “Verify Password” box. Notes • When you play discs which do not have the Parental Control function, playback cannot be limited on this player. • Depending on the disc, you may be asked to change the parental control level while playing the disc. In this case, enter your password, then change the level. If the Resume Play mode is cancelled, the level returns to the previous level. 38 Hookups Hookups To switch LINE SELECT (IN/OUT) switch LINE SELECT IN: Input images or audio from an exterior device. The “Line in” message will be displayed on the LCD screen until the signal from the exterior device is received. LINE SELECT OUT:Sends the playback signal from this player to a TV. Notes • Plug cords securely to prevent noise. • Refer to the instructions supplied with the components to be connected. • You cannot connect this player to a TV that does not have a video input jack. • Be sure to disconnect the mains lead of each component before connecting. • Connect the player to the TV directly. Image quality may suffer when the video output from the player is passed through a video deck on to a TV. Connecting to TV monitor TV or monitor with audio/ video input jacks DC IN 9.5V AUDIO VIDEOPHONES OPTICAL OUTA B LINE SELECT IN OUT To AUDIO/VIDEO Audio/video cord (supplied) To send the playback signal to a TV or a monitor 1 Set the LINE SELECT switch on the player’s right side to “OUT.” Hookups ,continued 39 Connecting to an AV amplifier (receiver) Connecting to an AV amplifier (receiver) DC IN 9.5V AUDIO VIDEOPHONES OPTICAL OUTA B LINE SELECT IN OUT Stereo amplifier To AUDIO Audio/video cord (supplied) To AUDIO input To send analog audio signal to an AV amplifier (receiver) 1 Set the LINE SELECT switch on the player’s right side to “OUT.” * The yellow plug is used for video signals (page 39). Example 2 Amplifier with Dolby Digital or DTS decoder DC IN 9.5V AUDIO VIDEOPHONES OPTICAL OUTA B LINE SELECT IN OUT To OPTICAL OUT Optical digital cord (not supplied) To AUDIO input To send digital audio signal to an AV amplifier (receiver) 1 Set the LINE SELECT switch on the player’s right side to “OUT.” 2 Set “Digital Output” to “On” in “Audio Setup” (page 35). Connecting to Video Player or Camcorder Connecting to Video Player or Camcorder DC IN 9.5V AUDIO VIDEOPHONES OPTICAL OUTA B LINE SELECT IN OUT To AUDIO/VIDEO To AUDIO/VIDEO output Audio/video cord (supplied) To receive the playback signal from a Video Player or Camcorder 1 Set the LINE SELECT switch on the player’s right side to “IN.” Note Set the LINE SELECT switch to “OUT” after use. You cannot play back on the player if the switch is set to “IN.” Hookups 41 Additional Information Additional Information If you experience any of the following difficulties while using the player, use this troubleshooting guide to help remedy the problem before requesting repairs. Should any problem persist, consult your nearest Sony dealer. Power The power is not turned on. , Check that the mains lead is connected securely. , When using with the battery pack, check that the battery pack is sufficiently charged. Picture There is no picture/picture noise appears. , The disc is dirty or flawed. , The brightness is set at minimum. Set the ...