


Stimmen - 4, Durchschnittliche Bewertung: 3.5
(


 )
)
|
Fotos und technische Daten Sony BDV-E300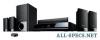 |


Dieses Gerät hat auch andere Anweisungen:


Anleitung Zusammenfassung
2 Remove the disc. 3 Disconnect the AC after you press Z. power cord (mains lead) from the wall outlet (mains), then reconnect after several minutes. A disc cannot be ejected and • Contact your Sony dealer or local authorized Sony service facility. “LOCKED” appears in the front panel display. The system does not work • Disconnect the AC power cord (mains lead) from the wall outlet (mains), then normally. reconnect after several minutes. 95GB Symptom Remedy Symptom Remedy • When “HDMI” does not light up in the front panel display, check the HDMI connection (page 22). • Set [Control for HDMI] in [HDMI Settings] to [On] (page 85). • Make sure that the connected component is compatible with the [Control for HDMI] function. • Check that the AC power cord (mains lead) of the connected component is connected securely. • Check the connected component’s setting for the Control for HDMI function. Refer to the operating instructions supplied with the component. • If you change the HDMI connection, connect and disconnect the AC power cord (mains lead), or have a power failure, set [Control for HDMI] in [HDMI Settings] to [Off], then set [Control for HDMI] in [HDMI Settings] to [On] (page 85). • For details, see “Using the Control for HDMI Function for “BRAVIA” Sync” (page 66). No sound is output from the • Make sure that the connected TV is compatible with the System Audio Control system and TV while using the function. System Audio Control function. • For details, see “Using the Control for HDMI Function for “BRAVIA” Sync” (page 66). The external memory is not • Try the following: 1 Turn the system off. 2 Align the V mark of the EXT slot recognized. with the V mark on the external memory, and insert the external memory (USG1H only). 3 Turn the system on. 4 Check that the EXT indicator lights up in the front panel display. Bonus contents or other data that • Try the following: 1 Remove the disc. 2 Turn the system off. 3 Remove and are contained in a BD-ROM re-insert the external memory (page 28). 4 Turn the system on. 5 Check that cannot be played. the EXT indicator lights up in the front panel display. 6 Insert the BD-ROM with BonusView/BD-Live. A message indicating that the • Delete unnecessary data in the external memory (page 46). local storage does not have enough space appears on the screen. The unit does not work and • Set the child lock function to off (page 75). “CHILD LOCK” appears in the front panel display when you press any button on the unit. The system menu does not work. • Press HOME on the remote. 96GB The S-AIR function The S-AIR function S-AIR connection is not established (sound transmission is not established), e.g., the indicator of the S-AIR sub unit does the following: • Turns off. •Flashes. • Turns red. • If you use another S-AIR main unit, place it more than 8 meters away from the unit. • Confirm the ID of the unit and S-AIR sub unit (page 60). • You performed pairing the unit and another S-AIR sub unit. Perform pairing of the desired S-AIR sub unit (page 63). • The unit is paired to another S-AIR sub unit. To cancel pairing, reset the ID of the unit and S-AIR sub unit (page 60). • Install the S-AIR main unit and S-AIR sub unit away from other wireless products. • Stop using another wireless product. • The S-AIR sub unit is turned off. Make sure the AC power cord (mains lead) is connected and turn on the S-AIR sub unit. No sound is heard from the S-AIR sub unit. • If you use another S-AIR main unit, place it more than 8 meters away from the unit. • Confirm the ID of the unit and S-AIR sub unit (page 60). • Confirm the pairing setting (page 63). • Install the S-AIR main unit and S-AIR sub unit closer together. • Avoid use of equipment that generates electromagnetic energy, such as a microwave oven. • Install the S-AIR main unit and S-AIR sub unit away from other wireless products. • Stop using another wireless product. • Change the “RF CHANGE” setting (page 64). • Change the ID settings of the S-AIR main unit and S-AIR sub unit. • Turn off the system and S-AIR sub unit, then turn on them. Additional Information There is noise or the sound skips. • If you use another S-AIR main unit, place it more than 8 meters away from the unit. • Install the S-AIR main unit and S-AIR sub unit closer together. • Avoid use of equipment that generates electromagnetic energy, such as a microwave oven. • Install the S-AIR main unit and S-AIR sub unit away from other wireless products. • Stop using another wireless product. • Change the “RF CHANGE” setting (page 64). • Change the ID settings of the S-AIR main unit and S-AIR sub unit. 97GB Self-diagnosis Function Self-diagnosis Function appears without any messages on the entire screen. In these cases, check the following. When an error code appears in the front panel display Error code Corrective action Exxxx Contact your nearest Sony dealer or local authorized Sony service facility and give the error code. SYSTEM ERR UPDATE NG Turn off the system and disconnect th...
Dieses Handbuch ist für folgende Modelle:Heimkino-Systeme - BDV-E301 (2.45 mb)
Heimkino-Systeme - BDV-E801 (2.45 mb)