


Stimmen - 3, Durchschnittliche Bewertung: 4
(

 )
)
|
Fotos und technische Daten Panasonic DMP-B100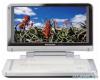 |


Anleitung Zusammenfassung
The Car DC Adaptor continues to consume some power even if it is not being used, and if a battery pack is attached to this unit, it will start recharging which uses more power. jDo not use the Car DC Adaptor for long periods when the engine is not running. .Leave some slack in the cord. .No responsibility will be taken for damage that occurs due to faulty installation. Getting started VQT2H71 Turning on/off the unit Press [POWER I] (approx. 0.5 sec.). The unit is turned off when [POWER I] is pressed again. .The power is shut off if the screen is closed while the power is “On”. .When the “Auto Power Off” is set to “On” (initially set to “On”), the unit will be turned off automatically after 15 minutes (5 minutes when the battery pack is used) when it is in stopped status (• 25). .The startup will take time. The operation related to startup of the unit after turning on this unit can be quickened by setting the initial setup “Quick Start” (• 25) to “On” (initially set to “Off”). (The power consumption will increase) .You may hear operational sounds when the unit is turned on, but this is due to the initialization of the pickup unit, and it is not a malfunction. Easy Setting After opening the LCD screen and pressing [POWER I] for the 1st time, a screen for the basic settings will appear. Follow the on-screen instructions and make the settings with [3, 4] and [OK]. “On-screen Language” (• 25), “Picture Quality Mode” (• 13) and “Quick Start” (• 25) are set. .You can perform this setup anytime by selecting “Easy Setting” in the Setup menu. (• 25) .You can also change this setting individually. (• 13, 25) Turn the unit off automatically The unit is turned off automatically after set time has passed. Switch by pressing the [OFF TIMER]. e.g., 30 min. Off Timer 0 : 30 It will switch every time it is pressed. Showing FUNCTION MENU Some functions of this unit can be operated from FUNCTION MENU. 1 Press [FUNCTION MENU]. .Functions displayed depend on the media and operating conditions. 2 Press [3, 4] to select the item and press [OK]. e.g., OK RETURN Playback Top Menu Other Functions SD card DISC Blu-ray Disc Player ! Playback (• 14) ! Top Menu (• 14) ! Menu (• 15, 18, 20) ! Viewing Picture (• 18) ! Viewing Video (• 14) ! Listening Music (• 20) ! Disc (• 14) Switches to the disc drive. ! SD card (• 14) Switches to the SD drive. ! Other Functions “Playlists”: You can play playlists created on DVD-VR. Press [3, 4, 2, 1] to select the playlist and press [OK]. “Setup” (• 24) “Card Management” (• 21) Off 1:00 2:00 3:00 6:00 12:000:30 VQT2H71 Adjusting the pictures on the LCD screen 1 Press [LCD MENU]. .It is also possible to display with the following procedures. 1 Press [SUB MENU]. 2 Select “Other Functions” with [3, 4], and select [OK]. 3 Select “LCD Menu” with [3, 4], and select [OK]. LCD Menu Picture Dynamic Brightness Color Tint RETURN SUB MENU 2 Select the item with [3, 4]. 3 Change the setting with [3, 4, 2, 1]. Picture:Adjusting image quality ! Standard: Standard ! Dynamic: Picture with high contrast ! Night: Picture suitable for viewing in dark places ! User jBrightness: s5 to r5 jColor: s5 to r5 jTint: s5 to r5 .Underlined items are the factory presets. To exit the screen Press [EXIT]. Loading the disc or SD card Disc . 1 Press [OPEN]. 2 Set the disc and close the lid. .Set the disc securely until you hear a "click", with the label side up. (Double-sided disc: place the label side up that you want to play back) .Some discs may start playing when it is loaded with the unit turned on. .About discs with a cartridge jDVD-RAM, DVD-R: Remove the disc from the cartridge and set the disc in the tray. Cartridge discs cannot be used. jPlace the disc back into the cartridge for storage to prevent dirt and scratches after use. .Do not touch the lens as it Lens (A) may make it dirty. SD card 1 Open the cover at the side of the unit. 2 Insert the SD card into the SD card slot. .With the label side up, insert the card straight in the direction shown in the figure, until you hear a sound. 3 Close the cover. To remove the card In step 2 above, press the center of the card until it “clicks”, and pull the card out straight. Getting started VQT2H71 Basic play (Playing video contents) Instructions for operations are generally described using the remote control in these operating instructions. Insert a disc or SD card (• 13). Play starts. .If play does not start, press [1](PLAY). .If a media with data in different file formats is inserted, the file selection menu is displayed. Press [3, 4] to select the desired file format and press [OK]. .If the menu is displayed, press [3, 4, 2, 1] to select the item and press [OK]. .If the screen prompting you to use the color buttons appears, continue to operate with the color buttons on the remote control. .DISCS CONTINUE TO ROTATE WHILE MENUS ARE DISPLAYED. Press [.] when you finish to preserve the unit’s motor. .The producers of the disc can control how discs are played, so you may not always be a...