


Stimmen - 3, Durchschnittliche Bewertung: 3
(

 )
)
|
Fotos und technische Daten Jonsered CS 2121 EL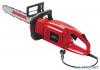 |


Anleitung Zusammenfassung
A chain brake can reduce the risk of accident, but only the operator can prevent accidents from happening. Be extremely careful when operating a chain saw and do not allow the kickback danger zone to make contact with anything. • The chain brake (A) is activated either manually (with the left hand) or by the force of inertia (the inertia of the kickback guard resisting the motion of the saw from the force of the kickback). However it is activated, the kickback protection mechanism works in the opposite direction to the force of the kickback. The saw incorporates a slip clutch which protects the saw against overload. If the chain stops while the motor is running, the saw is overloaded. Ease up on the cutting pressure until the chain starts running again. If the saw jams in the tree, stop the saw immediately and free it. • The chain brake is also activated when the kickback guard (B) is pushed forward. This releases a springloaded mechanism which jerks the brake band tightly around the brake drum. • The purpose of the kickback guard is not only to activate the chain brake. Its other important function is to reduce the danger of contact with the chain in the event that the operator loses his grip on the front handle. • Use the chain brake as a «parking brake» when carrying the chain saw around or putting it down for short periods! Besides automatic activation in the event of a kickback, the chain brake may also be activated manually and must be activated in the event of any inadvertent contact with a rotating chain. • An activated chain brake is released by pulling the kickback guard back towards the front handle. • As pointed out on page 7, a kickback can be extremely violent and lightning-fast. Most kickbacks are small and do not activate the chain brake. When this happens, it is important to maintain a firm grip on the saw and not let go. • The chain brake may be activated manually or by the force of inertia depending on the strength of the kickback and the position of the saw in relation to the object which made contact with the kickback danger zone. - If the kickback is sufficiently violent and the left hand is too far from the kickback guard, the chain brake is activated by the INERTIA of the chain brake against the force of the kickback. - In the event of smaller kickbacks or when the left hand is near the kickback guard, the chain brake is activated manually with the left hand. • When the chain saw is turned on its side and the operator is holding the side of the front handle, the kickback guard will not strike the left hand in the event of a kickback and will thus not activate the chain brake. In a situation of this type, inertia is the only thing that can activate the chain brake, but like manual activation, it will not work in every situation. Kickback guard inspection • Inspect kickback guard for visible defects, such as cracks. • Move kickback guard back and forth to ensure that it moves freely without being loose. Manual chain brake function check • Check chain brake daily or every time the saw is used. Holding the running saw firmly with the left hand on the front handle and the right hand on the rear handle, twist your left wrist, pushing the kickback guard to activate the chain brake without letting go of the front handle. The chain should stop instantaneously. If the chain brake does not perform as required, have it serviced by authorized personnel. Inertia chain brake function check • Hold the running saw level with the guide bar approximately 45 cm above a stump or other solid wooden object. Release the power trigger. • Release the front handle, letting the chain saw pivot in your right hand as the guide bar falls down and strikes the stump. The brake should activate when the bar nose hits the stump. ENGLISH 9 ENGLISHENGLISH MOUNTING GUIDE BAR AND ADJUSTING CHAIN CAUTION! Always disconnect power before performing cleaning or maintenance work. CAUTION! A loose chain can jump out of its groove during operation and cause serious or even fatal injury. 1. Pull kickback guard back against the front handle to ensure that the chain brake is not applied. 2. Screw out the guide bar nut and remove the chain drive cover. 2 3. Fit the chain around guide bar nose with the top cutters facing forwards. 4. Holding the chain over the guide bar nose, position the back end of the guide bar against the drive sprocket at a 45° angle to the power head. Pass the free end of the chain around the drive sprocket, swing the guide bar into place over the mounting bolt and against the power head, and guide the chain into the guide bar groove. 5. Seat the guide bar tensioner pin in its hole in the guide bar. 6. Replace the chain drive cover and screw the mounting nut hand tight. 7. Tension the chain by screwing the tensioning screw clockwise using the screwdriver tip on the combination tool. 8. Tighten chain firmly but not so hard that it does not turn easily by hand force. Push the button to release the chain brake. To ...
Dieses Handbuch ist für folgende Modelle:Kettensägen - CS 2117 EL (693.29 kb)