


Stimmen - 4, Durchschnittliche Bewertung: 4
(

 )
)
|
Fotos und technische Daten Sony CDX-C5000R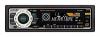 |


Anleitung Zusammenfassung
When operating just by the unit's button, the display returns to normal play mode after 5 seconds. • The track names are not displayed during MD or CD TEXT disc playback. • If there are no discs in the CD/MD unit, "NO DISC" appears in the display. • If a disc has not been assigned a custom name, "******** " appears on the display. • Some letters cannot be displayed during MD or CD TEXT disc playback. • If the disc information has not been read yet by the unit, "NOTREAD" is displayed. 13 Selecting specific tracks for playback — Bank (For a CD unit with the custom file function) If you label the disc, you can set the unit to skip or play the tracks of your choice. 1 Start playing the disc you want to label. 2 Press (menu), then press either side of (disc/prst) repeatedly until "BANK SEL" appears. 3 Press (enter). Bank edit mode Playing specific tracks only You can select: • “BANK-ON” — to play the tracks with the “PLAY” setting. • “BANK-INV” (Inverse) — to play the tracks with the “SKIP” setting. 1 During playback, press (menu), then press either side of (disc/prst) repeatedly until "BANK-ON", "BANK-INV", or "BANK-OFF" appears. 2 Press the (+) side of (seek/ams) repeatedly until the desired setting appears. -B BANK-ON-B BANK-INV- -BANK-OFF b- CUE DSC TRACK ^ | I I II I I, 5 IFLRX ---------- 4 Label the tracks. O Press either side of (SEEK/AMS) repeatedly to select the track you want to label. © Press (enter) repeatedly to select “PLAY” or “SKIP.” /T\ P>n mm- aw 3 Press (enter). Playback starts from the track following the current one. To return to normal play mode, select “BANK-OFF” in step 2. 5 Repeat step 4 to set "PLAY" or "SKIP" for all the tracks. 6 Press (menu) twice. The unit returns to normal CD play mode. Notes • You can set "PLAY" and "SKIP" for up to 24 tracks. • You cannot set "SKIP" for all the tracks on a CD. 14 Radio Memorising only the desired stations Memorising stations automatically — Best Tuning Memory (BTM) The unit selects the stations with the strongest signals and memorises them in the order of their frequencies. You can store up to 6 stations on each band (FM1, FM2, FM3, MW, and LW). Caution When tuning in stations while driving, use Best Tuning Memory to prevent accidents. You can preset up to 18 FM stations (6 each for FM1, FM2, and FM3), up to 6 MW stations, and up to 6 LW stations in the order of your choice. 1 Press (source) repeatedly to select the tuner. 2 Press (mode) repeatedly to select the band. 3 Press either side of (seek/ams) to tune in the station that you want to store on the number button. 1 Press (source) repeatedly to select the tuner. Each time you press (SOURCE), the source changes as follows: -► Tuner-► CD-► MD*- * If the corresponding optional equipment Is not connected, this Item will not appear. 2 Press (mode) repeatedly to select the band. Each time you press (mode) , the band changes as follows: -B FM1-B FM2-B FM3- -LW b— - MW b- 4 Press the desired number button ((D to (6)) for two seconds until "MEM" appears. The number button indication appears in the display. Note If you try to store another station on the same number button, the previously stored station will be erased. 3 Press (menu), then press either side of (disc/prst) repeatedly until "BTM" appears. 4 Press (enter). The unit stores stations in the order of their frequencies on the number buttons. A beep sounds when the setting is stored. Notes • The unit does not store stations with weak signals. If only a few stations can be received, some number buttons will retain their former setting. • When a number is indicated in the display, the unit starts storing stations from the one currently displayed. • If a CD is not in the unit, only the tuner band appears even if you press (source) . 15 Receiving the memorised stations 1 Press (source) repeatedly to select the tuner. 2 Press (mode) repeatedly to select the band. 3 Press the number button (Q) to (6)) on which the desired station is stored. Tip Press either side of (disc/prst) to receive the stations in the order they are stored in the memory (Preset Search Function). If FM stereo reception is poor — Monaural Mode 1 During radio reception, press (menu), then press either side of (disc/prst) repeatedly until "MONO-OFF" appears. 2 Press the (+) side of (seek/ams) until "MONO-ON" appears. The sound improves, but becomes monaural (“ST” disappears). 3 Press (enter). To return to normal mode, select “MONO-OFF” in step 2. If you cannot tune in a preset station Press either side of (seek/ams) to search for the station (automatic tuning). Scanning stops when the unit receives a station. Press either side of (seek/ams) repeatedly until the desired station is received. Note If the automatic tuning stops too frequently, press (menu), then press either side of (disc/prst) repeatedly until "LOCAL" (local seek mode) is displayed. Then press the (+) side of (seek/ams) to selec...
Dieses Handbuch ist für folgende Modelle:Car-Receiver - CDX-C4900R (1.65 mb)
Car-Receiver - CDX-C5000RV (1.65 mb)
Car-Receiver - CDX-C5000RX (1.65 mb)