


Stimmen - 6, Durchschnittliche Bewertung: 3.3
(


 )
)
|
Fotos und technische Daten JVC KD-G327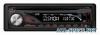 |


Anleitung Zusammenfassung
• Stop the car before performing any complicated operations. Temperature inside the car... If you have parked the car for a long time in hot or cold weather, wait until the temperature in the car becomes normal before operating the unit. ENGLISH ENGLISHParts identification Display window Control panel — KD-G327 Parts identification Display window Control panel — KD-G327 1 (standby/on/attenuator) button 2 SOURCE button 3 BAND button 4 Remote sensor • You can control this unit with an optionally purchased remote controller. For details, see page 14. • DO NOT expose the remote sensor to strong light (direct sunlight or artificial lighting). 5 Loading slot 6 Display window 7 0 (eject) button 8 TP/PTY (traffic programme/programme type) button 9 ./4 buttons p Control dial q SEL (select) button w DISP (display) button e EQ (equalizer) button r MO (monaural) button t SSM (Strong-station Sequential Memory) button y Number buttons u RPT (repeat) button i RND (random) button o M MODE button ; (control panel release) button Display window a Disc information indicators—TAG (ID3 Tag), (folder), (track/file) s Disc type indicators—WMA, MP3 d DISC indicator f Playback mode / item indicators— RND (random), (disc), (folder), RPT (repeat) g LOUD (loudness) indicator h EQ (equalizer) indicator j Sound mode (C-EQ: custom equalizer) indicators—JAZZ, CLASSIC, HIP HOP, POPS, ROCK, USER k Tr (track) indicator l Source display / Volume level indicator / Time countdown indicator / Main display z RDS indicators—TP, PTY, AF, REG x Tuner reception indicators—ST (stereo), MO (monaural) Getting started Getting started Basic operations ~ Turn on the power. Y * You cannot select “DISC” as the playback source if there is no disc in the unit. ! For FM/AM tuner . Adjust the volume. Volume level appears. Volume level indicator @ Adjust the sound as you want. (See page 11.) Basic settings • See also “General settings — PSM” on pages 12 and 13. 1 2 1 Canceling the display demonstrations Select “DEMO,” then “DEMO OFF.” 2 Setting the clock Select “CLOCK H” (hour), then adjust the hour. Select “CLOCK M” (minute), then adjust the minute. Select “24H/12H,” then “24H” (hour) or “12H” (hour). 3 Finish the procedure. To check the current clock time while... ENGLISH The power is turned off Listening to... An FM (non-RDS) or AM station: Frequency OClock An FM RDS station: Station name (PS) = Station Frequency = Programme type (PTY) = Clock = (back to the beginning) To drop the volume in a moment (ATT) To restore the sound, press it again. To turn off the power Radio operations Radio operations When an FM stereo broadcast is hard to receive ENGLISH ~ Y Lights up when receiving an FM stereo broadcast with sufficient signal strength. Selected band appears. ! Start searching for a station. When a station is received, searching stops. To stop searching, press the same button again. Note: FM1 and FM2: 87.5 MHz – 108.0 MHz FM3: 65.00 MHz – 74.00 MHz To tune in to a station manually In step ! above... 1 2 Select the desired station frequencies. Lights up when monaural mode is activated. Reception improves, but stereo effect will be lost. To restore the stereo effect, repeat the same procedure. “MONO OFF” appears and the MO indicator goes off. Storing stations in memory You can preset six stations for each band. FM station automatic presetting — SSM (Strong-station Sequential Memory) 1 Select the FM band (FM1 – FM3) you want to store into. 2 3 “SSM” flashes, then disappears when automatic presetting is over. Local FM stations with the strongest signals are searched and stored automatically in the FM band. Manual presetting Ex.: Storing FM station of 92.5 MHz into preset number 4 of the FM1 band. Preset number flashes for a while. Listening to a preset station 2 Select the preset station (1 – 6) you want. FM RDS operations What you can do with RDS RDS (Radio Data System) allows FM stations to send an additional signal along with their regular programme signals. By receiving the RDS data, this unit can do the following: • Programme Type (PTY) Search (see the following) • TA (Traffic Announcement) and PTY Standby Receptions (see pages 8 and 13) • Tracing the same programme automatically —Network-Tracking Reception (see page 9) • Programme Search (see page 13) Searching for your favorite FM RDS programme You can tune in to a station broadcasting your favorite programme by searching for a PTY code. • To store your favorite programme types, see page 8. ~ The last selected PTY code appears. Y Select one of your favorite programme types. or Select one of the PTY codes (see page 8). ENGLISH To be continued... ENGLISH ! Start searching for your favorite programme. If there is a station broadcasting a programme of the same PTY code as you have selected, that station is tuned in. Storing your favorite programme types You can store six favorite programme types. Preset programme types in the number buttons (1 to 6): 1 Select a PTY code (see page 7). 2 Select the preset number (1...