


Stimmen - 0, Durchschnittliche Bewertung: 0
(
 )
)
|
Fotos und technische Daten Yamaha HS10W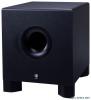 |


Dieses Gerät hat auch andere Anweisungen:
Anleitung Zusammenfassung
. Set the ROOM CONTROL switch according to the distance your speakers are placed from the nearest wall (refer to “Proximity to Walls and Corners”, above). . For accurate monitoring set the HIGH TRIM switch to “0”. This switch can be set to “-2 dB” to attenuate the highs slightly if you find the sound too bright. HS80M/HS50M/HS10W Owner’s Manual 8 Adding a Subwoofer English Even if you don’t plan to set up a surround system, adding a subwoofer can be a real advantage for stereo mixing. If you can’t hear the extreme low end there’s not much you can do to make it sound great. The extended bass response provided by a good subwoofer can indeed help you to improve the overall quality of your mixes. The location of your subwoofer is not as critical as the main speakers, because frequencies below around 200 Hz — the region your subwoofer will be working in — aren’t directional. To say it another way, the ear can’t locate the source of such low frequencies, so in theory the subwoofer can be placed anywhere in the room. In reality it’s a good idea to place the subwoofer on the floor somewhere between the main front speakers at the same distance from the listening position as the main speakers, but it doesn’t have to be dead center. Fine-tuning for Stereo + Subwoofer . Set the HS50M or HS80M LEVEL control to about 12 o’clock to set the nominal input level to approximately +4dB. If you’re using the HS50M set the HS10W LEVEL control to about 10 o’clock, and if you’re using the HS80M set it to about 11 o’clock. You can then fine-adjust the HS10W LEVEL control as required. Another approach would be to adjust the HS50M/HS80M output level to achieve the desired relativebalance with the subwoofer. . Start with the HIGH CUT control set at its center click position, which corresponds to a HPF frequency of about 100 Hz. The HIGH CUT frequency can be adjusted later to achieve the smoothest integration with the HS50M or HS80M speakers. . Turn the HS10W LOW CUT switch ON. Adjust the LOW CUT control to achieve the desired degree of bass extension. . Set the HS50M/HS80M LOW CUT switch to “FLAT”. . When set to “-2 dB” the HS50M/HS80M EQ MID switch attenuates the midrange frequencies slightly to produce a somewhat “softer” sound that may be better for listening or long monitoring sessions. For accurate monitoring, however, set the MID switch to “0”. . Set the HS50M/HS80M ROOM CONTROL switch according to the distance your speakers are placed from the nearest wall (refer to “Proximity to Walls and Corners”, above). . For accurate monitoring set the HS50M/HS80M HIGH TRIM switch to “0”. This switch can be set to “-2 dB” to attenuate the highs slightly if you find the sound too bright. Setting Up for Surround R C LFE RS L 30°30° 100 120°100 120° If you’re going to be mixing for surround, obviously you’ll need a surround monitoring system. For a 5.1 surround system, for example, you only need to add a center speaker and two rear speakers to the stereo + subwoofer system described in the previous section. Let’s see … two main speakers plus one center speaker plus two rear speakers is a total of five speakers, and “.1” refers to the subwoofer. All present and accounted for! According to the ITU (International Telecommunications Union) specifications for 5.1 surround setup, the main front speakers are positioned in the 60° equilateral triangle relationship to the listening LS position described earlier, and the rear speakers should be located at the same distance from the listening position, but at an angle of between HS80M/HS50M/HS10W Owner’s Manual 9 English 10 HS80M/HS50M/HS10W Owner’s Manual 100° and 120°, as shown in the diagram above. The center speaker should be placed precisely midway between the main front speakers, at the same distance from the listening position as the other speakers (which means that ideally it will be a bit behind the main left and right speakers. As you may have deduced by now, the main left and right, center, and rear speakers are all located on the circumference of a circle with its center at the listening position. An easy way to get all the distances right is to use a piece of string cut or marked to the exact distance between the main left and right speakers. Attach the string to a mic stand or other convenient object at the listening position and use it to measure the distance from the listening position to each of the speakers. Stretched from the listening position to the speaker position the string will also provide a convenient guide for aligning the speakers so that they point directly at the listening position. MG-series Mixer Setup If you’re connecting to a standard mixer that is not specifically designed for surround production, your main L and R speakers can be connected to any convenient stereo output pair via the HS10W subwoofer, while the center and rear speakers will be connected to individual output channels. Example: MG16/6FX Digital Mixer Setup If you’re connecting your HS-series speakers to ...
Dieses Handbuch ist für folgende Modelle:Lautsprecher und Subwoofer - HS50M (1.02 mb)
Lautsprecher und Subwoofer - HS80M (1.02 mb)